Cost Payment Application
When a billing period is activated and the schedule of values is locked, you can create the cost payment application to send to a supplier. Payment applications can be generated in the Cost tool.
In this article:
- Create a cost payment application
- Add a Change Order to a Cost Payment Application
- Stages of Payment Applications
- Link Budget and Cost Payment Applications
- Work with a Schedule of Values after Creating a Cost Payment Application
- Create a Cost Payment Application Document
- Export and reimport cost payment applications
- Request Input or Cost Payment Application Revision from a Supplier
- Complete a Cost Payment Application
- Export a Cost Payment Application Report
- More resources
- Related articles
Create a cost payment application
Before working with the cost payment application workflow, make sure you have managed permissions. As a project administrator, set the:
- Full Control option for the contractor
- Collaborate option for the supplier in the Cost Payment Application column
You can create a cost payment application and send it to your suppliers. This option allows you to create a single cost payment application for one contract and one billing period at a time. This option does not require the linked main contract and its master billing periods.
To do so:
Select the Cost tool from the left navigation.
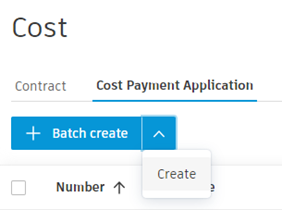
Switch to the Cost Payment Application tab.
Click Create.
Select the main contract from the first drop-down list and the billing period from the second drop-down list:
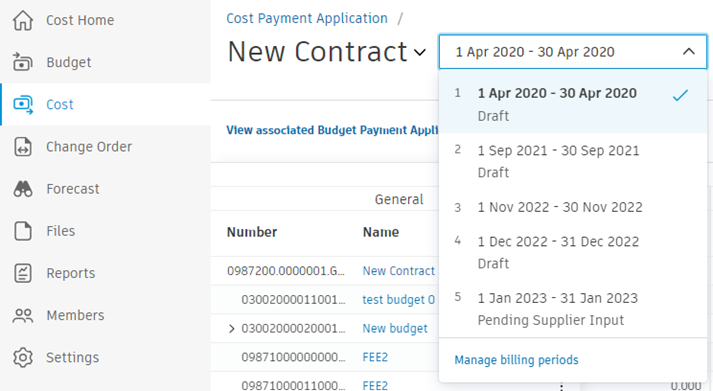
The created cost payment application shows on the list with a draft status.
Batch-Create Cost Payment Applications
You can also batch-create a cost payment application from several contracts. This option allows you to create multiple cost payment applications for several contracts and billing periods in one go.
Preconditions for batch-creating cost payment applications:
- The contract's budgets are linked to the main contract
- The main contract has master billing periods
To do so:
- Click Batch create.
- Choose the billing periods and contracts. The chosen items show on the list.
- Click Create. The created cost payment applications appear on the list with a status of Draft.
Create Multiple Payment Applications in a Billing Period
Administrators can generate up to five payment applications in a single billing period. This is beneficial in scenarios such as when making advanced payments, releasing retention separately and creating net adjustments retrospectively.
To add multiple pay applications in a period:
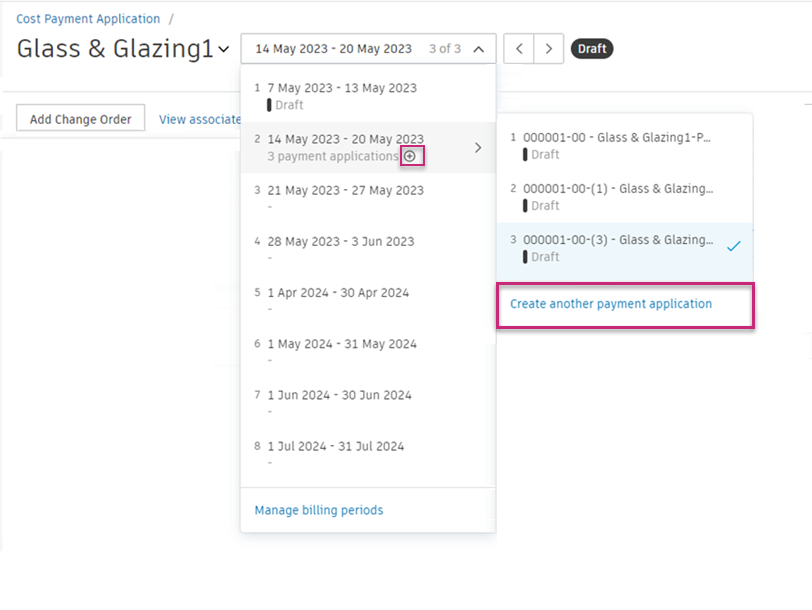
- Go to Cost Payment Application, select the billing period to which you want to add a payment application.
- Select the plus sign
 within the Manage billing period drop-down or choose Create another payment application in the drop-down submenu.
 - New payment applications are added at the end and have consecutive numbers provided in brackets.
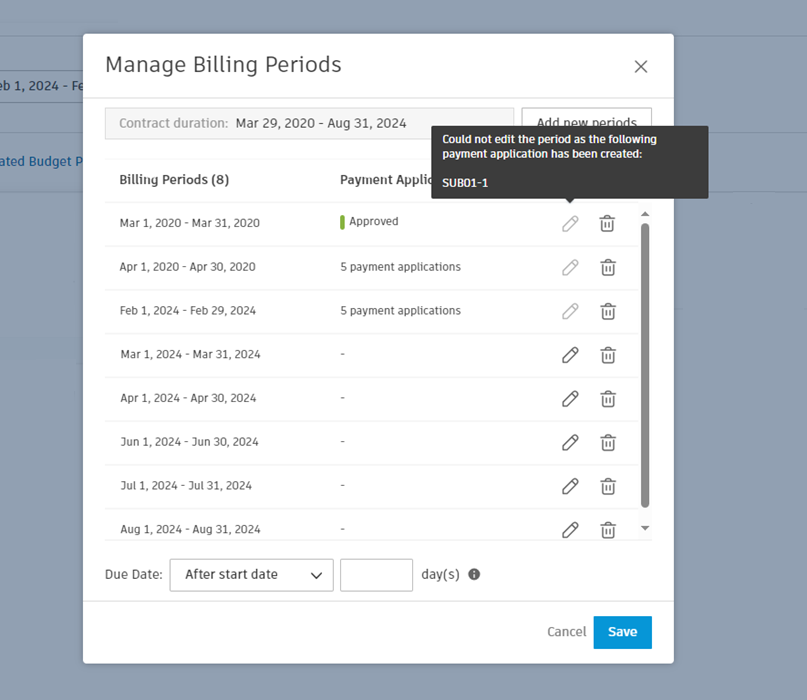
To manage payment applications in a billing period, select Manage billing periods in the drop-down menu. Here, you can rename or delete any application.
Add a Change Order to a Cost Payment Application
If the Subcontractor Change Order (SCO) is Approved or at least Open (and its type is configured to be added before approval in the settings), you can add it to the cost payment application. Learn more about setting up change order types for addition before final approval.
To add a change order to a cost payment application:
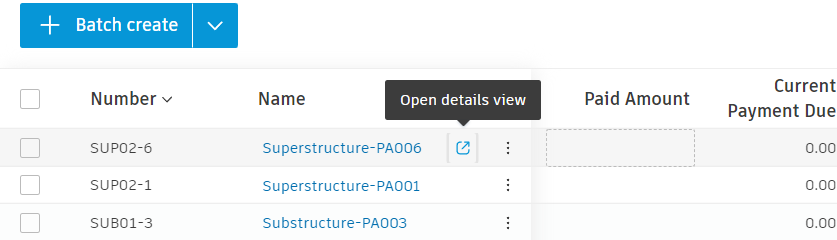
Navigate to the Cost Payment Application tab and open the details view of item you want to add change order to.
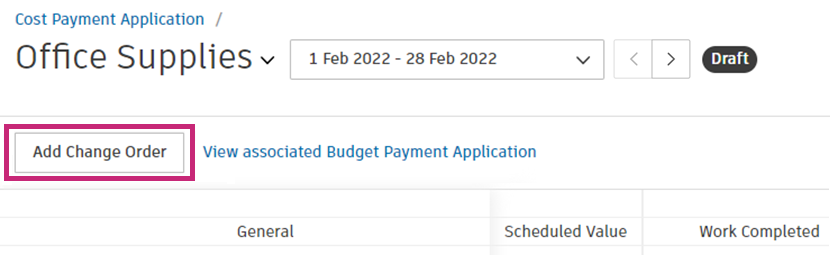
Click Add Change Order.
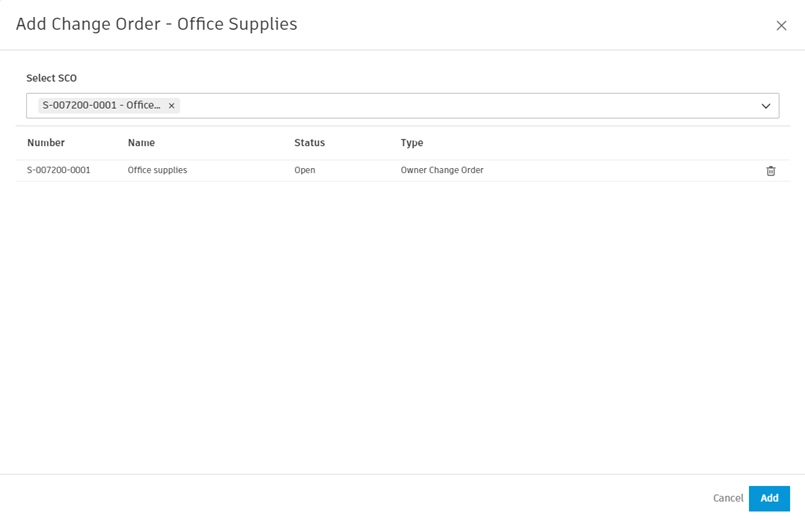
If there are SCOs available, they will be grouped into Approved and Unapproved sections.
- The Approved section displays items that have Approved and Executed statuses
- The Unapproved section displays items that have Open and In Review statuses
Select the items that you wish to add and click Add.
After adding unapproved SCOs, you will be asked to synchronise change orders. To do that, click Sync.
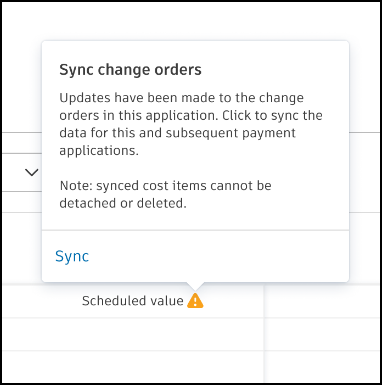 Note: Synchronised cost items and their subitems cannot be detached or deleted.
 , choose to show change orders as A Column. To add a change order in this view, click Add Change Order in the details panel of the payment application item.
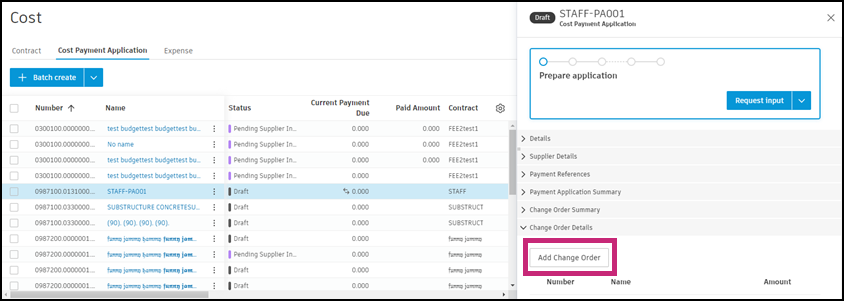
Stages of Payment Applications
If there are multiple payment applications under a contract, the first one is marked as initial, subsequent ones as progress and the last one as final. In cases where there is only one payment application under a contract, it can be both the initial and final payment application.
With different stages of payment applications, you can effectively manage the life cycle of your payment applications and ensure proper closure of the project or contract phase. For example, you can create different sets of compliance for payment applications.
Set a Payment Application as Final
When creating or managing cost payments, there may be instances where a payment application needs to be marked as the final payment application for a contract. This indicates the completion of the project or a specific phase of the project and ensures that all retained funds can be released. Learn more about retention.

To set a payment application as final:
Go to the Cost tool, then switch to the Cost Payment Application tab.
Open the details of the Cost Payment Application you wish to set as final.

In the payment application details, open the More
 menu.
menu.Toggle the switch for Set as the final payment application.

Marking a payment application as final will trigger the release of all retained funds associated with the contract. Ensure that all work is completed and inspected before setting the payment application as final.
Link Budget and Cost Payment Applications
Once a cost payment application is created, it can be associated with the budget payment application. Linking reduces manual entry and potential mistakes.
To link budget and cost payment application:
Go to the Budget Payment Application tab.
Select the main contract. The details panel opens.
Click Add in the Associated Cost section.
Choose between two options:
- Create to create a payment application from the existing contracts.
- Add Existing to add the existing cost payment application. Use the tick boxes to select the cost payment applications to import.
Click Add.
To update the information automatically, you need to associate cost payment applications for each budget payment application (a new billing period).
Work with a Schedule of Values after Creating a Cost Payment Application
After creating a cost payment application, there are a few rules to keep in mind:
- If a new Schedule of Values (SOV) is added, it won't appear in the existing cost payment application.
- If an SOV is deleted and the 'workCompleted' value is zero, it will be automatically removed from the existing cost payment application. If 'workCompleted' is not zero, an error will pop up when attempting to delete the SOV.
- When an SOV is updated (the amount), the update won't sync with the existing cost payment application.
- The next cost payment application that is created will synchronise with the latest structure and amounts of the SOV.
Learn more about the Schedule of Values.
Create a Cost Payment Application Document
You can generate a document and add it to a cost payment application. The most effective approach is to create a document template that can be shared across multiple payment applications. For best results, associate cost payment applications with contracts before generating documents to enable effective sharing.
To learn how to create and customise document templates, see Document Templates in Cost Management. Payment applications’ documents created this way are mostly view-only. See the Export and Reimport Payment Applications section to create a document that can be filled in by the subcontractor.
For a complete list of available document template variables, see Payment Application Variables.
Export and reimport cost payment applications
Cost payment applications can be exported for subcontractors to enter their billing information. To do so:
Select the Cost tool from the left navigation.
Switch to the Cost Payment Application tab.
Open the details view of the cost payment application.
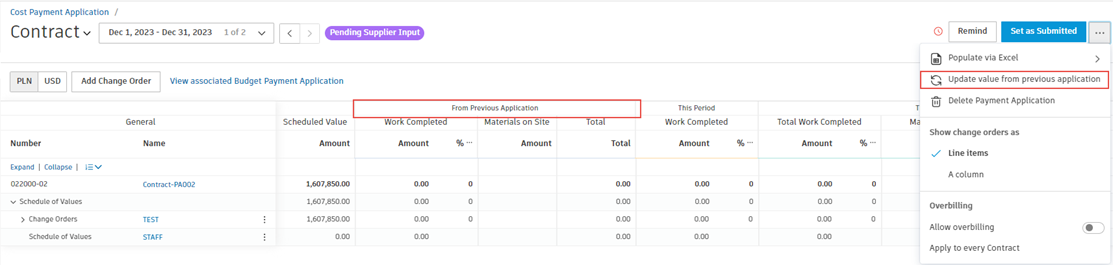
Open the More menu
 .
.Click Populate via Excel.
Click Export Excel File. The Excel file is downloaded.
Note: When a contract associated with a cost payment application is denominated in a foreign currency, the value will be exported in that currency during document generation.Click on the name of the cost payment application to open the details panel.
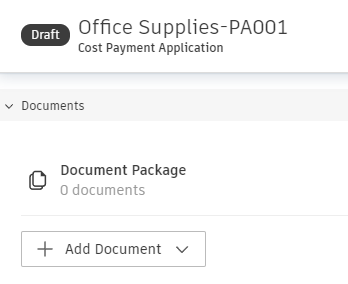
In the Documents section, click Add Document and choose the downloaded Excel file from your computer.
Click Request Input. A window pops up. Fill in the necessary information and click Send. Your cost payment application has the Pending Supplier Input status now.
You can import the received filled-in Excel file by clicking on the Import Excel File option in the 6th step. Then:
- Open the details panel of the cost payment application.
- Add the document to the Document Package in the Documents section.
Request Input or Cost Payment Application Revision from a Supplier
Once you have entered all the necessary details for your payment application, click Request Input to proceed. The supplier will then receive the information and can submit it in Cost Management, unless:
- Project administrator established a compliance workflow and its fulfilment is required.
- An approval workflow is set up. Then, a project administrator has to send an email to reviewers to get approval. You can make this process more automatic by toggling the Auto-start after submission option. See the Cost Settings article to learn more.
A supplier will be notified of the cost payment application for review by email when they have a collaborative permission for cost payment applications.
Respond to Cost Payment Application Email as a Supplier
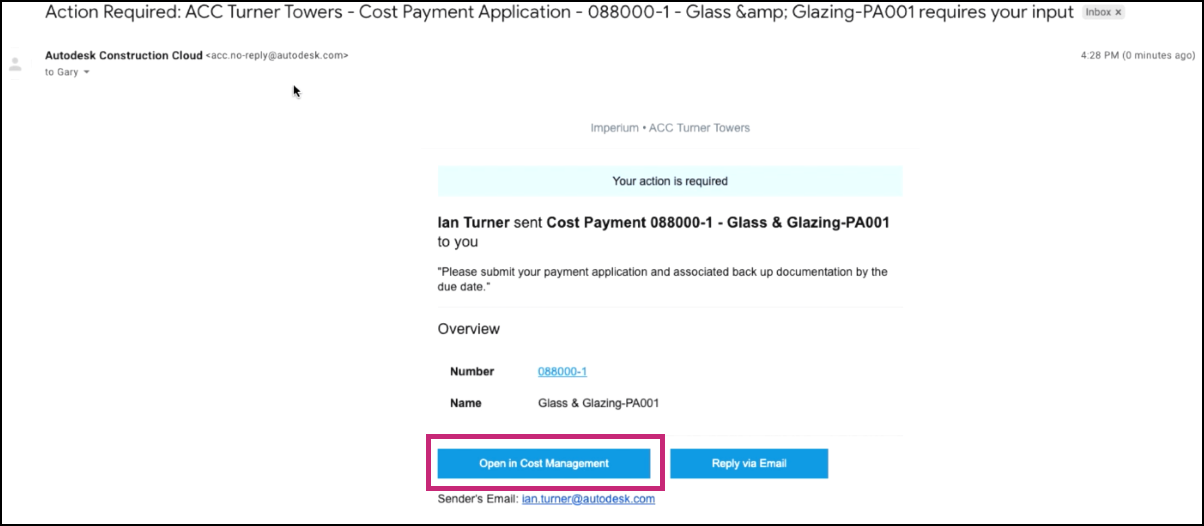
When receiving a cost payment application email, as a supplier:
Open the email and select Open in Cost Management. When Cost Management opens, only the information pertaining to a supplier’s cost payment application will be visible.
Scroll to review details. In the columns within This Period, click the fields to enter the completions. The information will auto-populate based on the Amount or % entered.
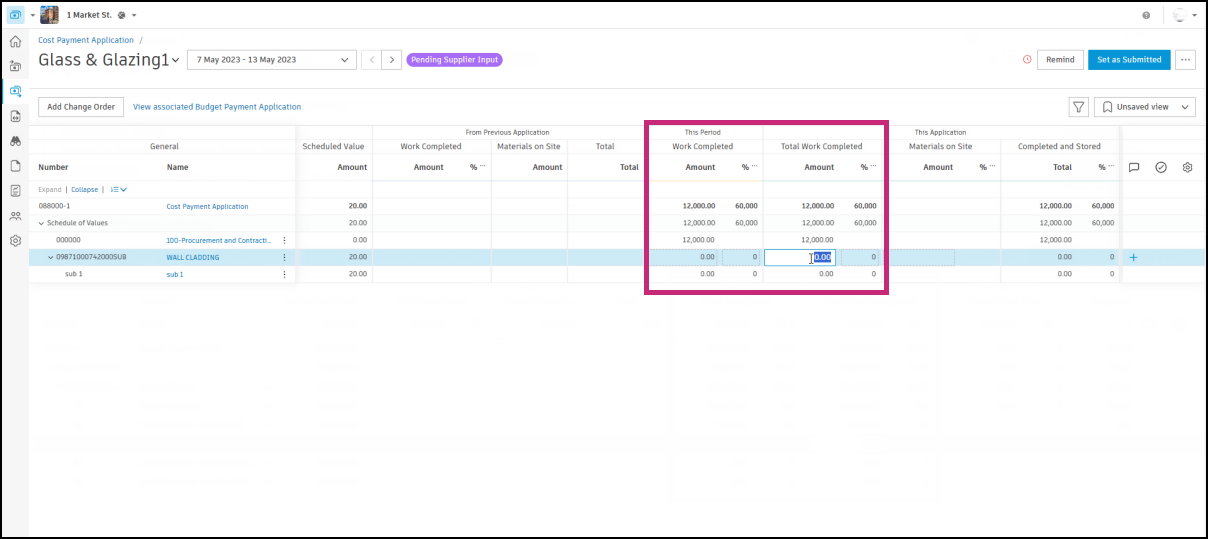
To auto-populate data based on the item being 100% complete, select the More
menu next to a line item and choose % mark as completed. Once the payment application information has been populated, select Submit.
Include a message in Submit.
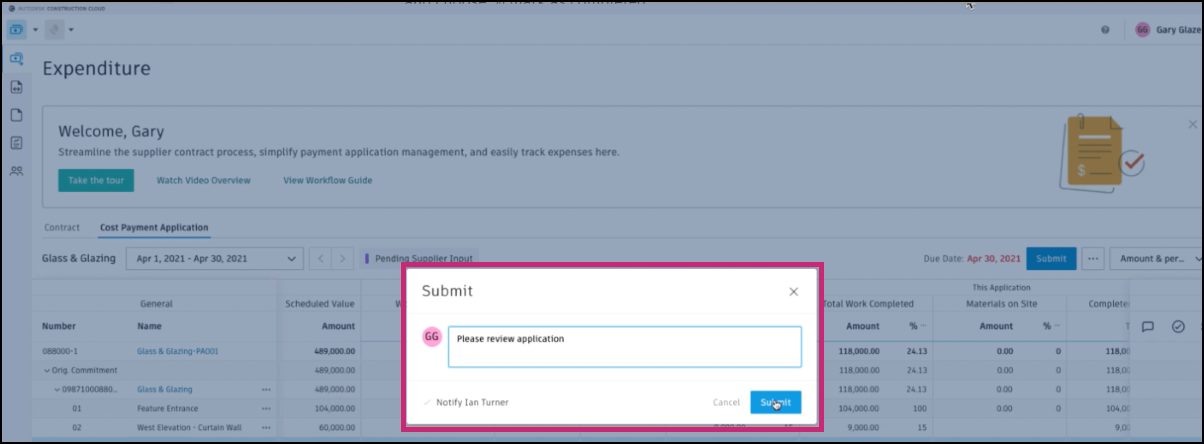
Once submitted, the system will notify a general contractor by email. They can review line-by-line and accept, reject and leave comments. If a revision is required, they may request it. A supplier can respond directly to the comments left by a general contractor and make necessary updates.

When done, a supplier submits the payment application back to a general contractor. A general contractor can accept all line items. The system will notify a supplier by email.
Complete a Cost Payment Application
After acceptance, the cost payment application can be set as approved and then as paid. You can learn more about payment application statuses. The information is updated in the From Previous Applications section in the active billing period.
Export a Cost Payment Application Report
You can generate a report for the cost payment application to share information with subcontractors.
To create a cost payment application report:
- Select the Cost tool from the left navigation.
- Switch to the Cost Payment Application tab.
- Click
 .
. - Select PDF Report or Excel Report.
- Enter the report title and choose the template.
- Click Run report.
You'll receive an email notification when your report is ready. You can also download it from the Reports tool. To learn more about reports and available actions, see the About Reports article. See the Cost Reports article to review all available reports for Cost Management.
More resources
Learn more about managing cost payment applications with the workflow guide. You can also take a course on this article.