Payments
With the payment application workflow, you can manage payment applications effectively, automate tasks and gain a real-time view of the project’s financial health. As a project administrator, you can create payment applications in the Budget and Cost tools to send to an owner or a supplier.
To effectively work with payments:
- Add non-members so that you can collaborate with suppliers and owners that don't need access to the rest of the project. See the Company Setup section in the General Settings article to learn more.
- Assign the Collaborate permission to payment applications that non-members need to work with. To learn more, see the Cost Management Permissions article. Owners and suppliers with this permission can create and delete payment applications too.
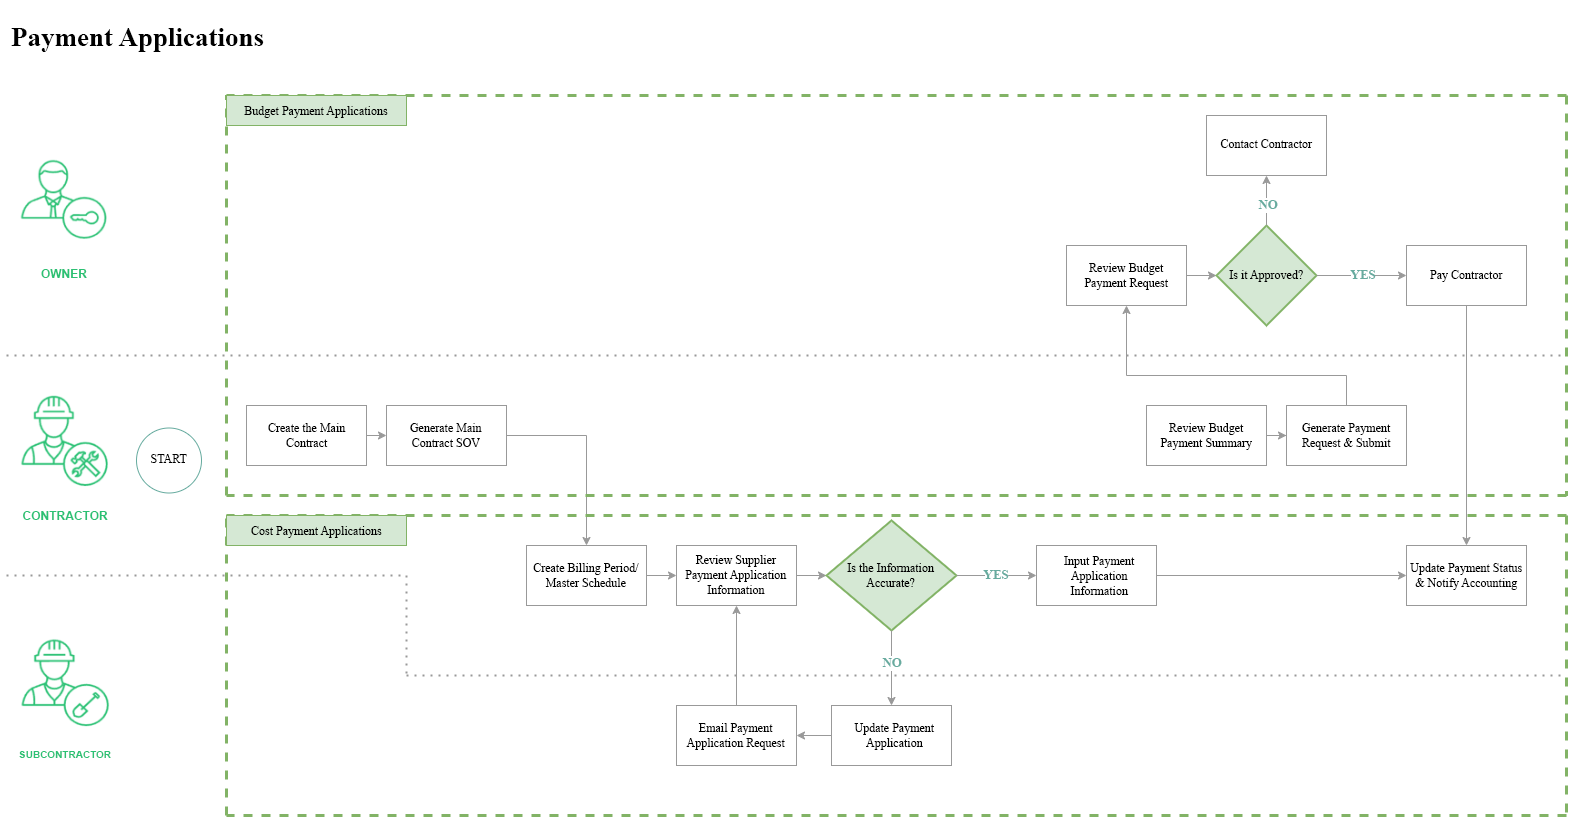
Check out a typical workflow for requesting and receiving payments:
In this article:
- Payment Application Tables, Sections and Columns
- Foreign Supplier Payment Application Management
- Advance payment and recoupment
- Overbilling
- Frequently Asked Questions about Payments
- Related articles
Payment Application Tables, Sections and Columns
The tables in the Budget and Cost Payment Application tabs contain the following sections:
- General: Contains the name and number of the cost items in the contract.
- Scheduled Value: Provides the details about the cost item from the projected budget.
- From Previous Application: Processed payment from the last billing period.
- This Period: Entry columns for the active payment application.
- This Application: Total work completed for the current billing period and materials stored on site.
- Remaining: Scheduled value minus the completed work.
- Retention: Records of payments held back from contractors. Project administrators manage retention rates in the General Settings article.
The values populate and move across the columns in the Budget and Cost Payment Application tabs. Hover over a column to see the logic behind it. Click the ![]() icon to see all available columns.
icon to see all available columns.
Here is a handful of helpful examples:
Unit Cost: Track how variable prices may affect your budget.
Tip: If the payment item is at the bottom of the hierarchy, you can edit the Unit Cost field directly in This Period Work Completed column.Note: There are two rules for Unit Cost calculation in Payment Applications:- The Unit Cost of This Period will inherit from the Unit Cost of the Total Work Completed of the previous payment application.
- The Unit Cost of Total Work Completed = Amount of Total Work Completed / Qty of Total Work Completed.
Claimed Work Completed: Add this column group when you want to create a cost or budget payment application document. Include the claimed amount and rejected reasons to satisfy the legal requirement.
Payment Ongoing: Check an amount in the column for each cost payment application to follow up and regularly push the payment to full paid status.
Materials Stored: Number of materials stored from the previous application, for this application, or currently on site and retained for the project. Learn more about materials in payment applications.
 .
.Cost Payment Application Detailed View
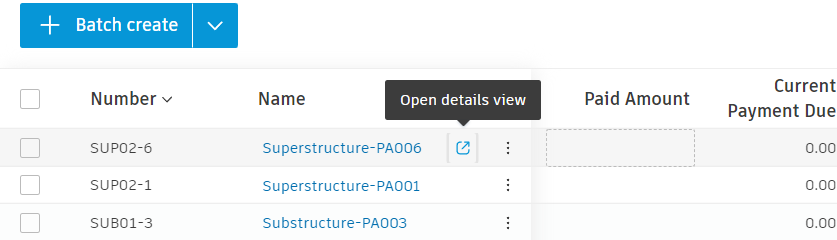
The Cost Payment Application tab offers a list view of every cost payment application for your project. However, it also has a detailed view, where you can review the info on any listed item. To see this view, click the icon next to a payment item.
In the detailed view of a cost payment application, you can, for example:
- Expand or collapse the list of items for better clarity
- Request input from the supplier
- Populate through Excel to obtain information from the subcontractor
- Check for overbilling
Learn more about cost payment application-related actions.
Foreign Supplier Payment Application Management
Payment applications can also be entered and managed in foreign currencies. Set up a foreign currency on the contract and associate it with the cost payment application. Within the Cost tool, select the Cost Payment Application tab and open the details view for the appropriate supplier. Now you can send it to your foreign suppliers.
In the cost payment application's list view, the values are shown in the base currency. Hover over the ![]() icon to see the converted values and the current exchange rate. To edit the exchange rate:
icon to see the converted values and the current exchange rate. To edit the exchange rate:
- Open the detailed view of the cost payment application.
- Click the name of the cost payment application to open the flyout.
- Edit the exchange rate. It can be edited at any time except at the In Review, Paid, or Approved status. Learn more about payment application statuses.
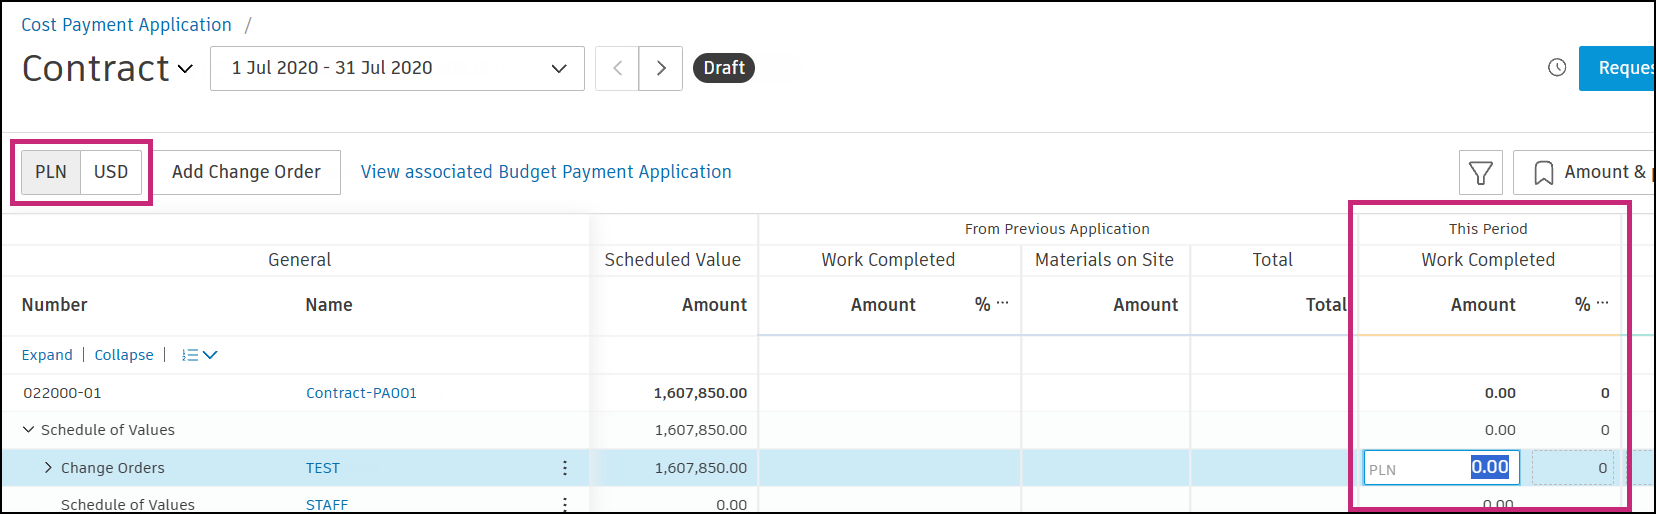
In the detailed view of the cost payment application, you can:
- Toggle between currencies for the whole table.
- Edit the value of the Unit Cost and Amount columns. The selected foreign currency is shown as default.
The system will automatically recognise the currency set for a supplier within their contract, so Work Completed will be entered in the local currency. And the system will auto-convert it back to the project’s base currency.
- If overbilling is disallowed, the validation process will only apply to the foreign, not base currency values.
- When you set a cost payment application's status as Approved, you can edit the exchange rate. After doing that, this application and the Actual Cost values will be recalculated. The next applications will be updated as well.
Advance payment and recoupment
The advance payment feature enables members to configure, create and manage advance payments and their recoupment in construction projects. An advance payment is a partial payment that is made before the work has started or the goods have been delivered, usually to cover some initial costs such as procurement of materials or equipment. The feature aims to facilitate the management of advance payments and reduce the risks associated with them.
In Cost Management tables, there are several columns related to Advance Payment:
| Table | Column | Section |
|---|---|---|
| From Previous Application | Advance Payment | Amount |
| Recoupment | Amount | |
| This Period | Advance Payment | Amount % of Scheduled Value |
| Recoupment | Amount % of This Period Work Completed |
|
| This Application | Total Advance Payment | Amount % of Scheduled Value |
| Total Recoupment | Amount % of Total Advance Payment |
|
| Remaining | Unrecouped Advance Payment | Amount % of Total Advance Payment |
Add Advance Payment
To add an advance payment:
Open the Cost Payment Application.
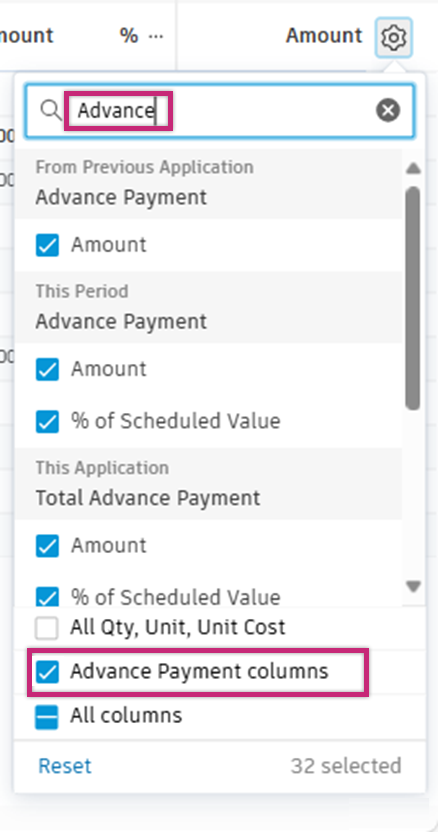
To enable the Advance Payment-related columns, click the column gear button.
Now, you have two options:
Search for the Advance keyword in the column search area.
Select the Advance Payment columns in the Columns Groups section.
Input the advance payment as either an amount or a percentage.
The system will automatically update the Total Advance Payment amount field in This Application column.
Progress payments with recoupment
Recoupment is a repayment of advance payment through deductions from progress payments. You can choose which payment items are applicable for recoupment.
To add recoupment amount or percentage:
- Open the Cost Payment Application.
- Navigate to the column labelled This Period and Recoupment within it.
- Input the recoupment as either an amount or a percentage.
- The system will automatically update the Total Recoupment amount field in This Application. The Total Recoupment is calculated as the sum of Previous Recoupment and This Period Recoupment.
When members create another pay application, it automatically inherits recoupment percentage from the previous pay app, but does not inherit the recoupment amount.
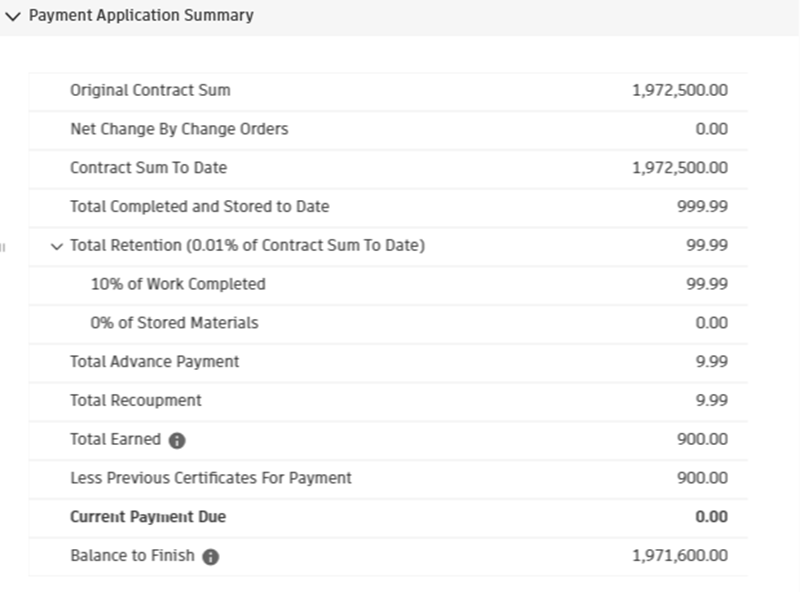
Payment application summary
The Total Advance Payment and Total Recoupment amounts are included in the Payment Application summary, which is visible in the flyout panel in the Cost Payment Application.
To show the Summary:
- Open the Cost Payment Application.
- Click the selected payment application.
- Flyout panel, including the Payment Application summary pops up.
The summary includes Total Earned, which excludes retention and includes unrecouped advance payment and a Balance to Finish, which includes retention but excludes unrecouped advance payment.
Overbilling
Overbilling in Autodesk Cost Management occurs when the billed amount exceeds the budgeted or contracted amount for a specific item or service. This can lead to discrepancies and potential disputes between project stakeholders. To ensure accurate billing, it is essential to check for overbilling in your payment applications.
Steps for overbilling checking:
Go to the Budget or Cost tool in Cost Management.
Switch to the Budget Payment Application or Cost Payment Application tab. For a cost payment application, open the detail view by clicking the icon next to it.
Select between Line items and Column view modes to identify where overbilling occurs.
 Note: Overbilling may appear in one view mode but not the other. Always review the payment application in both view modes. For example:
Due to negative change orders, there may be no overbilling item in line items view mode:

However, there may be overbilling items in column view mode:

Expand the SOV (Schedule of Values) tree structure to view all items. Overbilling checking will iterate through every child item in the SOV tree structure.

- Tip: For budget payment applications, it also checks hidden SOV subitems. If you receive an overbilling error message, unhide any hidden subitems to identify the overbilling items accurately.

By following these steps and tips, you can effectively manage overbilling and maintain accurate billing throughout your project's lifecycle.
Frequently Asked Questions about Payments
How to create an invoice for a payment?
In Cost Management, invoices for payments are not created directly. Instead, expenses serve as invoices. You can use the document generation feature to create a document from a predefined template, which can then be sent as an invoice. For more information on expenses and document templates, refer to these articles: Expenses and Document Templates in Cost Management.