Mark-ups
Issue markups add visual context to issues placed on 2D files and 3D models, helping project teams communicate important updates, changes and critical information. Learn more about markups here.
This topic covers the following:
Create Nested Issue Markups in the Viewer on 2D Sheets or Files
You can create issues and place them on a 2D file or 3D model in the viewer.
On 2D files, you can enhance issues by adding nested markups for greater context and detail. Nested markups remain linked to their parent issue, helping clarify information and minimise misunderstandings.
In the Sheets or Files tool, navigate to the 2D file where you want to create an issue.
Select the Issues markup tool from the toolbar.
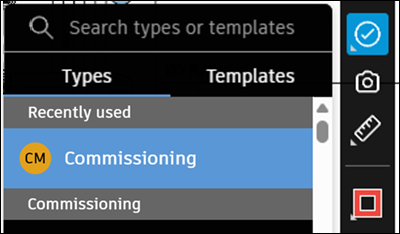
Select from the issue Types or Templates.
Types are preconfigured or created in the Type settings.
Templates have an associated type and can contain prepopulated information to make creating issues faster. Templates are created in the Templates settings.
Click to place the issue pin and create the issue. Issues are automatically published by default.
Note:The issue thumbnail is created automatically based on the current view of the file. You can click the thumbnail to open the full size image.
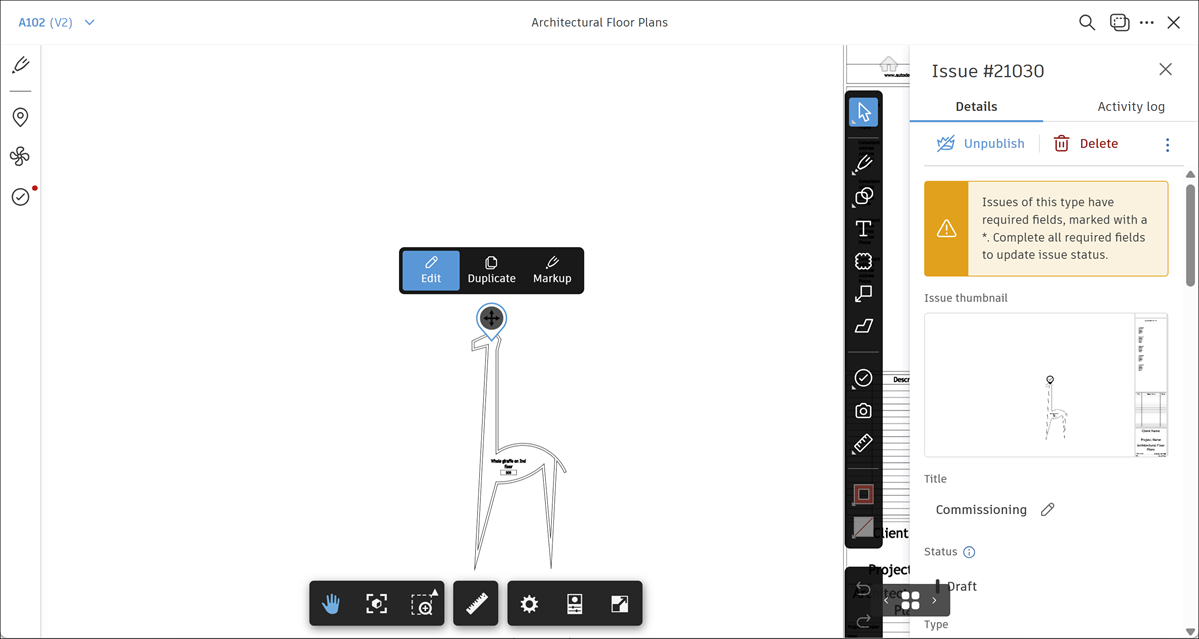
Click the Markup icon
 to open the markup mode:
Nested markups are visible only when the issue pin is selected. If you move the issue pin, the nested markups will remain at their original location. To move nested markups along with the pin, you must first enter Nested Markup mode.
When you select an issue with nested markups, you can click a nested markup to enter Nested Markup mode and make edits as needed.
Use the tools in the markup toolbar to add and style markups. Learn more about markup toolbar here.
Click Duplicate
 to create a copy of a markup. The duplicated markup will be placed next to the original markup.
 Click to select a markup and click
 to delete it.
Click and hold CTRL button and click to select multiple markups, then click
to delete them together.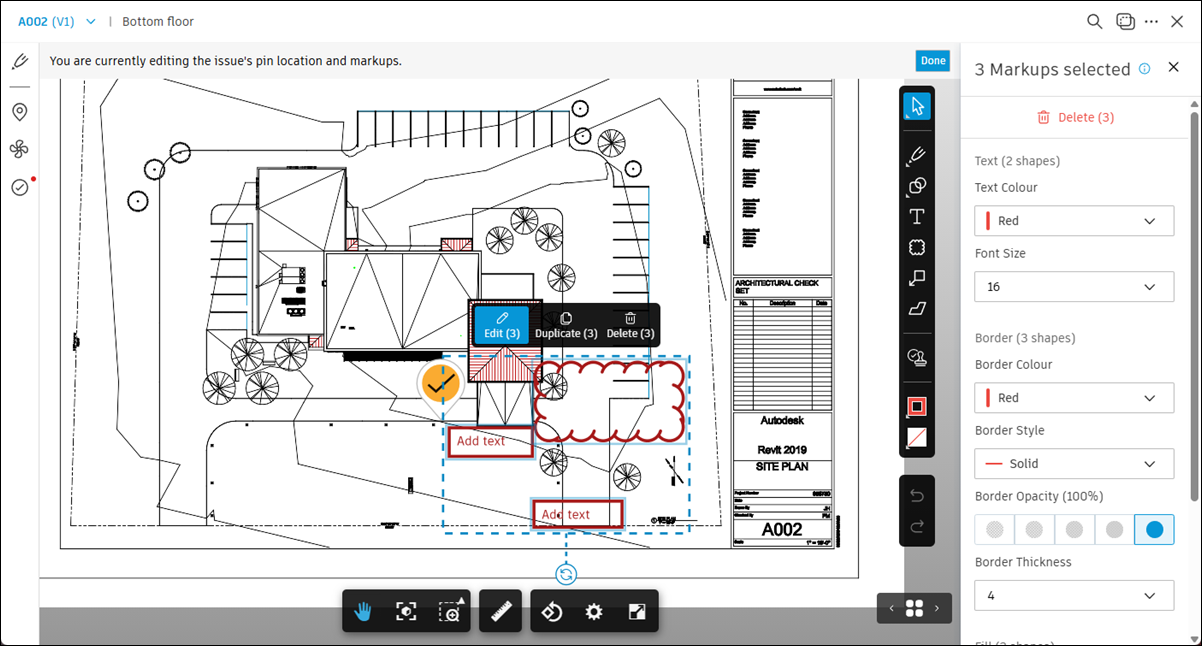

Click
 to save your markups. Tip: The issue thumbnail updates with a snapshot of the markups you add.
Click outside of the issue thumbnail to hide the contextual menu.
Click the issue pin again to open contextual menu: edit or duplicate an issue, or add markups.
Copy and Paste Issues and Markups on 2D Sheets or Files
Copy and paste one or multiple issues with markups to a different location on the same 2D sheet/file or to a different 2D sheet/file. This feature is especially useful when you have similar issues that need to be placed in multiple locations, or when you want to copy an issue with markups from one sheet to another sheet.
In the Sheets or Files tool, navigate to the 2D sheet/file containing the issue with markups that you want to copy.
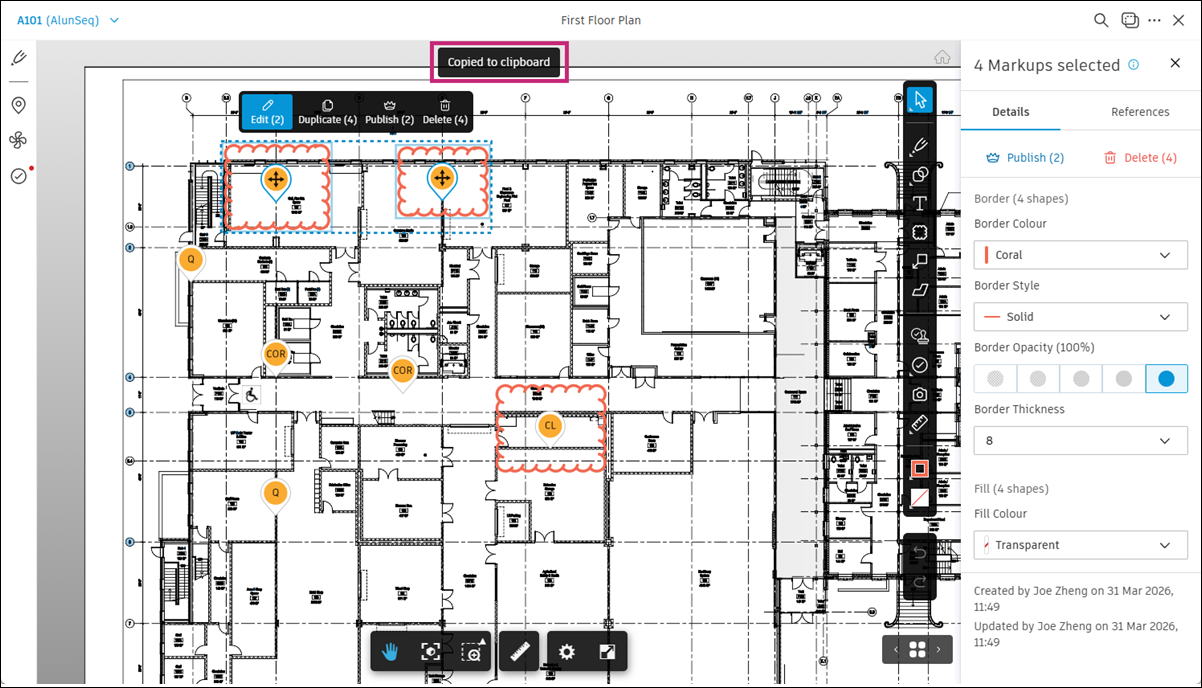
Right click the issue pin of the issue you want to copy or use Ctrl + C. Optionally, click and hold CTRL button and click to select multiple issue pins. Click Copy.
Note: Using Ctrl + C to copy and Ctrl + V to paste will place the issue in the same location as the original (paste in place). Using Right-click → Paste will place the issue at the cursor location.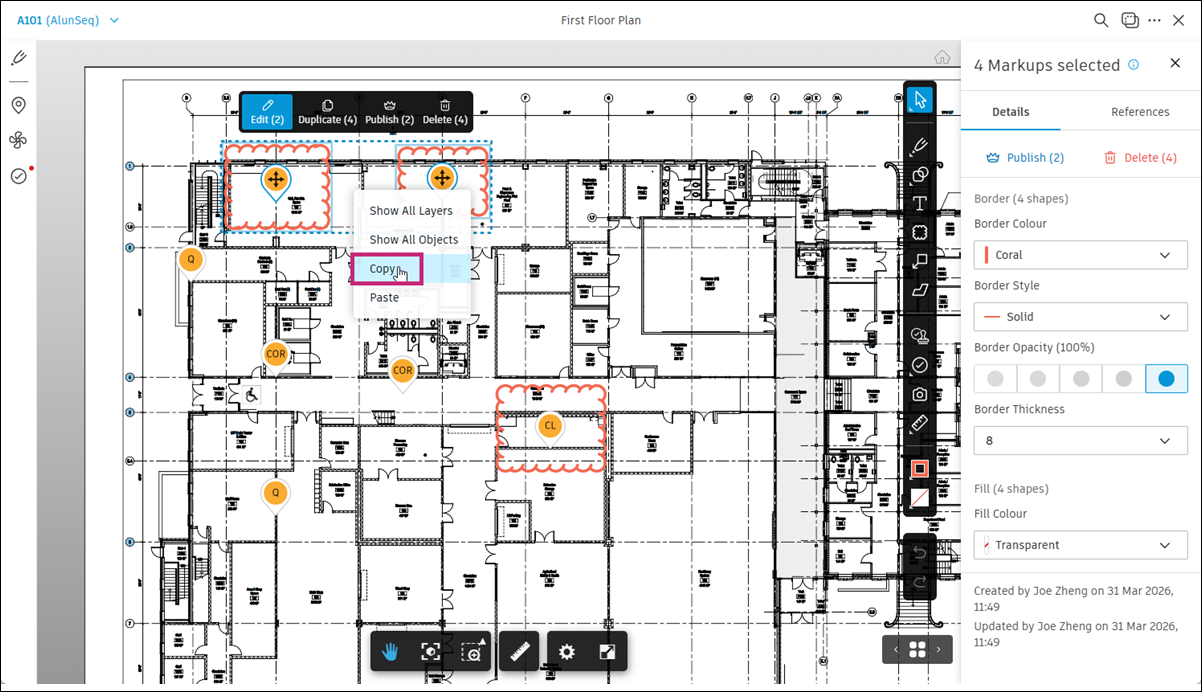 Tip: Click Duplicate to create a copy of the issue on the same file. The duplicated issue will be placed next to the original issue.
A ‘Copied to clipboard’ message appears at the bottom of the screen.
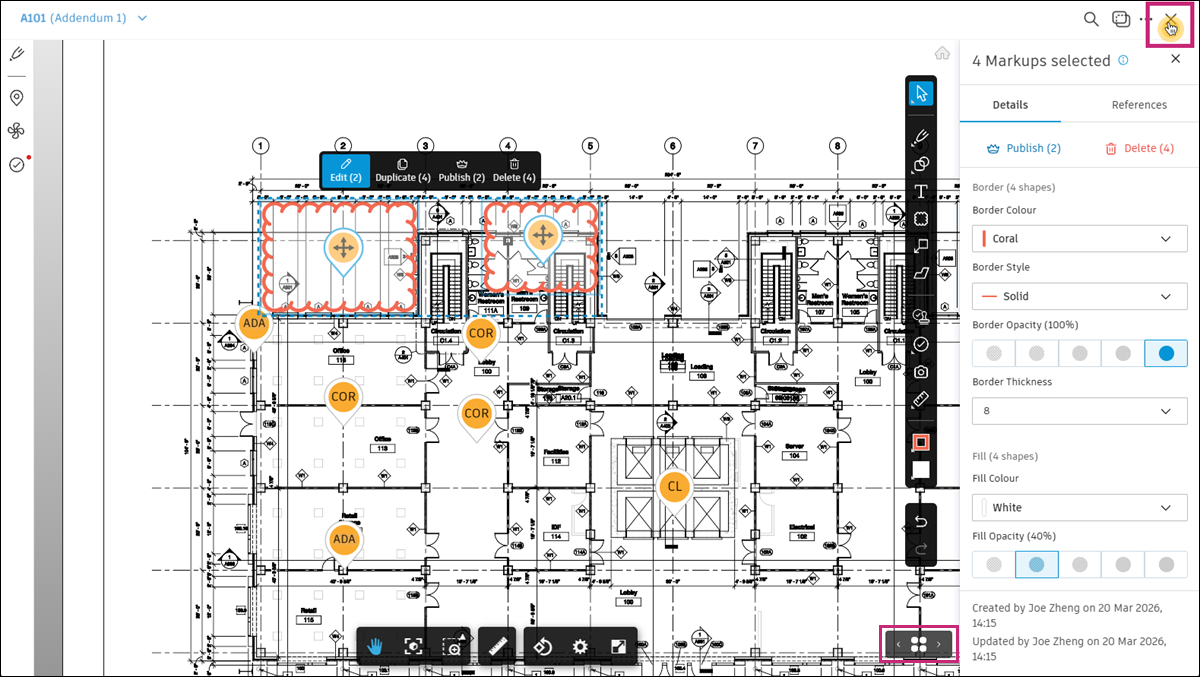
Exit the current file by clicking X at the top right of the screen or click the Sheets pages icon in the lower right of the screen to navigate to sheet where you want to paste issues with markups.
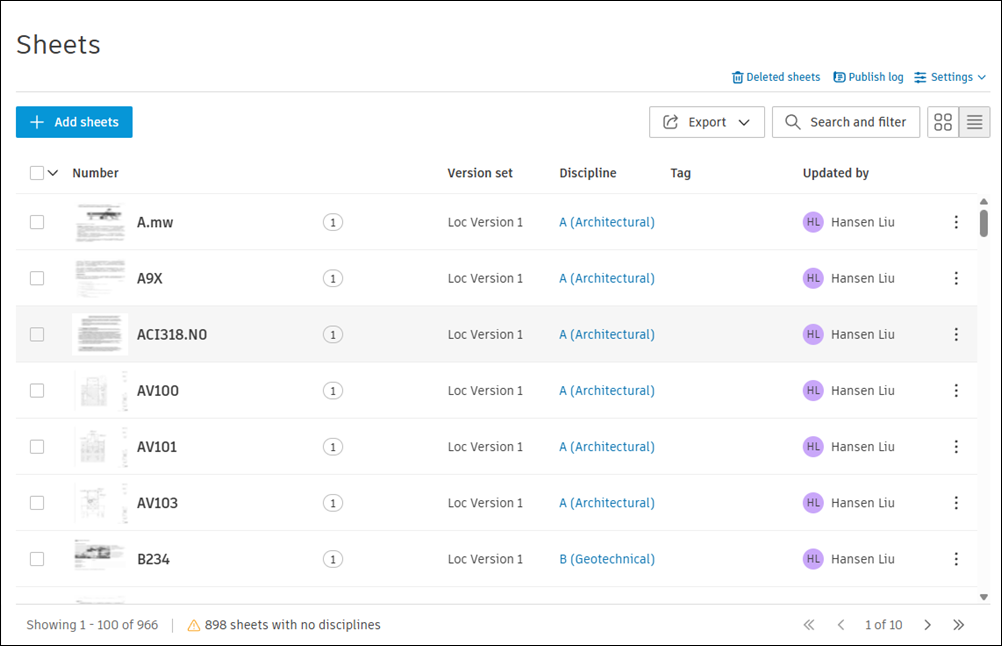
You can also navigate to the desired sheet from the Sheets homepage. Click the relevant sheet to open it in the viewer.
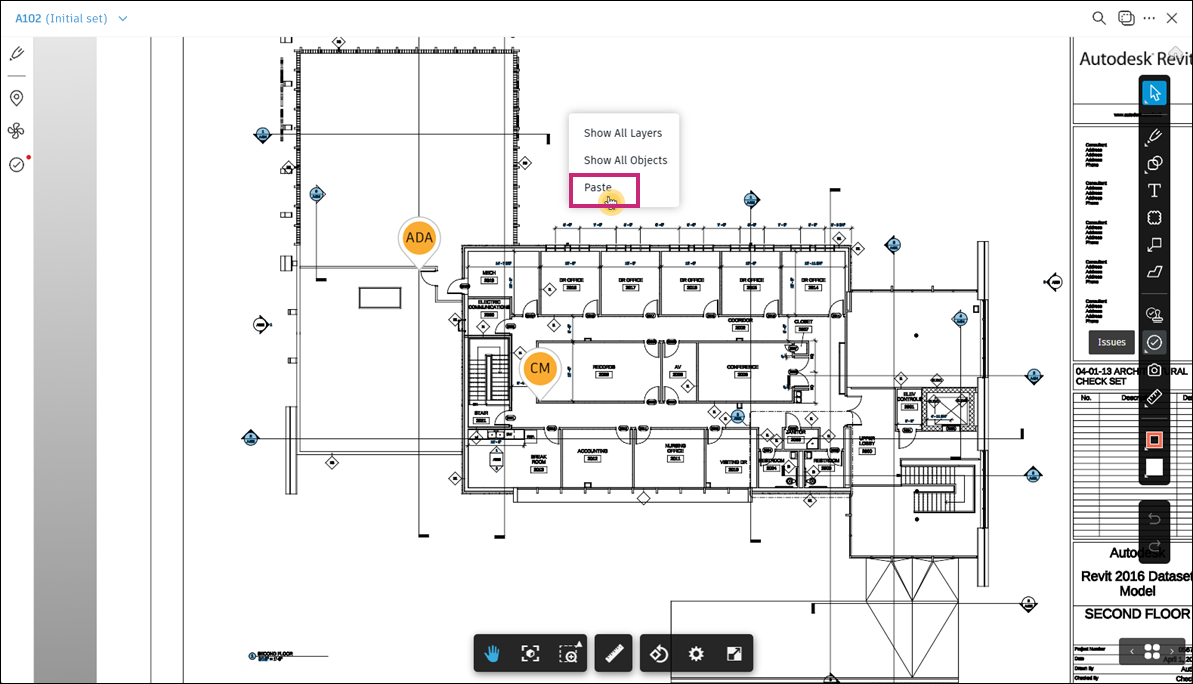
Right click the location where you want to paste the issues and click Paste to paste them on the cursor location.
Use CTRL + V to paste the issues in the same place of the previous sheet.
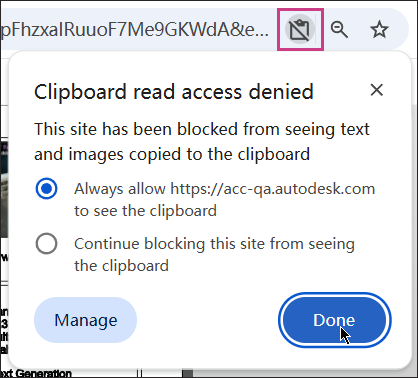
Note:Copy and paste depends on browser clipboard permissions, not permissions or project feature flags. If copy and paste does not work but Duplicate does, your browser may be blocking clipboard access for this site.
In Chrome, when paste is blocked, a clipboard permission icon can appear in the address bar. Click the icon to open the site permission prompt, allow clipboard access for the site and then try pasting again. Clipboard access is controlled in your browser’s site settings.
Your issues and markups have now been copied to a different sheet.
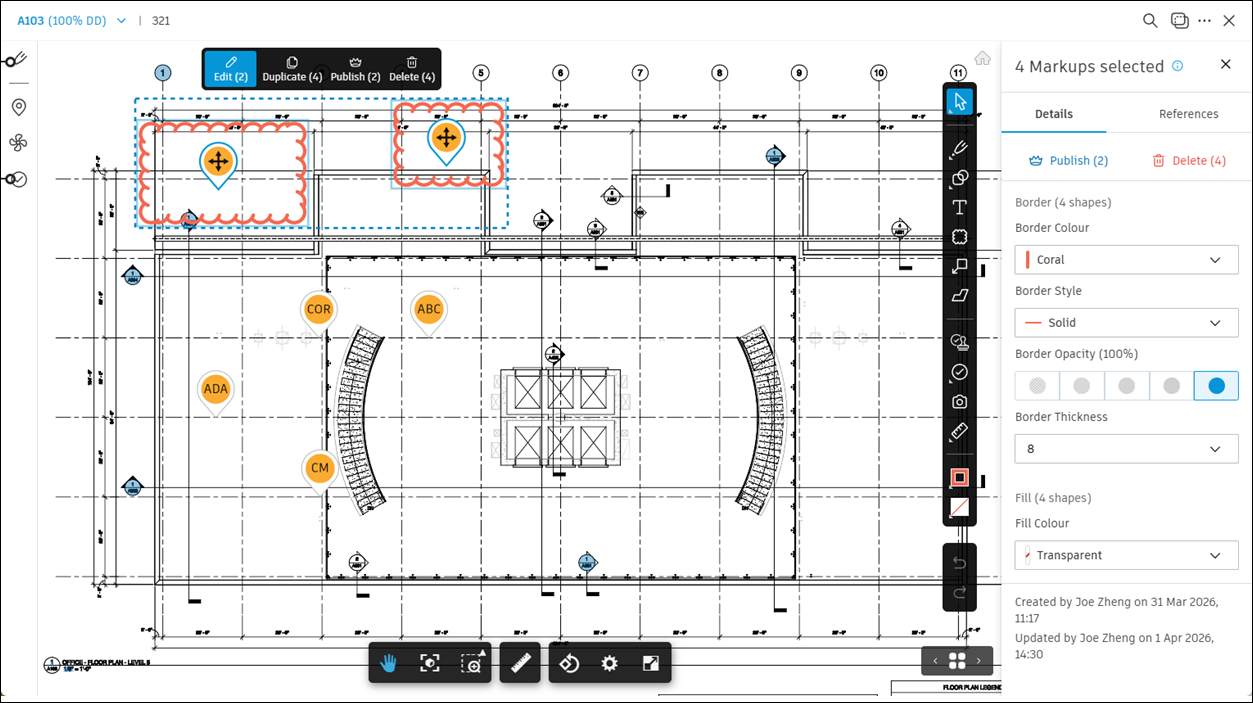
The issues are added to the top of the Issues list.
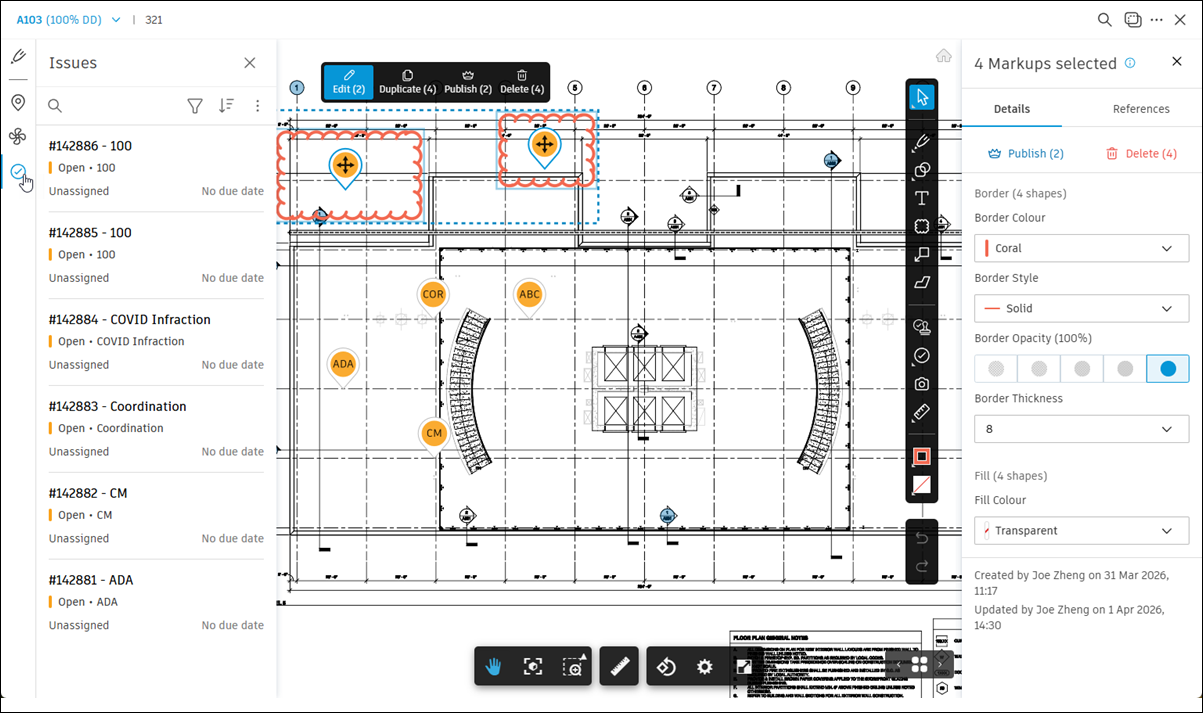
After pasting, markups are added to the button of the Issues panel on the left.
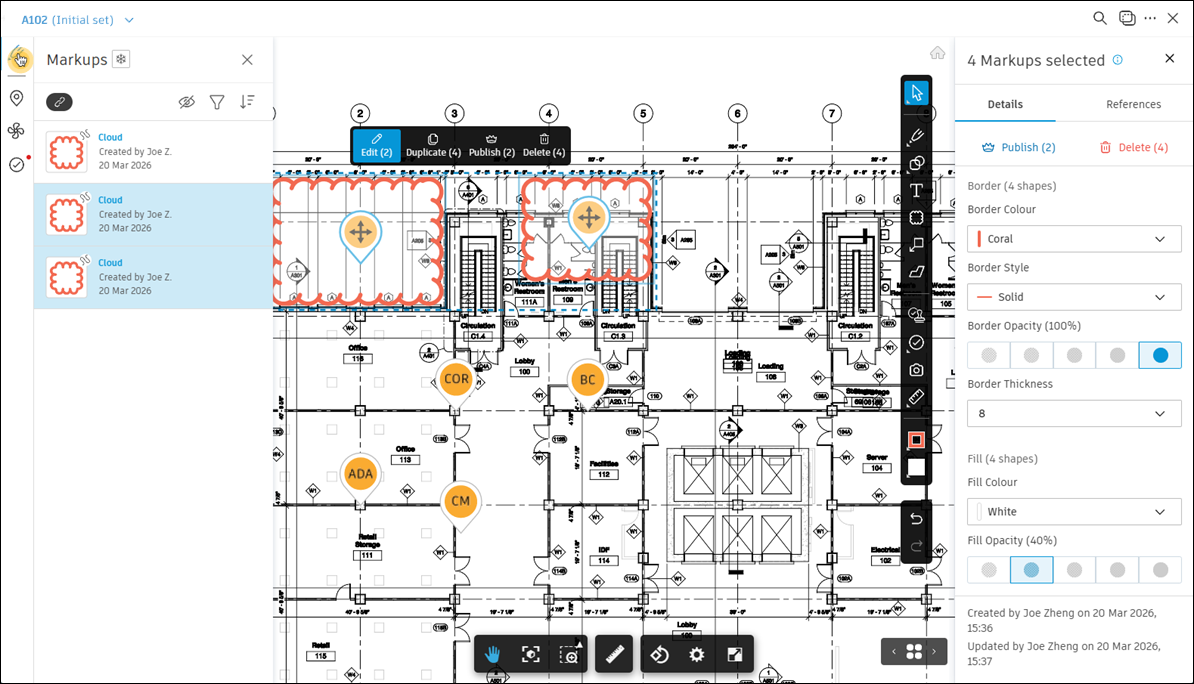
Note the following considerations:
Currently, issues are copied based on the database state at the time of paste. This means that any changes made to the original issue after copying – but before pasting – will be reflected in the pasted issue. For example:
- Copy Issue A.
- Change Issue A’s status.
- Paste.
- The newly created Issue B will have the updated status, not the status that existed at the time of copy.
Copied and Not Copied Attributes
When you copy or duplicate issues, most fields are transferred, but some follow specific rules:
Fields updated for the destination:
- Placement: Linked to the destination sheet, file or view.
- Location: Determined by the new placement.
Fields that are not copied:
- Attachments
- References
- Comments
- Source issue activity log history
- Thumbnail snapshot URN
- Source placement link metadata (including linked document data)
- Created at, Created by, Updated at, Updated by
System-generated fields for each new issue:
- Issue number
- Issue ID
Fields copied with permission restrictions:
If you lack permission to set a field, it will be copied as empty.
Each copied or duplicated issue is a new issue with a new ID.
Create Nested Issue Markups in the Viewer on 3D Models
Select the issues markup tool
 from the toolbar.
 Select from the issue Types or Templates.
Types are preconfigured or created in the Type settings.
Templates have an associated type and can contain prepopulated information to make creating issues faster. Templates are created in the Templates settings.
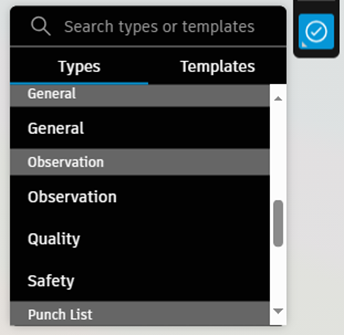
Click to place the issue
 in a desired location on a 3D model. Issues are automatically published by default.
A screenshot of the current view with the issue pin will be uploaded as a thumbnail to the issue. On the issue panel that appears on the right of the screen, you can click the thumbnail to open the full-size image.
To add a markup to the thumbnail:
a. Click the Add markups icon in the bottom-left corner of the issue thumbnail.
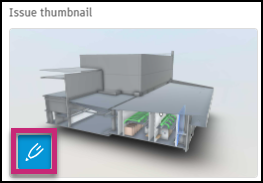
b. Use the tools in the toolbar to create markups.

See Markups Toolbar for more information.
c. Click Save thumbnail to save your markups to the issue thumbnail. The thumbnail in the panel on the right will update accordingly.
To retake a thumbnail to clear or update the markups:
Click the Retake thumbnail icon in the bottom-left corner of the issue thumbnail.
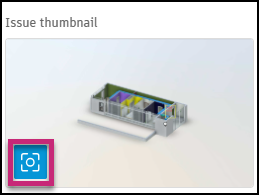
Click Take a new thumbnail.
Note: You can only retake thumbnails for issues placed on 3D models. This option is not available for 2D issues. (edited)The issue thumbnail will update accordingly. Click to add new markups.
Edit any issue fields as needed.
Tip: When an issue is selected, you can also move the issue pin by dragging and dropping it to a new location. The issue thumbnail will update accordingly with the new view of the issue pin.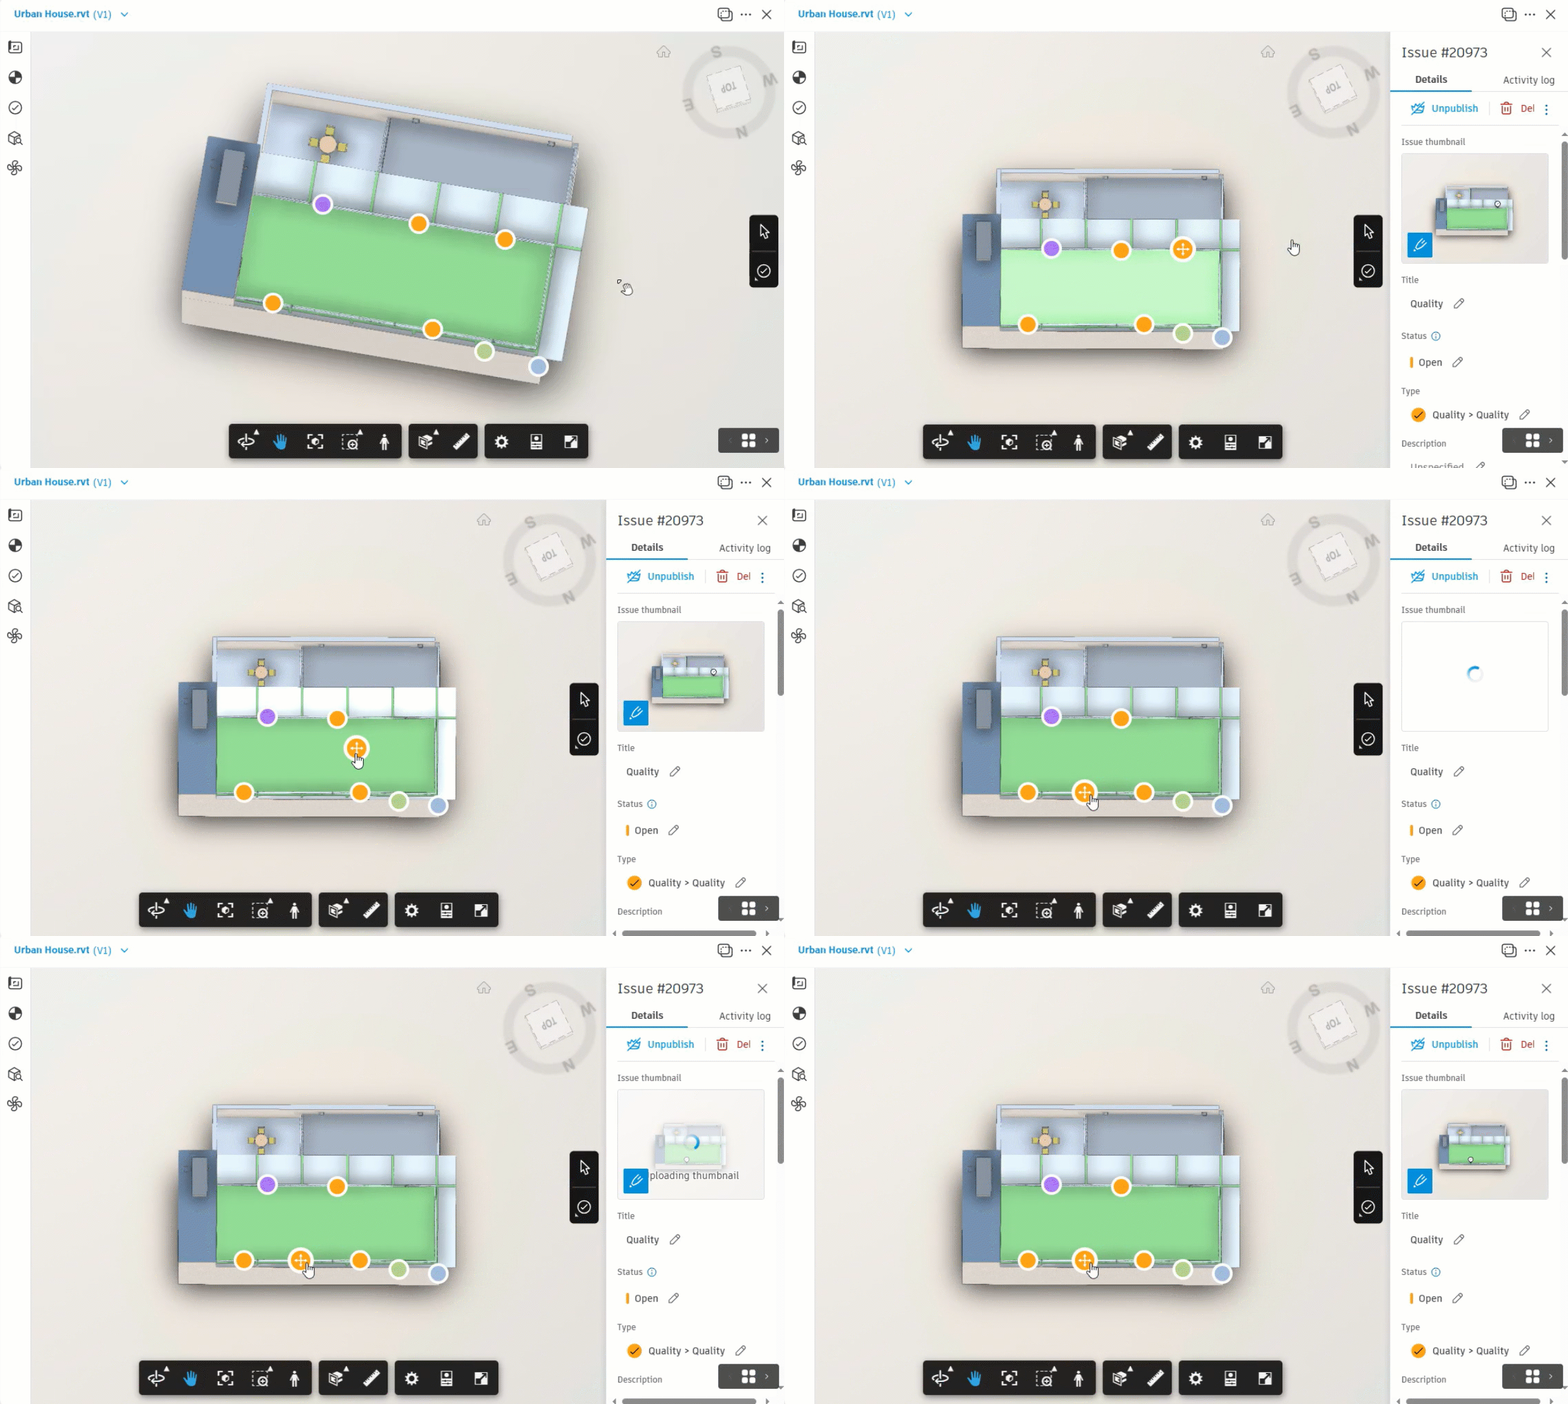
Click the Close icon
 in the panel to return to the model.