Create Issues in Model Coordination
When reviewing clashes, models or views in Model Coordination, you can create an issue to indicate that something in the design requires investigation.
Issues can be created in the viewer from the Issues tab to create a coordination issue directly on a model or the Clashes tab to create issues from specific clashes. Issues can also be viewed, filtered, and opened in the Issues tool in Model Coordination, Forma Data Management, and Forma Build.
Configure Issue Settings in Forma Data Management
Before creating issues in your project, a project administrator needs to configure the issue settings in Forma Data Management which are then inherited by Model Coordination. These include permissions for viewing and creating issues, and also managing settings such as categories and types, custom fields and root causes.
Create an Issue
You can use different tools in Model Coordination to access the viewer before creating a coordination or clash issue.
Access the viewer to start creating coordination issues which have no colouring or clash data:
Models tool: Select the relevant models and click Open in viewer.
Views tool: Click the name of the relevant view.
When the viewer opens, click the issues icon
 in the left-side navigation.
Issues tool: Click the relevant issue to open the Issue Details panel. Scroll to the Placement section and click the file name.
Access the viewer to start creating clash issues, which include colouring and clash data:
Clashes tool: Click either a primary model in the vertical column or a numbered cell in the clash matrix. When the viewer opens in the Clashes tab, select the relevant clash groups or clashes.
When you create issues from clashes, the associated clashes are saved with the issue and can be viewed using the Clashes tab on the issue details panel in the viewer.
Note: You can only create issues containing a maximum of 400,000 clashes. The same limit applies to classifying clashes as Not an issue.
Next, for either coordination or clash issues:
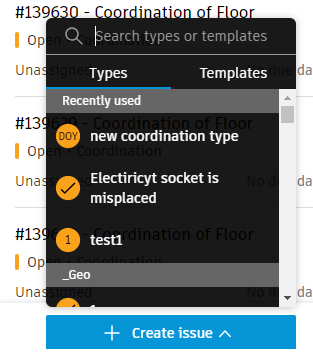
Click Create Issue at the bottom of the list of issues in the viewer:
 Note:
Note:You can't create an issue if more than 1,000 models are open in the viewer. Once you start creating an issue, the other tabs in the left-hand panel of the viewer are not available for selection.
Tip: You can also batch create issues from multiple clashes. See Batch Create Clash Issues for more information.Choose from Types or Templates:
- Types are preconfigured or created in the Type settings in Forma Data Management.
- Templates have an associated type and can contain prepopulated information to make creating issue faster. Templates are created in the Templates settings in Forma Data Management.
Note: When you place your issue, the issue status will vary depending on how the selected Type or Template has been configured by your project administrator in Forma Data Management. See Edit Issue Details below for more details.
Place Issue and Create Thumbnail
When you place an issue on a model in Model Coordination, this will create a thumbnail which includes the issue drawing pin.
Click the relevant place on the model to place the issue drawing pin. This will be published automatically.
Note: If multiple models are open in the viewer, the issue will be associated with the model where the drawing pin is placed. InForma Build and Forma Data Management, the Placement field of the issue will refer to that model file. We recommend placing the drawing pin on the model that needs to be modified (for example, a clash issue drawing pin could be placed on a model that should be moved for clash reasons).The new issue thumbnail will display in the issues Details tab. Click the thumbnail to open the full size version.
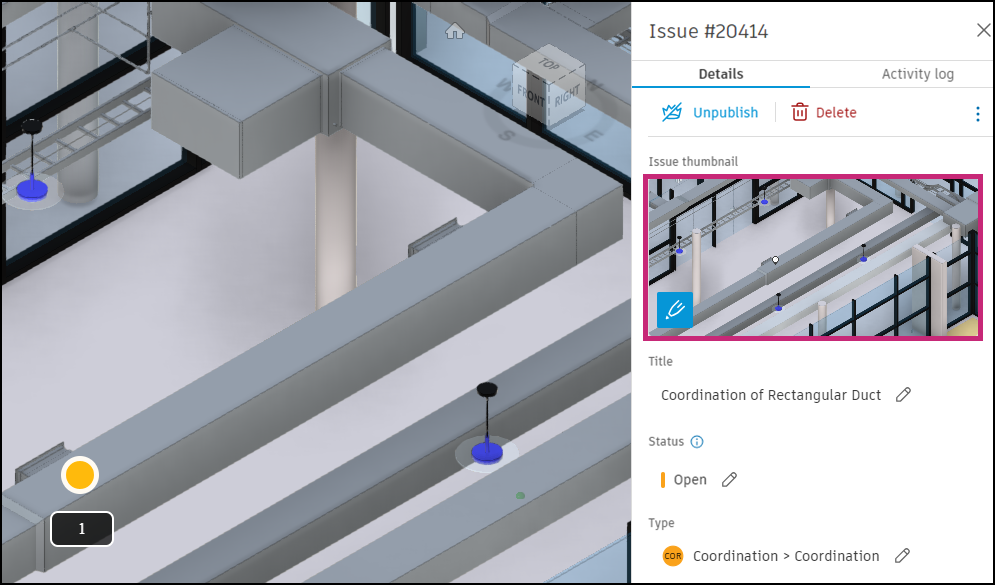
If you create an issue from the Clashes tab, the thumbnail will display the issue drawing pin, the clash colouring and aggregated models.
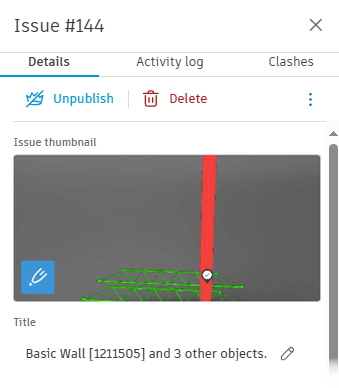 Note: Photo references are no longer created in addition to issue thumbnails.Important: Issue thumbnails can be viewed in Navisworks when collaborating on issues using the Navisworks Coordination Issues Add-in, but can't be edited.
For clash and design issues, you can also move issue pushpins to a new position. This can include to a different object or model.
Note: See Edit, Publish and Delete Issues for more information about the moveable issue pushpins feature.
Create thumbnail for existing issue
You can create thumbnails for issues which were previously created without thumbnails.
Click the issues tab icon
in the viewer.Click the relevant existing issue.
Click the Take issue thumbnail icon.
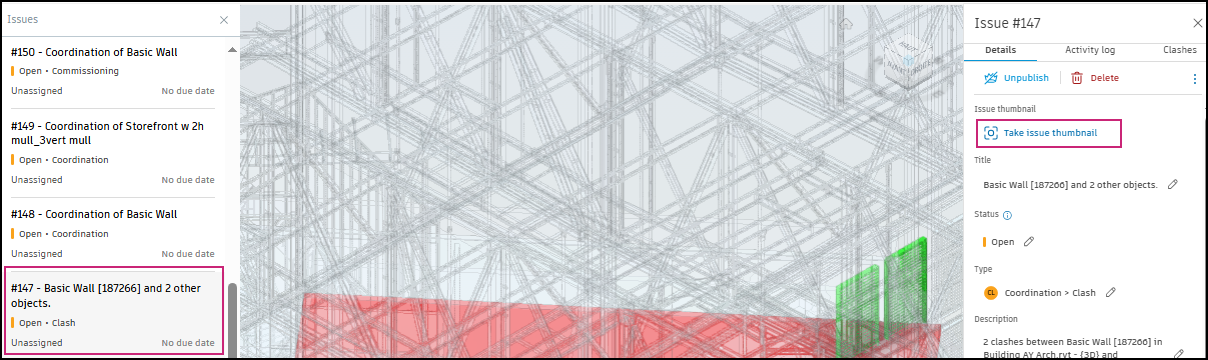
This thumbnail will match the perspective of the issue at the time it was created. If you've changed the camera angle or zoomed the perspective, the viewer will revert to the default position at the time of issue creation and then take the thumbnail.
Once the thumbnail is created, you can add markups.
Add Markups to Issue Thumbnails
To add markups to an issue thumbnail:
Click the pen icon
 in the lower-left corner of the issue thumbnail to activate markup mode.
Select a tool from the markup toolbar on the right and start creating your markups.
Note: The photos, issues and measurement feature markups are not included in the markups toolbar.Edit, duplicate or delete the markups as required.
Click Save thumbnail when you have finished.
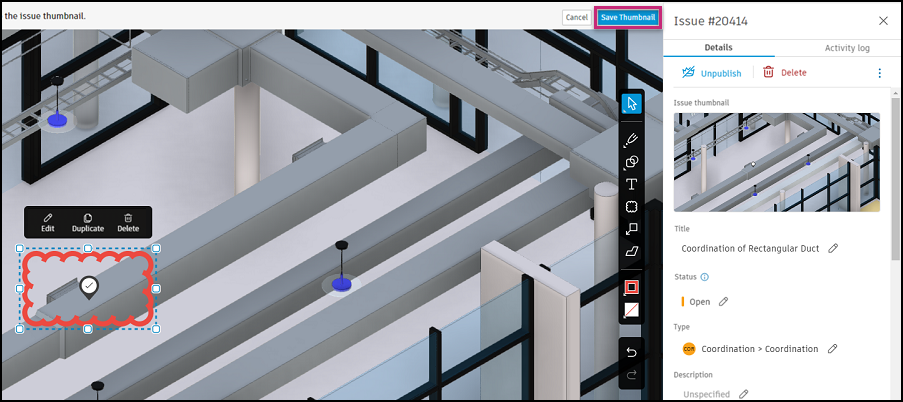 Note: Markups can't be edited after you've saved the thumbnail.
The thumbnail will now display the issue drawing pin and the added markups.
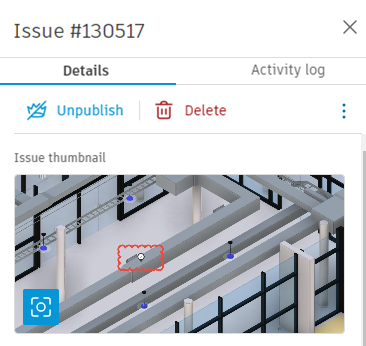
Update Markups on Issue Thumbnail
To update markups on an issue thumbnail, you need to retake the thumbnail. This will reset the thumbnail to the original perspective at time of issue creation, and also discard all markups previously added to the thumbnail.
Click the camera icon
 in the lower left corner of the issue thumbnail.
Click Take new thumbnail.
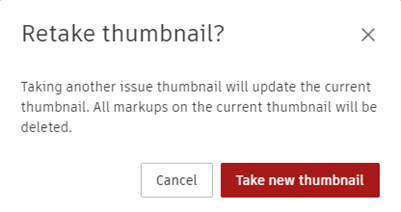
The new thumbnail will display in the original viewer perspective that was captured at the time the issue was created.
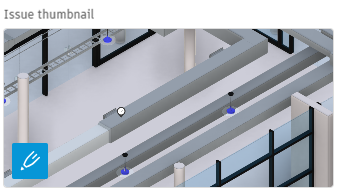
Click the pen icon
to add new markups.Click Save thumbnail when you have finished.
Important: If you create an issue in Model Coordination, open it in Forma Data Management or Forma Build and take a new thumbnail or add markups, you will lose the aggregated models context for coordination and clash issues and the clash colouring for clash issues. This is shown in the following image: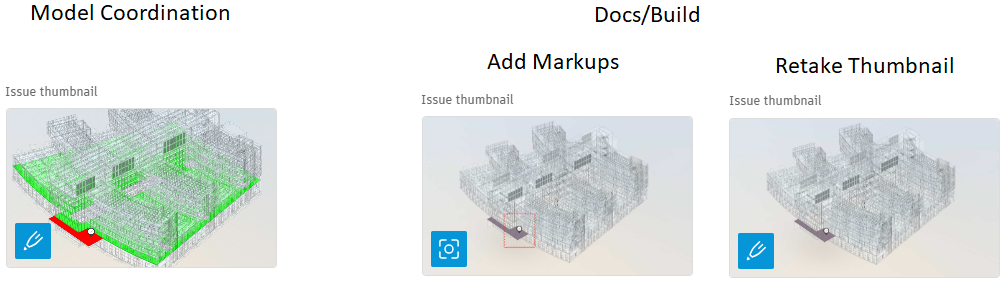
Add Issue Details
After you've placed your issue and added markups to the issue thumbnail, you need to add the issue details.
The Details tab displays issue fields which vary depending on the Type or Template you selected when you created the issue. The Type or Template will have been configured by your project administrator in Forma Data Management in issue settings and can include:
Required fields
Title: Enter a title for your issue (maximum 100 characters). You can search for issues based on their title in the Issues tool.
Note: The title and description fields are automatically filled if you create the issue from only one clash or clash group.Status: The assigned status will vary and depends if you've selected a:
- Type or Template which has required fields. The status will be set as Draft. You can update the status to Open or keep as Draft when all the required fields are completed.
- Type which doesn't have required fields. The status will be set as Open.
- Template which doesn't have required fields and a status other than Draft or Open. The status will be set as defined in the template.
Project administrators can configure which statuses are available in the Issue Statuses settings.
Type: You change the issue type if necessary. The types are organised under categories. Project administrators can configure categories and types in the Issue Types settings in Forma Data Management.
Note: If any fields are hidden for the selected type, you may not see some of these default fields. Learn more about hidden fields.Other fields may also be required based on your project’s issue field settings. These fields are marked with an asterisk.
Optional fields
Description (maximum 1000 characters)
Assigned to: Select a member, role or company from the drop-down list, or type a name to filter the list of options. Assignees will receive an email notification with a link to the issue.
Note: When you assign an issue to a member, they are also automatically added as a watcher.Watchers: Add team members who should be aware of the issue, but are not expected to contribute to its resolution. Learn more about watchers.
Location: Select a location from the drop-down list. If a project administrator has mapped areas of the model to locations, the location field is populated automatically when a drawing pin is placed in that area. Learn more about Locations.
Location details: Add any additional identifying information for your issue.
Placement: This field shows the name of the file that the issue has been placed on.
Note: If you click Remove , the issue is removed from the file and from the Issues tool in Model Coordination. It is not recommended to remove a clash issue in this way, as the related clashes are also removed. The issue is still visible in Forma Data Management and can be placed on another file or sheet or deleted.
Due date
Start date
Root cause: Select a root cause. Project administrators can configure root causes in the Root causes settings.
Custom fields
Any custom fields will display below the Root cause field.
Attachments – Attach non-Autodesk Forma files to issues. Either drag and drop files or screenshots into the upload area, or browse your computer to select single or multiple files. See Issues References and Attachments for more information.
References: Add references including photos, files, schedules, RFIs, assets, submittals, PCOs and forms. See Issues References and Attachments for more information.
Comments: Add comments related to the issue. Use @ to mention a specific member, role or company.
All issues created against models that are contained in the current coordination space are listed in the Issues tool in Model Coordination. From there you can filter the issues log by category, including Navisworks Clash Issues, Model Coordination Clash Issues and All Issues. Issues created in Model Coordination also display in the Issues tool in Forma Data Management.