As of the 2022 Autodesk product releases, nearly all products for Windows allow you to create deployments from Autodesk Account, where you select the components you want. This eliminates the need to download the product before you create a deployment. Although the deployment configuration is created in Account, the deployment files are saved on your network share.
For most product releases earlier than 2022, you use the classic installer to create deployments. See Create deployments with the classic installer.
- 3ds Max 2021
- Maya 2020
- Maya LT 2020
- Revit 2021.1
- VRED 2021
Select and customize your products
- Sign in to Autodesk Account.
- Select Custom Install from the left navigation.
- Click Create New (in the top right corner).
- Select the license type for the installer to use for all products.
- In the Add Products section, select one or more products to add to the deployment package. If you don't see a product listed, you can download it from the Products and Services page.
- As you select products, you can customize them in the right panel. You can select the version to include in the deployment. All installers needed for that version are included in the deployment. You can also add optional applications or specify a storage location for content, including templates, materials, and drawings. Custom settings apply to every instance of the product installed from the deployment package. Serial numbers and product keys automatically appear based on your license type.
Note: Configuration settings vary by product. For more information, see the product's installation instructions.
Enter settings and create the deployment
- After selecting the products you want in the deployment package, click Next to go to Install Settings. You can go back to the previous step by clicking the section header.
- Enter a package name, or accept the "Autodesk Custom Installer" default. This name is used in filenames to identify the deployment after it's created on your network share. Use a valid Windows filename that's unique within all your saved packages.
Tip: Use a name that helps you identify the package when viewing a list. Represent who the package is intended for and which products are included.
- Optionally, enter a package description. This will help you understand the contents of the package when you view it in a list.
- Choose Deploy to create a package to install on multiple devices. (The Install option creates a package of products to install on your own device.)
- Enter a deployment image path. This is the location on your network share where the deployment is created. You can use a UNC (Uniform Naming Convention) path name or a drive letter and path, for example: \\servername\path or S:\Autodesk\Deployments. This should be a valid Windows path to an empty folder.
- Enter a deployment log file path if necessary. The default path is shown in the illustration. Each installation of the deployment will write diagnostic information to this log. Use a valid Windows folder path.
- If you selected the Network license type, add the license server information by clicking Specify License Server, then clicking Save. To make changes, click Edit License Server.
- Expand Advanced Options to make other package changes, such as changing the default installation path, installing the Autodesk desktop app, or using Symbolic Links. For more information about Symbolic Links, see Using Symbolic Links in Custom Installs and Deployments.
- Confirm the settings in the Package Summary in the right pane.
- Click the checkbox to agree to the Terms of Use.
- Click Download or Save:
- Download puts the deployment creation executable in your Downloads folder (or other folder specified in your browser settings). This file is about 10 MB and includes the deployment configuration and the executable that creates the deployment. The package is saved in your library automatically, and the page returned to the list of packages.
- Save allows you to save the package without downloading it.
Note: At this point, product images aren't downloaded. - When the download is ready, double-click the downloaded file to create the deployment image. After it's complete, you can either close the deployment tool or view the deployment in the deployment folder.

Install the deployment
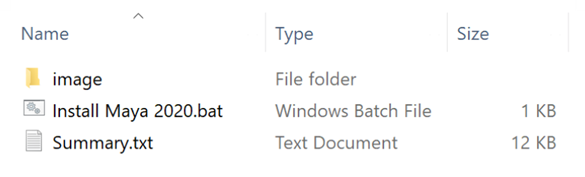
In the deployment folder, the Install <deployment name>.bat
file (see the following example) shows the command line parameters that you need to use to install the product. You can run the batch file manually to install the product on a workstation. It is also a good resource for creating a Configuration Manager installation script. While the script uses full paths to the configuration files, you can also use relative paths. Also, there is a
Summary.txt file that gives detailed information about every application installer included in the deployment, such as installer name, build number, and product codes.