Account administrators can create projects and assign project administrators to BIM 360 services.
When you create a project, you add information used for company reporting and analytics and ensure that all team members have consistent project information across workflows.
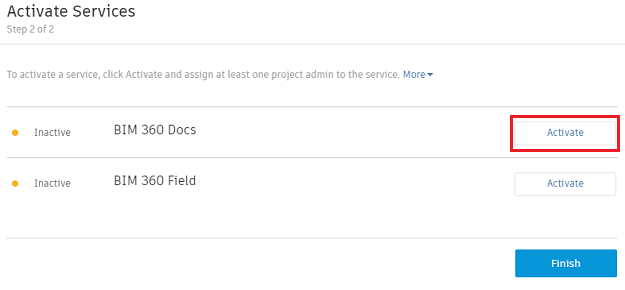
IMPORTANT: after creating a project profile, you can activate BIM 360 services. Note that you must activate BIM 360 Docs first, before you can activate other next gen services.
Create a Project
- In account administration, click Projects.
- Click Add.
- In the Create Project Profile dialog, specify the project name and enter the project information. Required fields are marked with an asterisk.
- Specify the language. English is the default. German is available only for BIM 360 Field.
- Click Save & Continue to create the project. Now the Activate Services page displays.

Activate a Service
- On the Activate Services page, you can add multiple project administrators to a project. Next to a BIM 360 service heading, click Activate to activate that service.
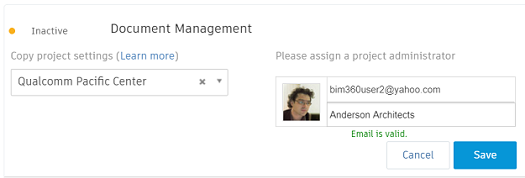
- (Optional) When activating Document Management, you can copy a folder structure from an existing project. Under Copy Project Settings, search for a project name and make your selection.
- Add at least one project administrator for members using the service. Enter a name or email, and optionally a company.
IMPORTANT: you must activate BIM 360 Document Management first before you can activate a next gen service.
 Note: New members receive an invitation to the account and the project.
You can also add existing account members. Search the directory by entering a name or email. If the name or email is valid, click Save.
- (Optional) When activating BIM 360 Field, you can copy project settings from an existing project as a template. Under Copy Project Settings, make your selection and choose whether to copy companies and locations as well.
- When done, click Finish.