As an account administrator, you can activate services and add project administrators to an existing project.
To add Project Admins to a new project
- In account administration, click Projects.
- Click a project in the list.
- On the Project Members page, click Services.
- For the BIM 360 service that you want to assign an administrator to, click Activate. For example, for BIM 360 Docs, click Activate to add an administrator and integrate BIM 360 Docs with the current project.
- Enter the member's name or email. Click Save to send the welcome email. This email allows project administrators to sign in to the account with their Autodesk ID.
Existing members are notified that they've been added to the account as project administrators.
To add Project Admins to a previously created project
- Click Members.
- You can add new members/admins. See To Add Members.
- You can grant an existing member project admin rights by clicking on the Project Admin icon. Granting admin rights to the project automatically makes the person an admin for every next gen service that they have access to.
Account or project admins can add project admins to an existing project.
To add Project Members to a previously created project
- In account administration, click Projects.
- Click a project in the list.
- Click Add.
- Enter names or email addresses and click Select.
- For Company, select an existing company name or enter a new company. When you search for an existing company, it will display for you to select. If you enter a new company, select Create Company <company name>.
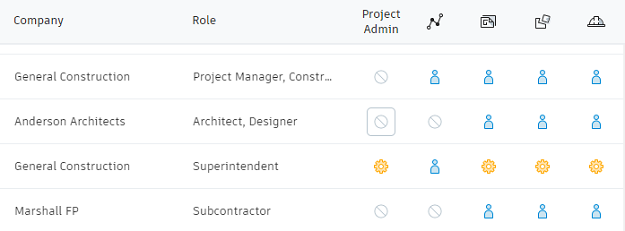
- Select their project role.
- (Optional) For Project Admin, and each BIM 360 service, you can click to change their access level to overwrite the access level granted by their project role.