As a project administrator, you can invite members to a project. You can also assign member permissions and project roles, such as architect or subcontractor.
Invite New Members
- Click .
- Click Members
 .
.
- Click (+) Members.
- In the Add Members dialog, you can add one or multiple members to a project at the same time.
- Add new members by entering their name or email and press Enter.
- You can also add members who have previously been added to the BIM 360 account. Search the account directory by entering a name, email, or company. Select a result and press Enter.
- Enter the member's name, email, and company.
- Specify a user role.
- (Optional) Specify project access rights as needed, including Project Admin, Document Manager, and Photo Viewer.
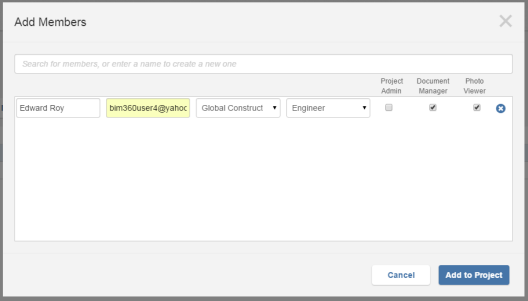
- Click Add To Project to send the Welcome to BIM 360 email. This email allows users to activate their membership and access the project.
Import Members from an Excel File
- Click .
- Click Members
.
- Click .
- For a first-time import, click Download The Member List Template to download the spreadsheet.
- Replace the sample members with your actual members, one per row.
- Save the completed spreadsheet as an XLS file and close it.
- In the Import Members window, choose Browse to navigate to your saved XLS file.
- Click Start Import. A message appears when the members have been uploaded successfully.
- Click Done.