Document Management User Interface
Explore the user interface to increase productivity and optimize your workflow.
Learn how to navigate the user interface to increase productivity and optimize your workflow.

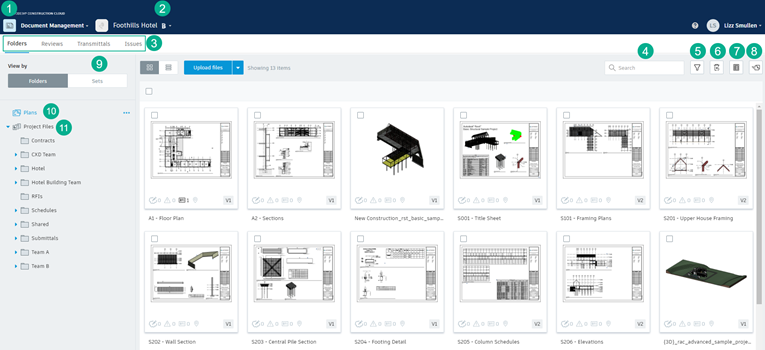
- Module Selector. Use to select the module you want to work with. Project administrators can invite members and set up folder permissions.
- Account/Project Selector. Use the drop-down list to select a desired account and project that you have access to.
- Navigation. Select the project folders, document reviews, transmittals, or issues tabs.
- Search. Find documents and files in any folder and its subfolders.
- Filter. Use this feature to filter the models by versions.
- Delete. Use this feature to permanently remove a model from a project.
- Document Log. Generate a log of all documents from a given folder or subfolder and send it by email as an Excel spreadsheet. For more details, see Document Log.
- Publish Log. View the chronological record of all activities in the publishing process. For more details, see Publish Log.
- Sets. Click to view and manage document sets. For more details, see Upload and Publish Documents.
- Plans. Use to manage, publish, and review the latest set of construction documents, in both 2D and 3D formats. This is the digital equivalent to the printed set of contract drawings for the project. For more details, see Plans and Project Files.
- Project Files. Manage any project document, including design data and all other document types. For example, photos, reports, schedules, budgets, requirements, etc. For more details, see Plans and Project Files.