Clash Checks
Save and reuse customized clash detection configurations with clash checks for faster, more consistent coordination workflows.
Creating saved clash checks can help to:
- Eliminate repetitive setup by reusing saved clash configurations.
- Standardize clash detection, reducing the number of clicks to get to the 'right' information.
- Tailor clash checks to specific disciplines and project phases.
Create a clash check
To save a clash check configuration:
Choose the content that you want to clash in the Clashes panel.
Apply filters and grouping as required.
Click Save clash check.
The Save clash check dialog opens:
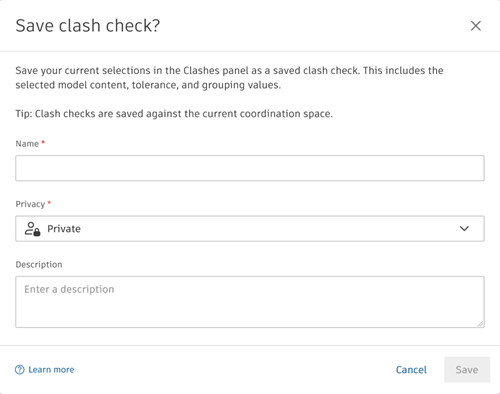
Enter a name for your clash check.
Select a privacy level from the drop-down list:
- Public: Viewable by all project members in the coordination space. Can only be edited by the creator and project administrators.
- Private: Viewable only by the creator and project administrators.
Optionally, add a description of the clash check.
Click Save.
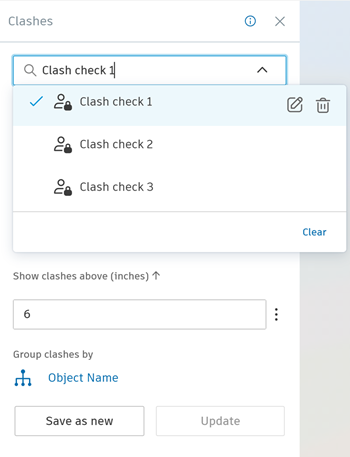
Once clash checks have been created, they are displayed in a drop-down list at the top of the Clashes panel.
Apply a clash check
When you first enter the Clashes panel, no clash check will be selected. To apply a saved clash check:
Open the Clashes panel.
At the top of the panel, use the drop-down list to view the available clash checks:
 Note: Only clash checks relevant to the content in the viewer will be shown. You can see clash checks that you've created, and those that other project members have created and set as public. Project administrators can see all clash checks.
Select the desired clash check from the list.
Once selected, the saved configuration is applied automatically and the resulting clash results are displayed. The Save clash check button is replaced with Save as new and/or Update options based on permissions for the clash check.
Note: If the selected clash check contains models that are not currently loaded in the viewer, they are loaded before the clash configuration is applied.
Update a clash check
When you modify a clash panel configuration that has been saved as a clash check, a blue dot appears against the clash check in the drop-down list. You can either:
Click Update to save your changes to the existing clash check.
Note: Clash checks can only be updated by the creator or project administrators.Click Save as New to create a new clash check.
Edit clash check details
Clash check details can be edited by the creator, or a project administrator. To edit a clash check's name, privacy level, or description:
Open the Clashes panel.
At the top of the panel, click the drop-down list to view the available clash checks.
Hover over the clash check that you want to edit, and click the edit icon
 .
.Edit the name, privacy, or description in the Edit clash check details dialog.
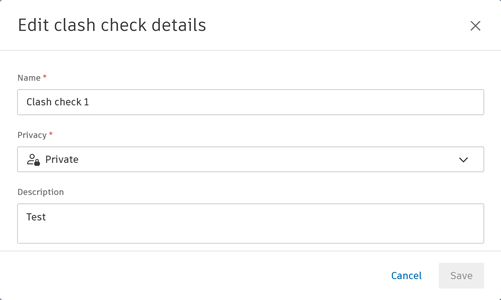
Click Save.
Delete a clash check
Clash checks can be edited by the creator, or a project administrator. To delete a clash check:
- Open the Clashes panel.
- At the top of the panel, click the drop-down list to view the available clash checks.
- Hover over the clash check that you want to delete, and click the delete icon
 .
. - Click Delete to confirm.