Filter and Investigate Clashes
Spatial coordination is mainly conducted in the viewer, where you can filter, group, and investigate clashes. There are different ways to access clashes in the viewer:
Open the desired models in the viewer, either by selecting them in the Models tab or by opening a view from the Views tab. Once inside the viewer, use the Clashes button
 on the left to open the clashes panel.
The clash grid:
Click a numbered cell to view the clash groups between that pair of models in the viewer.
Click the primary model listed in the vertical column to view all clash groups affecting that model in the viewer.
 Tip: Use the Models
 and Clashes
  buttons to the left of the panel to switch between a list of clash groups and the affected models. You can also use the Issues
  button to view any issues associated with the selected models.
Filter Clashes
There are two main ways in which you can filter for specific clashes in the viewer. These two methods can be used in combination to provide in depth filtering and analysis.
 model browser: Use the basic object filtering to investigate further. Filtering in the model browser also filters out clashes associated to these objects.
 - clashes: Use the filter tools in the clashes panel.
When you are in the Clashes panel:
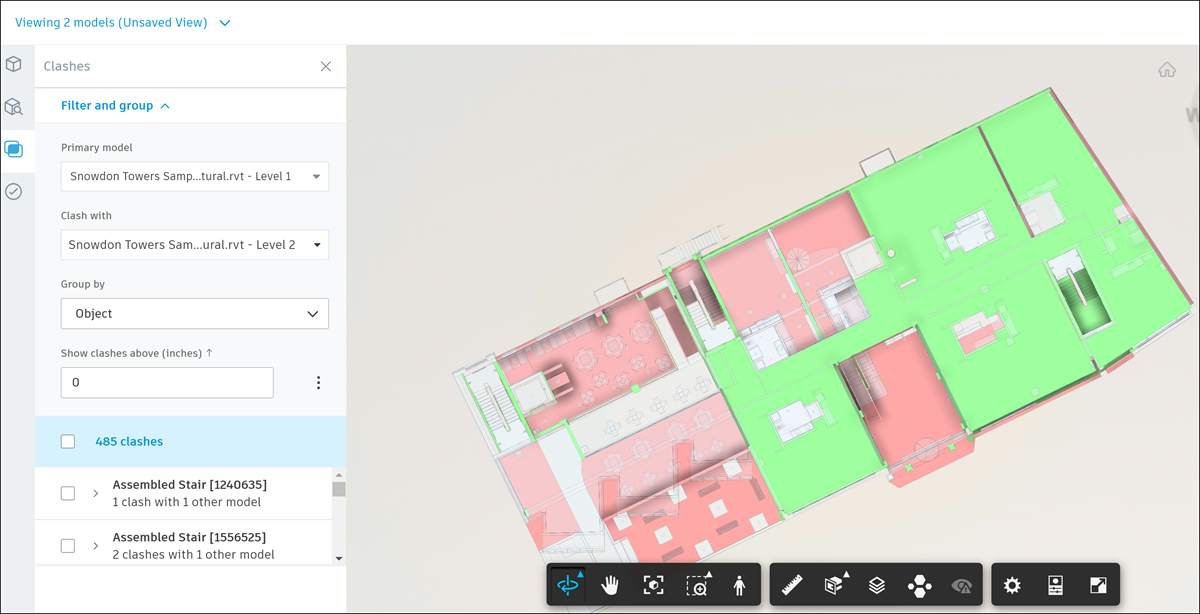
Use the Primary model drop-down list to select which model is treated as the primary model.
Use the Clash with drop-down list to select which model the primary model is clashed against.
Use the Group by drop-down list to choose whether to group clashes by:
Model objects
Object property
System
Type
Layer names
You can also select the standard and custom object properties that are defined in your model.
Tip: Systems, types, and layers are typically used in CAD to group objects with related function or location. They are defined in the parent software that the models are created in, therefore the options available depend on the model file type. It may be useful to view clashes using these groupings, as related objects are likely to be affected by the same clashes.Note: Currently, the system and type properties only work for English.Use the Show clashes... option to filter the clashes by a specified tolerance value. Tolerance is a specified distance by which two objects can intersect, but not be classified as a clash.
Click the More menu
 and choose from the following options:
- Below a value - Show only those clashes that are caused by an intersection less than a specified value.
- Above a value - Show only those clashes that are caused by an intersection greater than a specified value (default).
- Within a range - Show only those clashes that fall within a specified range of intersection values.
- Units - Choose either inches or millimeters as the units.
Enter a value or value range in the text field to filter the clashes.
For example, select the Above a value option, select mm for the units, and then enter 10 in the field. This filters out all clashes caused by an intersection of less than 10 mm. This would allow you to focus on the clashes caused by larger intersections, which have the potential to be more problematic.
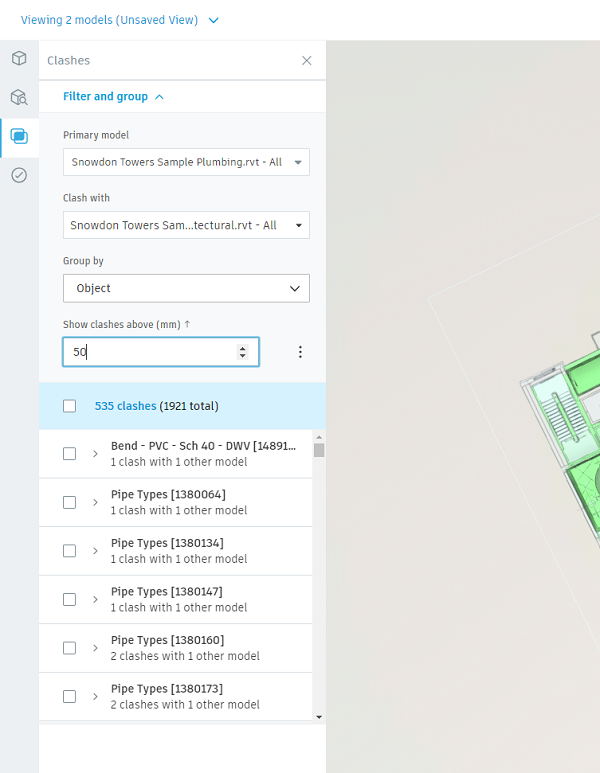
The total number of clashes is shown in parentheses (shown as (1921 total) in the image). The number of clashes which are visible with the tolerance filter applied is the other number (shown as 535 clashes in the image).
Note: Any Filter and group settings applied to clashes on this page don't persist on other pages, for example if creating issues or views.
Investigate clashes
When you've opened clashing models in the viewer, and filtered and grouped them as needed, you can use various tools to investigate the geometry causing the clash in the context of the surrounding models. You can also create issues from clashes to mark them for further investigation or indicate that a design change is needed.
Use the viewer toolbar to control the view, take measurements, and inspect model properties.
Right-click objects in the model, and right-click again to use the options in the context menu:
Isolate: Isolates the selected objects by making the rest of the models transparent.
Hide selected: Hides the selected objects from view.
Show all objects: Shows all objects in the models.
Focus: Zooms the view on the selected objects
Pivot: Uses the selected objects as a pivot point.
Clear selection: Clears the selection
Section:
- Section Box: Uses the selected object as a box to section the models.
- Section Plane: Uses the selected object as a plane to section the models.
Tip: You can also use Ctrl/Shift+Click to select multiple objects in the model.Click a highlighted clash in the model or click a checkbox next to a clash group in the clashes panel to select it. If necessary, expand a clash group to select individual clashes:

The total number of clashes in the models being viewed is displayed at the top of the clashes panel. Click this number to return to a top-down view of all the clashes, or click the checkbox next to the number to select all clashes.
If you select individual clashes or clash groups, the number of selected clashes is displayed in brackets next to the total.
Tip: You can also click the name of a clash or clash group in the left panel to isolate it in the viewer without selecting it:
To view all clashes again, press Esc, or right-click in the viewer and select Show all objects.
When you have selected some clashes, you can either mark them as Not an issue or create an issue for further investigation.
Click the X in the top-right corner to exit the viewer and return to the clash grid.
Use the Closed tab to view clashes marked as Not an issue, and the Issues tool to view clashes marked as an issue and track the changes being made to resolve the clash.