Create RFIs
Request information from collaborating companies about the project.
There are two types of RFI:
- RFIs associated with a specific document or model. For more details, see Create RFIs in Document Management.
- Project-level RFIs that are not associated with a specific document or model. These RFIs are displayed on the RFIs tab in the Project Management module. For more details, see Use RFIs.
To create and view RFIs on the relevant BIM 360 Mobile App, see RFIs (Android) or RFIs (iOS).
Note: Roles assigned by the project administrator affect certain entries.
- Creator and Manager roles can create an RFI.
- Only a manager can open an RFI (i.e., submit it to the responsible party).
- Creators assign RFIs to managers to review and open.
- Only the user who opened the RFI (Manager workflow role) can close an RFI.
Create an RFI in List View
- Click the Module Selector


 .
. - Select the RFIs tab.
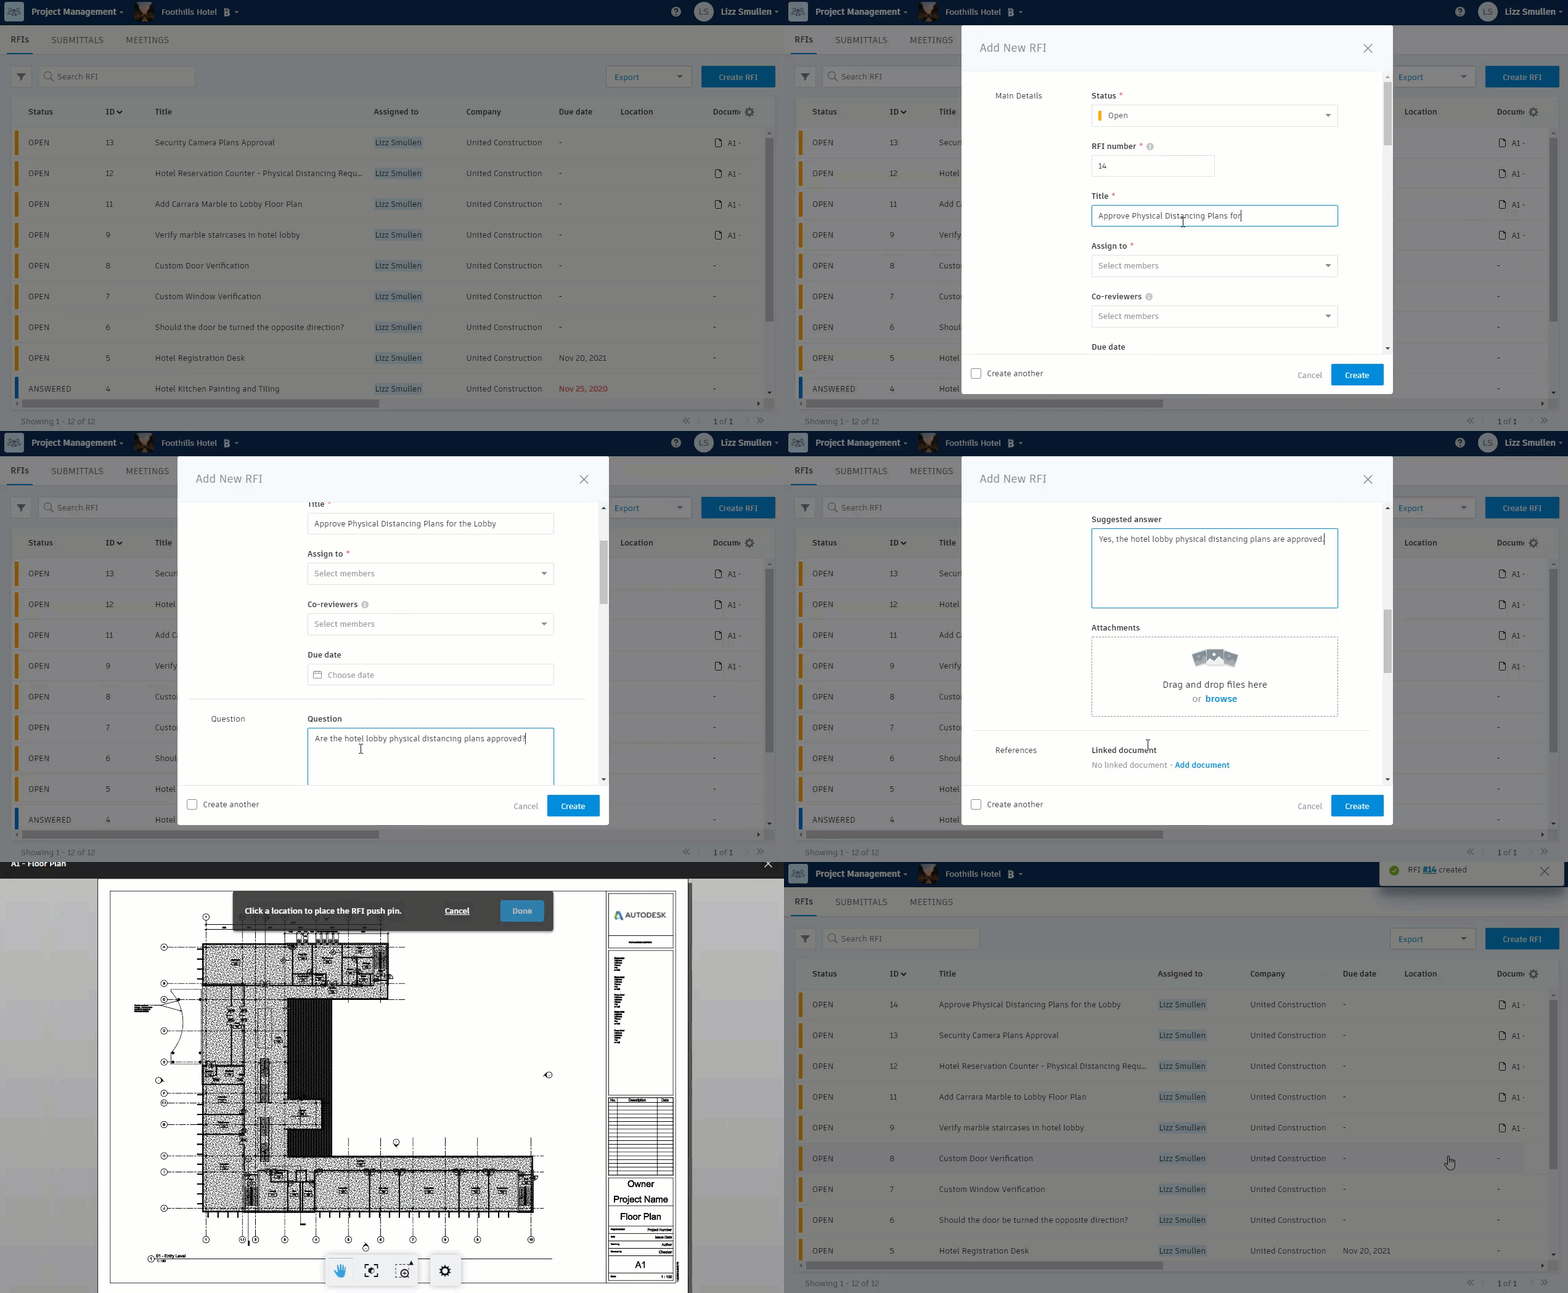
- Click Create RFI.
- Select the desired status using the drop-down list: - Draft: Keeps the RFI private to the creator. - Submitted: Assigns the RFI to a Manager. - Open: Assigns the RFI to a reviewer. Only Manager roles can open an RFI.
- Enter a title.
- Select the person to assign the RFI to using the Assign To drop-down list. If you are a manager you can select a manager or reviewer. Members must select a manager. See Set Up RFI Workflows for information about the roles.
- You can also:
- Add a due date
- Add a question.
- Suggest an answer to add clarity to the question.
- Attach files from the Plans or Project Files folder, or upload them from your computer.
- Click Add document to select a document in the project by:

     1. Navigating through the project documents folders.
     1. Selecting the document.
     1. In the viewer, finding the location in question.
     1. Clicking in the canvas to place a push pin.
     1. Clicking Done.

- Enter text about the location.
- Provide any information if the cost or schedule is impacted.
- Select a priority.
- Select the related disciplines.
- Select the related categories.
- Enter an external ID if the RFI was created in another software for reference. Filtering by this ID can bring it up quickly for a conversation.
- Select members for the distribution list, they are sent emails as the RFI progresses through the workflow.
Click Create to save.
