After launching a cloud rendering or illuminance simulation from Revit, you can view and edit it directly from the web on the Render Gallery.
You or any collaborator who you have granted access to your account can also create or modify illuminance renderings from the Render Gallery through your Autodesk 360 account. This service is available for renderings you have already completed through Revit. You cannot change views, but you can render an existing image as a visual or an illuminance rendering, modify legend scales, times and dates, or sky models, for example. Note that this option works from a version of the model geometry stored in the cloud, and thus will not take into account any changes you have made to the model since the first rendering was done.
-
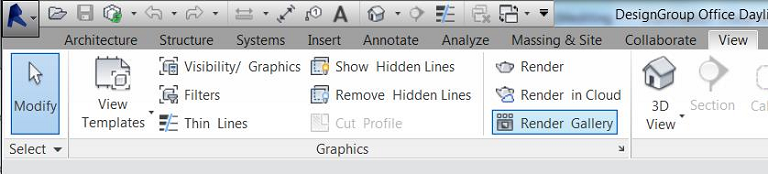
Access the Render Gallery from the Graphics panel in the View tab within Revit or by signing in to Rendering.360.autodesk.com.
-
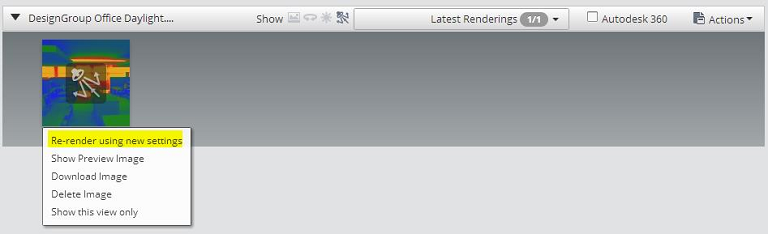
From the Render Gallery, select the rendered view you want to change. Drop down the arrow and select Re-render using new settings.
-
You will then be prompted with a dialog box similar to the one you went through to create illuminance renderings through Revit. Review the settings here .
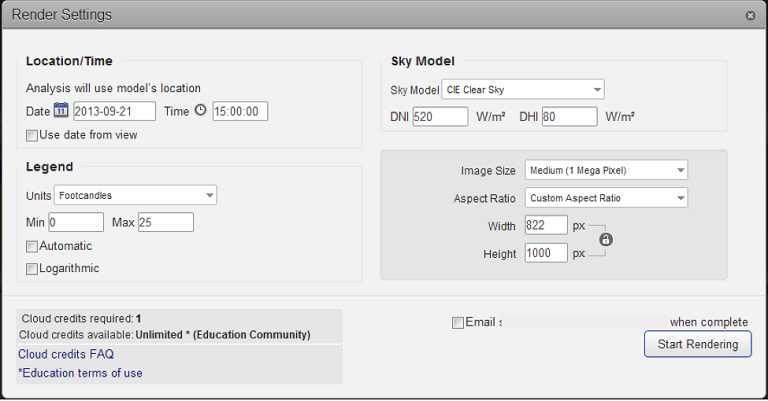
Once you have completed your selections, select Start Rendering. The rendering with the new settings will save as a separate image from the original. Be sure to refresh your browser and show All Renderings to view the new rendering. The new rendering will not be titled anything different or have any information about the rendering settings so be sure to keep track of your changes and the associated images (a good tip is to download and save the image with a name that corresponds to the settings after it is completed—the date and time in the file name when you download are for when the rendering was completed, not your rendering settings).