Collaborative Potential Change Order Workflow
The collaborative Potential Change Order (PCO) workflow allows you to work with your downstream and upstream collaborators on change order requests.
Give your suppliers collaborative permission so they can generate PCOs and review, accept, or reject proposed changes. Send a PCO out to request pricing for a change order instead of using an RFQ. Work on a PCO for acceptance of a proposed price on potential changes.

Work with your upstream collaborators on:
- PCOs instead of CORs for budget change requests. Submitted values show up as a PCO even if a COR is not used.
- PCOs instead of RFQs for cost change requests.

In this article:
Collaboration on Downstream PCO Workflow
Setting Project Process for Downstream PCO Collaboration
To enable the downstream collaborative Potential Change Order workflow, make sure that your project process is set correctly. To do so:
Select the Settings tool from the left navigation.
Switch to the General tab.
Select the Project Process drop-down list.
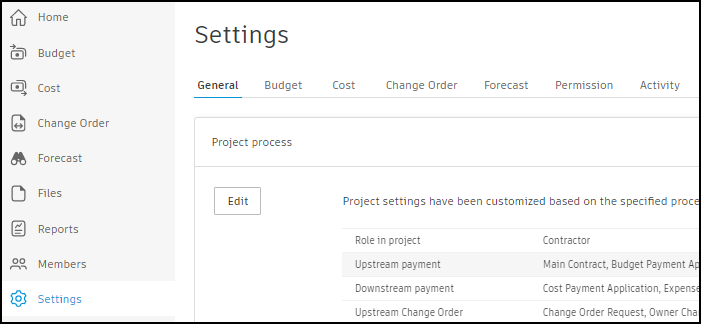
Click Edit.
Go to the Downstream Change Order section by clicking Next.
Disable the Request for Quotation option. Then enable the Use Potential Change Order to Request Quotations option.
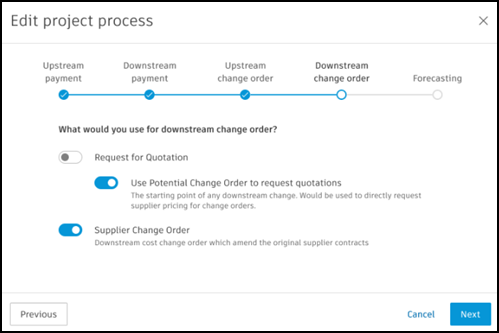
Click Next until you can click Save.
Setting Permissions for Downstream PCO Collaboration
The downstream collaborative PCO workflow requests certain permissions. To do so:
Select the Settings tool from the left navigation.
Switch to the Permission tab.
Choose the Collaborate on Downstream Change permission for the supplier role, and switch to the second level of permission. Only members with those two permissions enabled can create a PCO within this workflow.
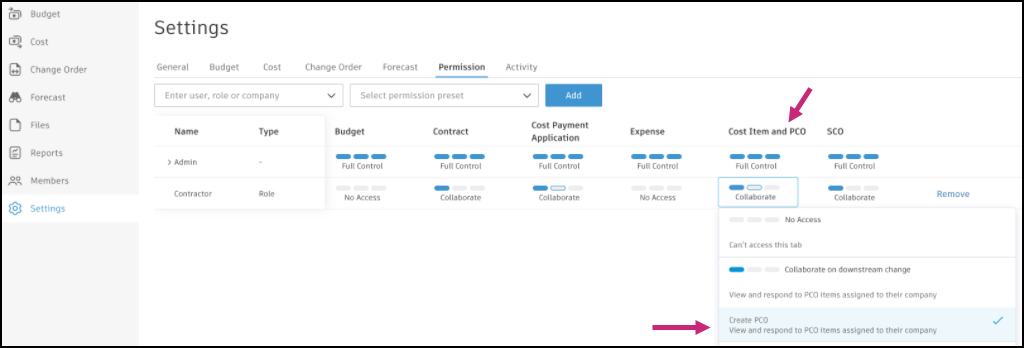 Note: This set of options works while the Use Potential Change Order to Request Quotations option is on. While disabled, the member’s collaborative permission is set as No Access.
Working with Downstream Collaborative PCO Workflow
Once the project process and permissions are set, suppliers as collaborators can work with general contractors on the downstream collaborative PCO workflow.
When you want to create a PCO as a supplier:
In the Change Order tool from the left navigation, select the PCO tab.
Click Add. The pop-up window Add PCO from Contract shows.
Select the Contract Name and Contract SOVs.
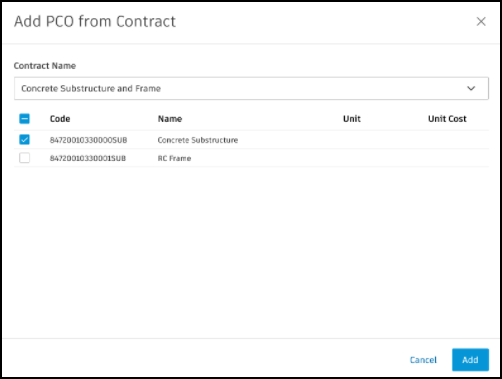
Click Add. The PCO is created and the Submit PCO panel opens.
- Add a name for the PCO request.
- The default recipient of the PCO is a general contractor. Choose more recipients of an email copy to a general contractor, if necessary. Learn more about company setup.
Tip: To see cost items' breakdown, use the contract hierarchy button.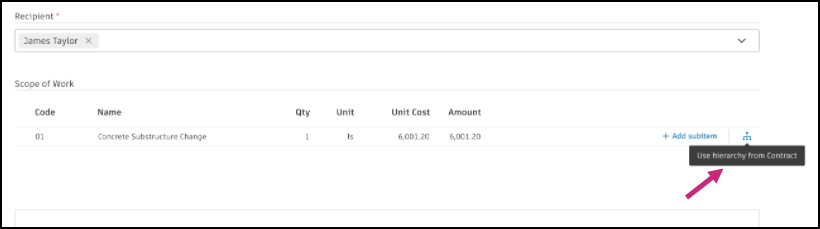
Generate documents from templates (optional)
Before you submit the PCO, Collaborate and Collaborate + Create users can generate documents from templates on the Submit PCO page or the PCO flyout. This option is available when PCO as RFQ is enabled. Generated files can complete the document package without waiting for the general contractor to add them.
Before you generate documents:
- A project administrator must create a PCO document template in Settings.
- Forma Data Management folder permissions must allow collaborative users to save generated files to the mapped folder. If folder access is misconfigured, generation can fail. See file permissions for collaboration.
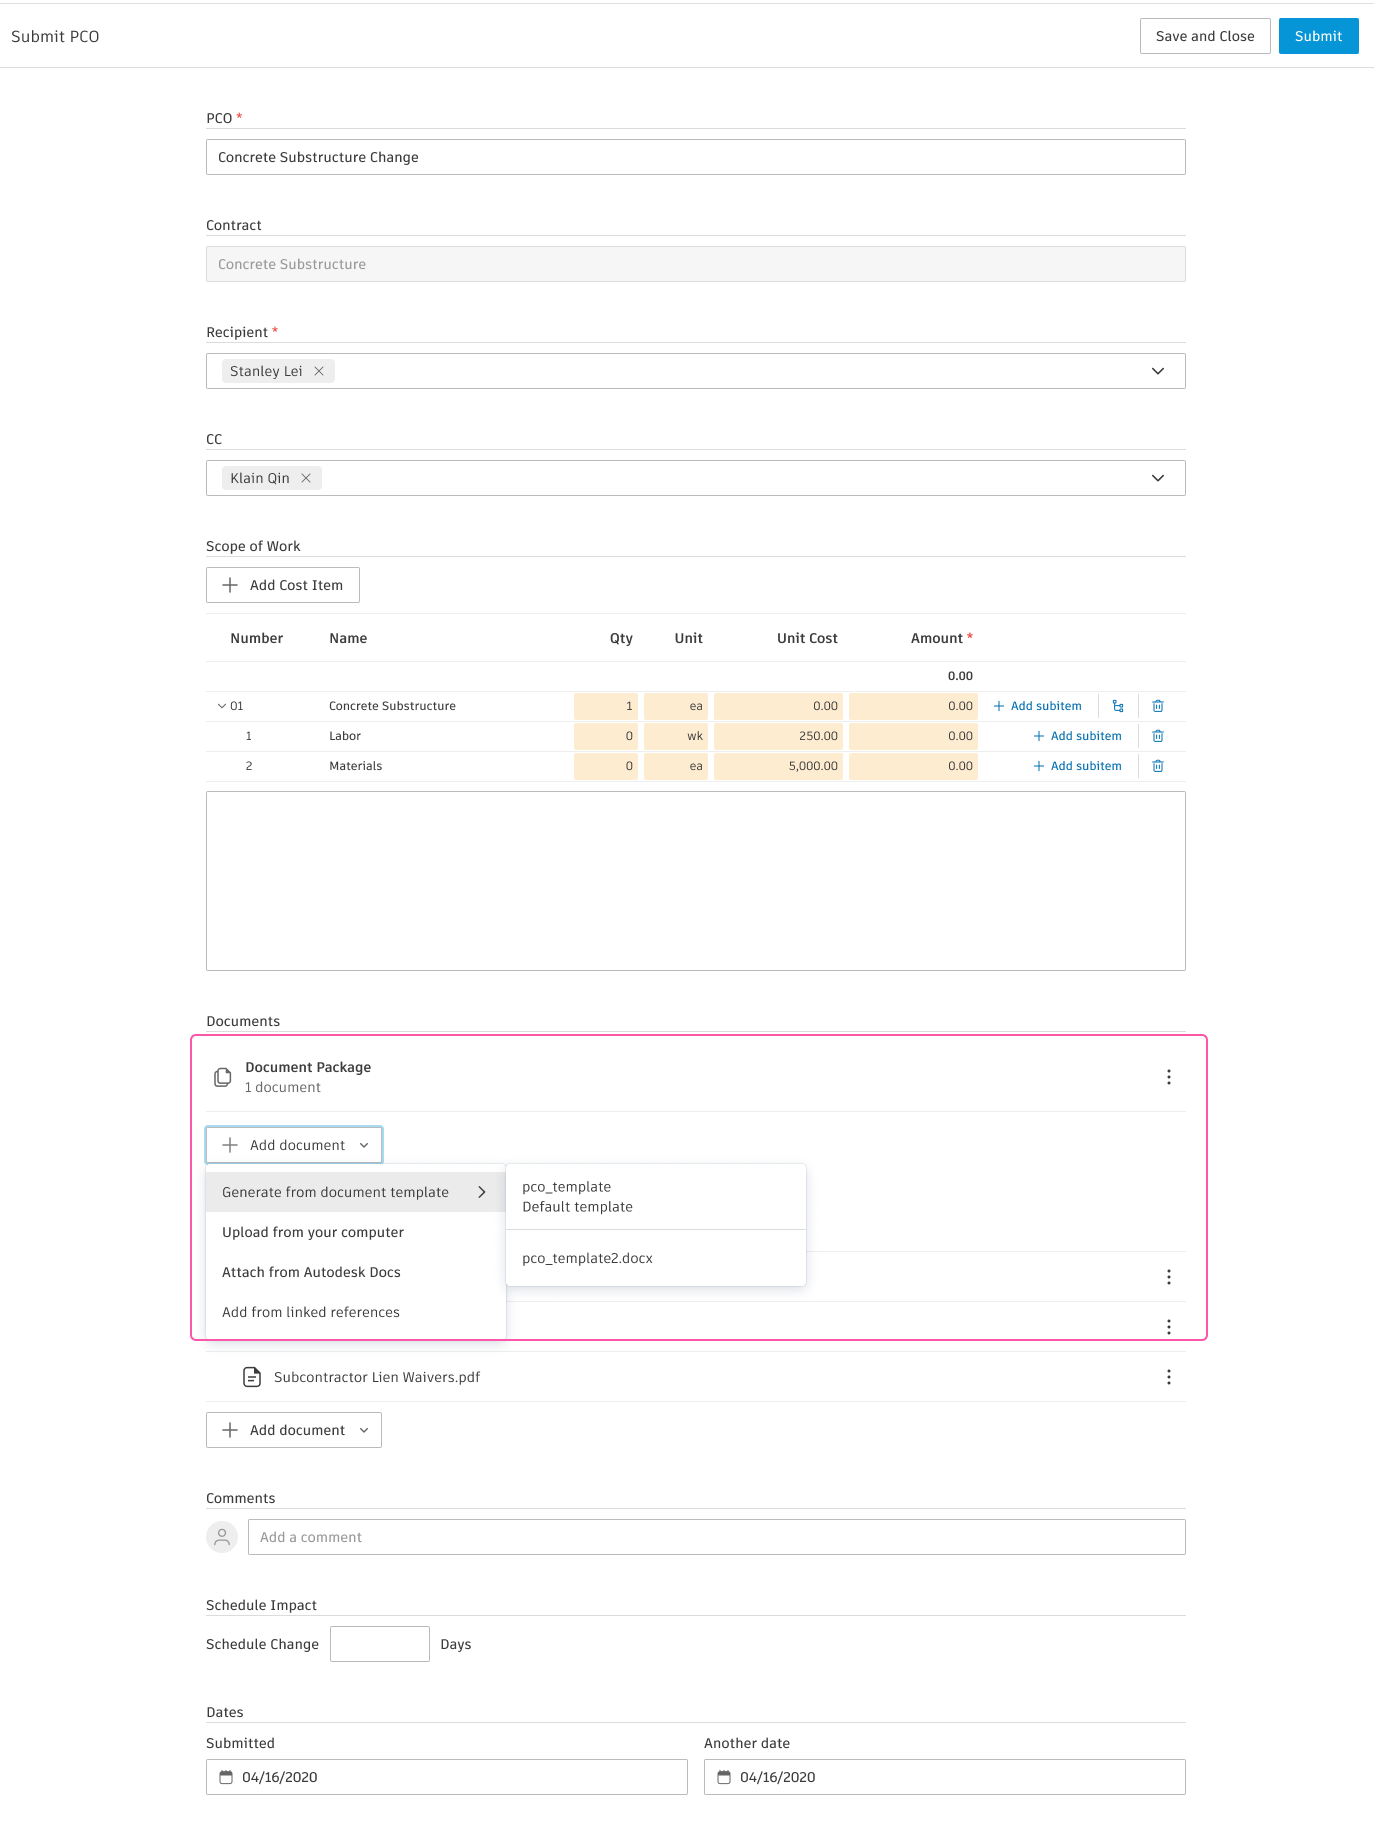
From the Submit PCO page
- On the Submit PCO page, expand the Documents section.
- Click Add document.
- Select Generate from document template, or use other options such as Upload from your computer or Attach from Forma Data Management.
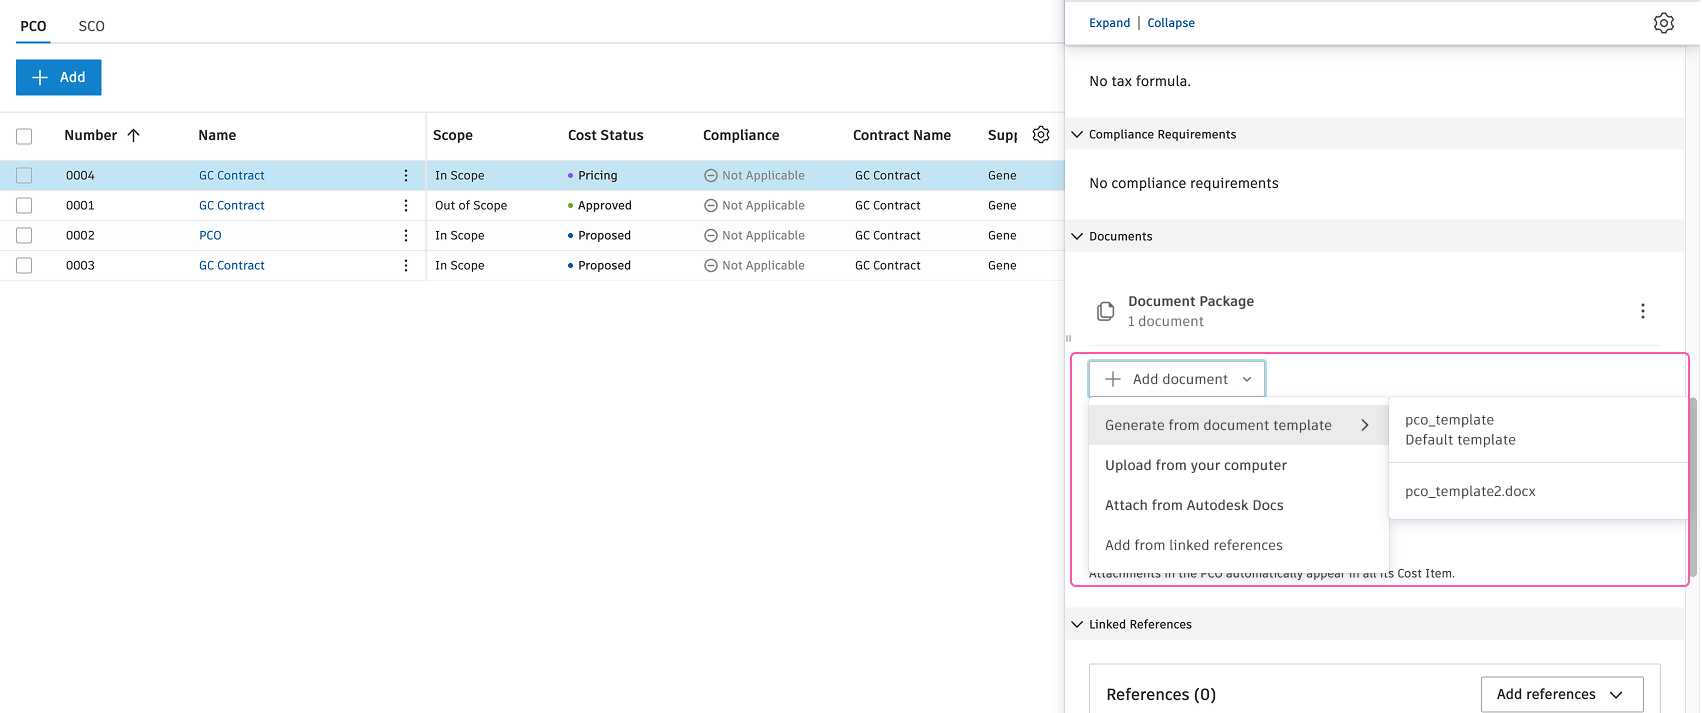
From the PCO flyout
- Open the PCO details panel.
- In the Documents section, open the document package.
- Click Add document and select Generate from document template.
- Choose a template. Cost Management generates the document and adds it to the document package.
Generated documents are saved using the same PCO document storage rules as other PCO documents.
Members with Full Control permission can view generated documents on the PCO and review document activity in the activity log. See Document Packages in Cost Management.
Submit the PCO
On the Submit PCO page, click Submit. The PCO receives the Proposed status.
General contractor review (Proposed status)
The general contractor receives an email notification and opens the change request in Cost Management.
While the PCO is in Proposed status, the general contractor can:
- Request a pricing revision.
- Add, assign, detach, or batch-create cost items.
- Edit the proposed value on cost items that are in Proposed status.
 , click View Cost Detail.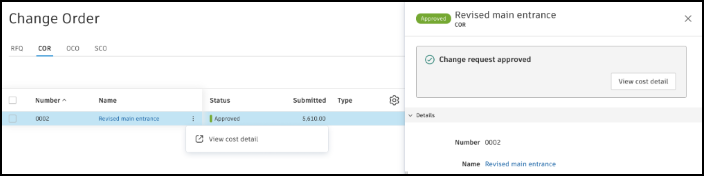
After acceptance
The supplier receives a confirmation message. The general contractor can generate a Subcontractor Change Order (SCO) to continue the change order workflow. See Change Order Requests.

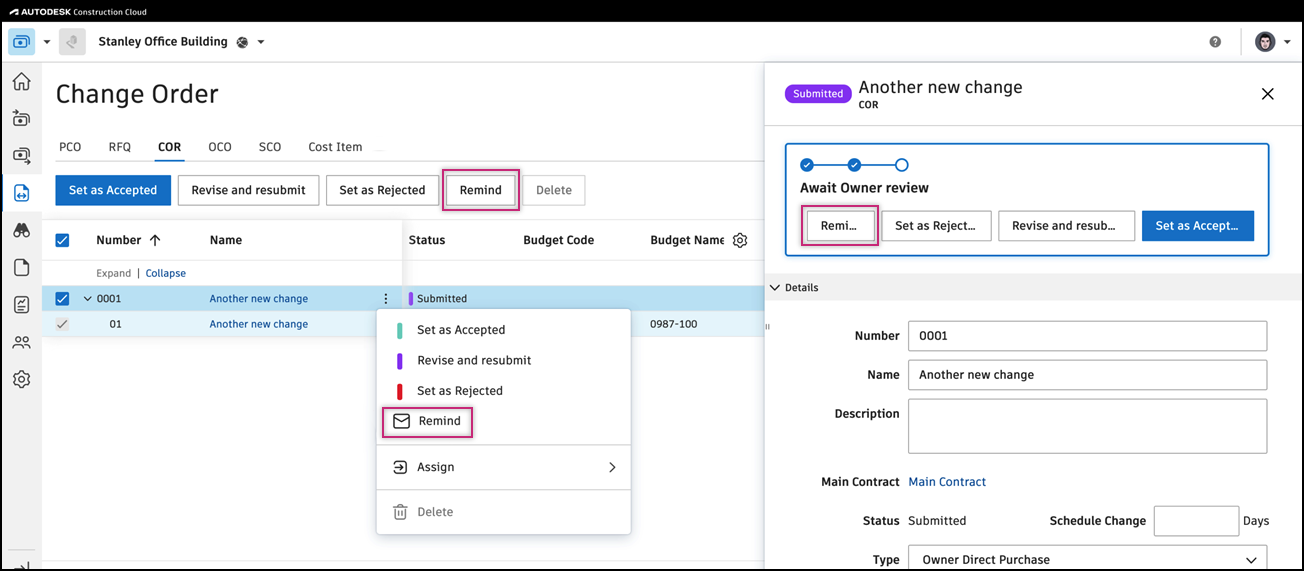
Send a reminder
Administrators can remind a supplier or owner that a response is awaited. Click Remind when:
PCO as COR or OCO status is Submitted.
PCO as RFQ status is Priced or Revised.
RFQ status is Pricing or Revising.
SCO status is Sent.
Collaboration on Upstream PCO Workflow
Setting Project Process for Upstream PCO Collaboration
To enable the upstream collaborative Potential Change Order workflow, make sure that your project process is set correctly. To do so:
Select the Settings tool from the left navigation.
Switch to the General tab.
Select the Project Process drop-down list.
Click Edit.
Go to the Upstream Change Order section by clicking Next.
Disable the Change Order Request option. Then enable the Use Potential Change Order for Change Order Request option.
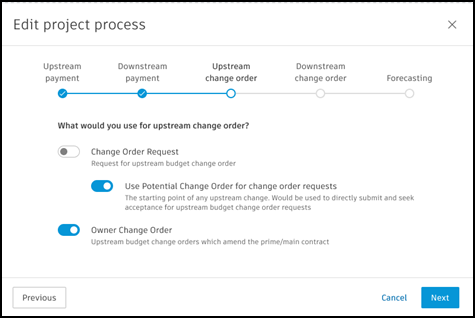
Click Next until you can click Save.
Setting Permissions for Upstream PCO Collaboration
The upstream collaborative PCO workflow requests certain permissions. To do so:
Select the Settings tool from the left navigation.
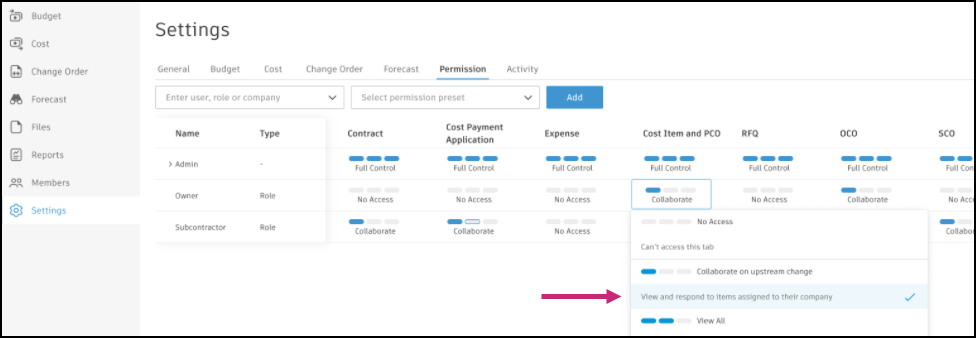
Switch to the Permission tab.
Choose the Collaborate on Upstream Change permission for the Owner role.
Working with Upstream Collaborative PCO Workflow
Once the project process and permissions are set, you can work with the upstream collaborative PCO workflow as a contractor (to work with main contractor) or a main contractor (to work with owner).
To send PCO as RFQ:
In the Change Order tool from the left navigation, select the PCO tab.
Create a PCO. See the Potential Change Orders article for more information.

Click Generate in the Cost Change window. Select RFQ.
Send an RFQ to a main contractor/owner and other recipients, if necessary. The main contractor/owner contact from PCO flyout is the default recipient of an email. You can change the company setup in the Settings tool. Once a main contractor/owner receives a proposed price, they can review it and accept. In the Cost Change window, an RFQ receives the Accepted status.

Click Submit in the Budget Change window. The pop-up window opens.

In the pop-up window, enter the submitted value and then click Submit.
Prepare an email to an owner and then click Send. In the Budget Change window, the status changes to Submitted.
In the next steps of the workflow, a main contractor/owner:
- Receives the email notification.
- Opens the PCO in Cost Management.
- Reviews the change request and decides to accept it or not.
Once accepted, a contractor receives a confirmation email and can generate an Owner Change Order (OCO). To learn more about creating change orders, see the CORs, OCOs, and SCOs article.
 When a change order is in the Approved or Executed status, an owner can read cost information or download documents in the view-only details panel. Click View Cost Detail in the More menu .