Create Custom Attributes
The details flyout panel allows members to quickly view detailed information behind any item in multiple components within Cost Management. With the Custom Attributes feature, teams can customize a portion of the details flyout panel to suit their needs and preferences. Create custom attributes to personalize the use of Cost Management.
In this article:
- Create a Custom Attribute
- Enter Data for a Custom Attribute
- Group by Custom Attributes
- Display Custom Attributes as Columns
- Custom Attributes and Contract Types
- Use Custom Attributes - an Example
Create a Custom Attribute
Project administrators are the only individuals who have permission to create and edit custom attributes. To do so, in Cost Management, select the Settings tool from the left navigation. You can now access the settings for the different components within Cost Management.
Custom attributes can be created in the following tabs for each component:
- Budget: budget, main contract, and budget payment application
- Cost: contract, contract schedule of values, cost payment application, expense (and its subitems)
- Change Order: cost item and all change orders
To add a custom attribute:
- Go to Settings choose one of the settings tabs.
- Select either the Budget, Cost, or Change Order tab.
Then:
Click Add in the Custom Attributes section.
Either click to add, or drag the attribute from the left sidebar into the center preview panel. Available attributes include:
- Text: Members can enter alphanumeric text.
- Number: Members can enter numerical values.
- Date: Members can select a date from a calendar.
- Dropdown menu: Members can select from the options designated in the settings.
- Checkbox: Members can enable or disable the checkbox.
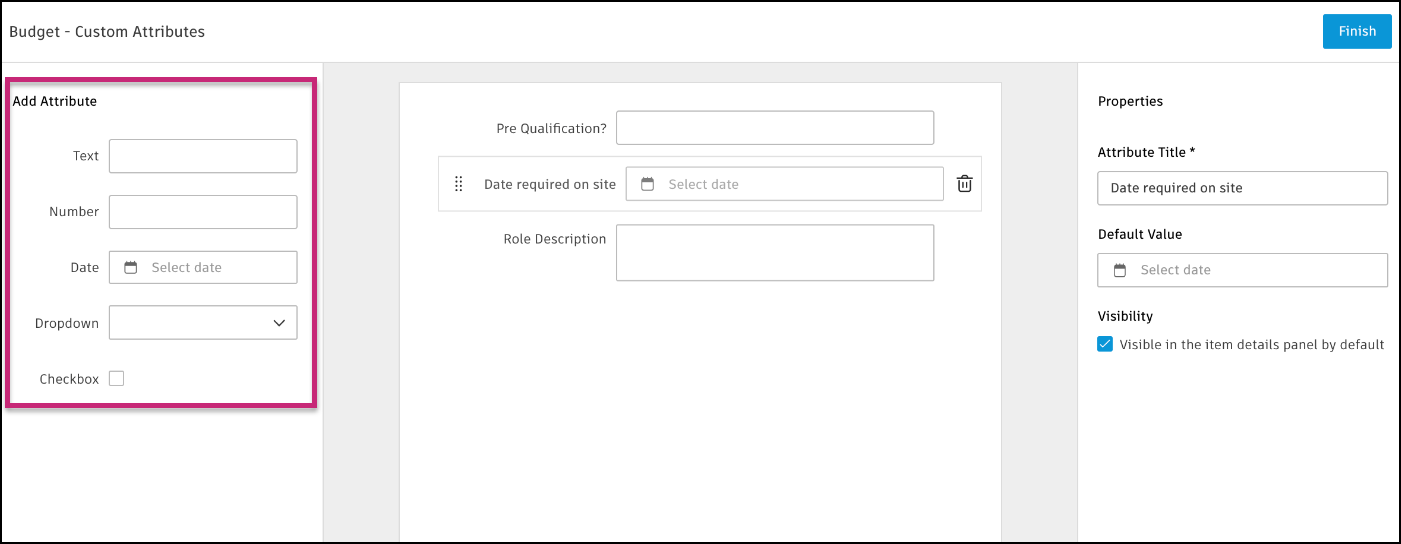
Select the attribute to define it in the properties panel on the right. Options depend on the attribute type. See Attribute properties by type for details.
If the attribute is used in a module that supports collaboration (such as Contract, Cost Payment Application, or change orders), set the Collaborator access level in the Permission section:
- No access (default): Collaborators cannot see the attribute.
- View only: Collaborators can see the attribute but cannot edit it.
- View + Edit: Collaborators can see and edit the attribute during the statuses where editing is allowed.
Note: Collaborator access is available for custom attributes in Main Contract, Budget Payment Application, Contract, Contract SOV, Cost Payment Application, RFQ, COR, OCO, and SCO. The setting is configured in the respective settings tab: Budget, Cost, or Change Order.Click the attribute handlebar
 to rearrange attributes' order.
To delete an attribute, click the trash can icon.
Click Finish to save.
After creating the custom attribute, it appears as an option in the details panel or table view.
Attribute properties by type
Configure the selected attribute in the properties panel. Some settings apply to every type; others are type-specific.
All attribute types
- Attribute title — Name shown in the details panel, filters, groups, and table columns.
- Visibility (show by default) — Clear this option to hide the attribute in the item's details panel until a member enables it.
Contract custom attributes only
- Apply to Contract Type — Choose which contract types the attribute applies to. New attributes apply to all contract types by default. See Custom Attributes and Contract Types.
| Setting | Text | Number | Date | Dropdown | Checkbox |
| Attribute title | Yes | Yes | Yes | Yes | Yes |
| Default value | See Text | See Number | See Date | See Dropdown | See Checkbox |
| Visibility (show by default) | Yes | Yes | Yes | Yes | Yes |
| Apply to Contract Type | Contract custom attributes only. See Custom Attributes and Contract Types. | ||||
| Display in the home page | — | — | Yes | — | — |
Text custom attributes
- Default value and format
- Multi Line — Enter a default value that spans multiple lines of text.
- Rich Text — Add formatting such as bold, italics, and bullet points to the default value. Use with Multi Line.
- Character limit — Set Minimum and Maximum to control how many characters members and collaborators can enter. Enter values from 1 through 255 (the maximum for text custom attribute values). Use this when an external system requires a specific length—for example, a payment application accounting reference that must fit an ERP field length. Cost Management blocks values below the minimum or above the maximum. If you lower the maximum on an attribute that already has data, edit or clear values that exceed the new limit. See Product and Tool Limitations for platform limits.
Number custom attributes
- Default value — Enter a whole number or a number with a decimal point. For example, 11,700.
Date custom attributes
- Default value
- None — No default value. Select Date appears and members choose a date from the calendar.
- Fixed Date — Choose the date that appears by default. Members can select a different date from the calendar.
- Relative date — Set an adaptive date. For example, show the date one week after creating the contract to mark a deadline.
- Display in the home page — Choose whether the custom attribute's date appears on the home page.
Dropdown menu custom attributes
- Options — Enter one option per line.
- Multiple selection — Enable to let members choose more than one option. See Multiple selection on dropdown attributes.
Checkbox custom attributes
- Default value — Show the checkbox as marked or cleared by default.
Multiple selection on dropdown attributes
For dropdown custom attributes, you can allow members to select more than one option.
- In the properties panel for a dropdown attribute, enable Multiple selection.
- Enter each option on its own line.
- Click Finish to save the attribute.
Members can select multiple values in the item details flyout. Multiple-selection attributes work in table columns, filters and groups, approval workflows, and markup formulas. When you copy project settings from an existing or template project, multiple-selection attributes are copied with the rest of the custom attribute configuration.
Custom Attributes as Variables in Documents
Some custom attributes can be used in generating documents, such as change orders. Create custom variables to include your custom attributes in document templates. Not all custom attributes create custom variable entries. The following support custom variables:
- Cost contract custom attributes
- Change order custom attributes
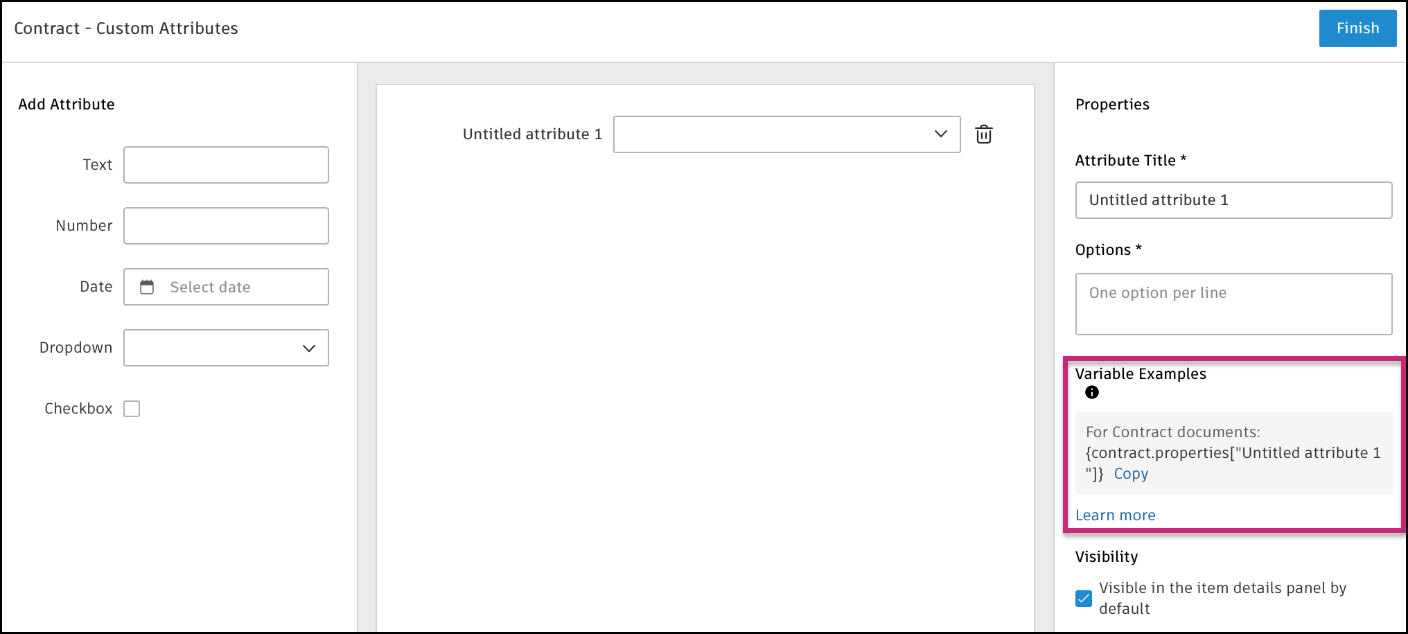
The format for these custom attributes is {xxx.properties["Attribute Title"]}. For example, a date custom attribute for an RFQ titled "Required on Site" would be {rfq.properties["Required on Site"]} would return the date specified.
Copy the variable from the custom attribute edit and paste it into the desired document template.
Enter Data for a Custom Attribute
When a custom attribute has been defined in the settings, it is available to use in the area it was created for.
- Select the tool that you created the attribute for (for example, Budget) and the tab (for example, Main Contract).
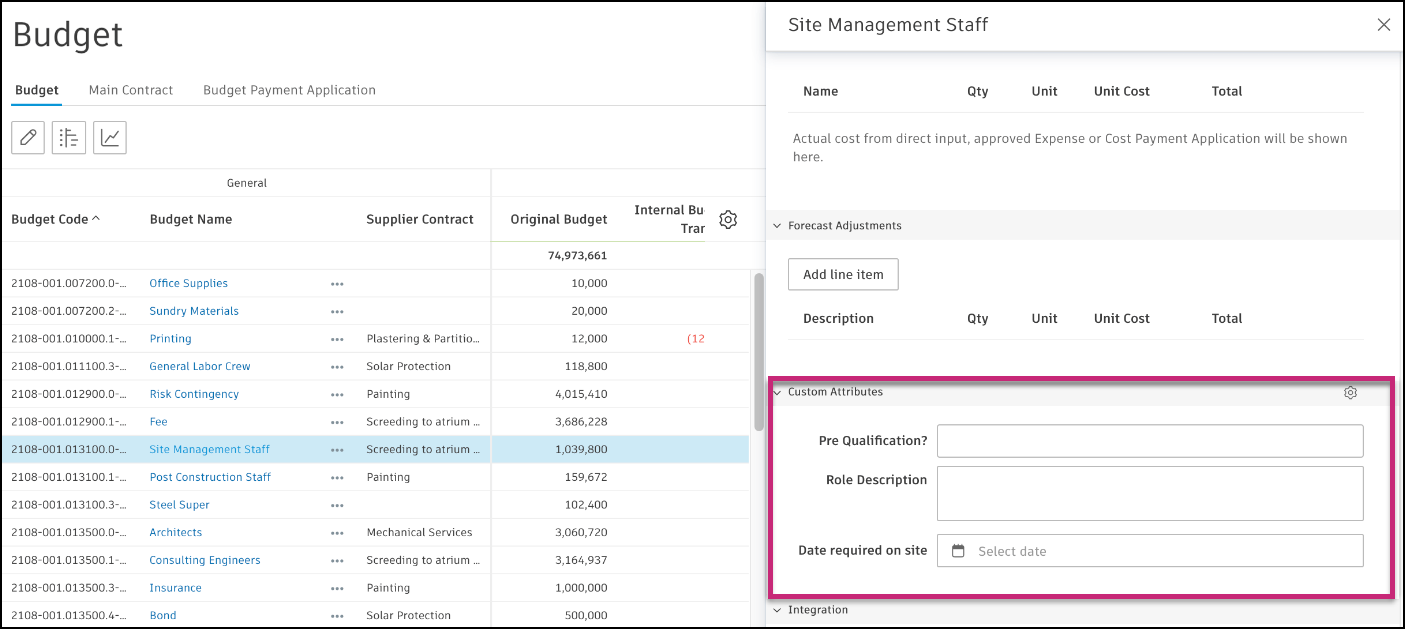
- Click a line item to open the details panel.
- At the top of the details panel, use the drop-down list to enable the checkbox for Custom Attributes.
- Scroll to the bottom of the details panel to locate the custom attributes.
- Enter the data for each attribute.
Group by Custom Attributes
You can group by custom attributes in the Budget, Contract, and Change Order views. This gives you customizable views that can be exported.
- Select the tool that you created the attribute for (for example, Cost) and the tab (for example, Contract).
- Select the filter icon
 .
. - Click the Group Items By drop-down list and the defined custom attribute appears in the list.
- Enter a preset name in the Save Preset section and select Save.
Display Custom Attributes as Columns
You can choose to display custom attributes as columns in the Budget, Cost, and Change Order table views.
- Select the tool that you created the attribute for (for example, Cost) and the tab (for example, Contract).
- Click the
 icon.
icon. - Select the checkboxes next to the custom attributes that you want to display as a column in the table view.
Custom Attributes and Contract Types
Contract custom attributes can be configured to apply to specific contract types. This allows you to tailor which custom attributes are relevant for different kinds of contracts in your project.
When you create or edit a contract custom attribute, you can select which contract types it applies to using the Apply to Contract Type drop-down list. By default, new custom attributes apply to all contract types.
To configure which custom attributes apply to contract types, see Contract Types in the Cost settings.
| Question | Answer |
| What happens if I clear a custom attribute for a contract type? | That contract type is automatically deselected in the custom attribute settings as well. |
| What happens if I deactivate a contract type? | The contract type is hidden from the custom attribute settings. |
| What happens if I delete a contract type? | The contract type is removed from all custom attribute settings. |
When you change which contract types a custom attribute applies to, existing data may become invalid if a contract's type no longer matches the custom attribute configuration.
Not Applicable and Invalid Custom Attributes
When working with contracts, you may encounter custom attributes in two states:
- Not Applicable (N/A): The custom attribute doesn't apply to the contract's current type. These appear dimmed in the table view.
- Invalid: A value exists in the custom attribute, but the attribute no longer applies to the contract's type (for example, if the contract type changed or the custom attribute configuration was modified). Invalid values appear dimmed and cannot be modified.
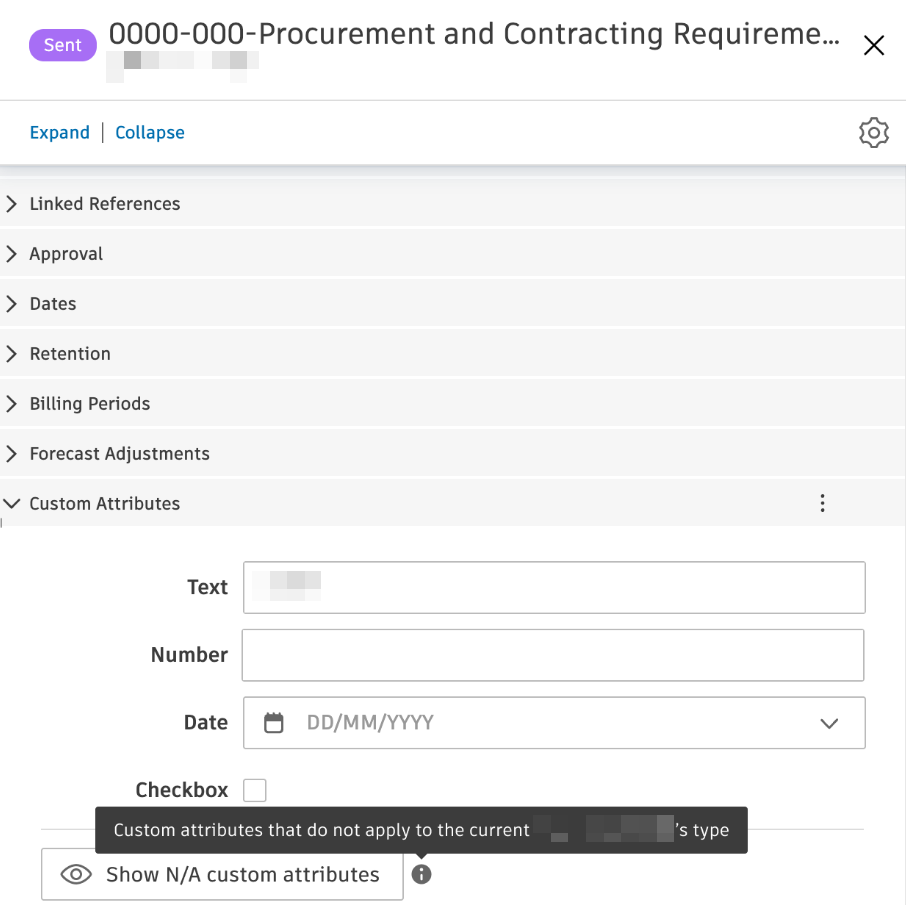
In the contract details flyout panel, the Custom Attributes section provides options to manage these attributes:
- Show N/A custom attributes: Click this button to display all custom attributes, including those that don't apply to the current contract type.
- Hide N/A custom attributes: Click this button to hide custom attributes that aren't applicable to the contract type.
- Clear invalid data: Click this link next to an invalid custom attribute to remove the value. A tooltip explains: "The custom attribute cannot be modified because it no longer applies to the current type."
- Clear all invalid data: Click this button to remove all invalid custom attribute values at once.
Use Custom Attributes - an Example
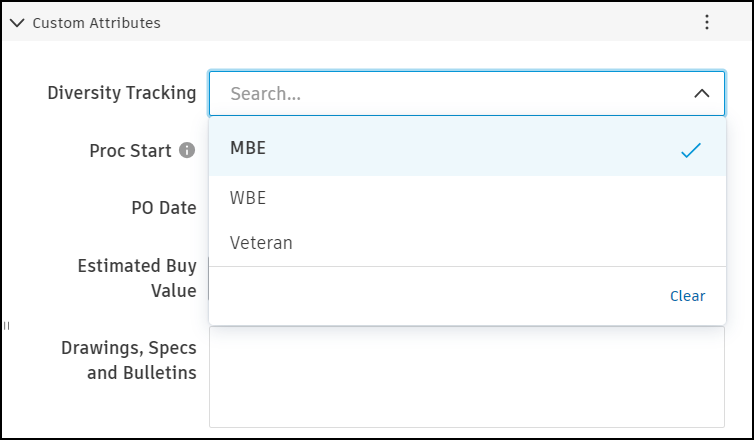
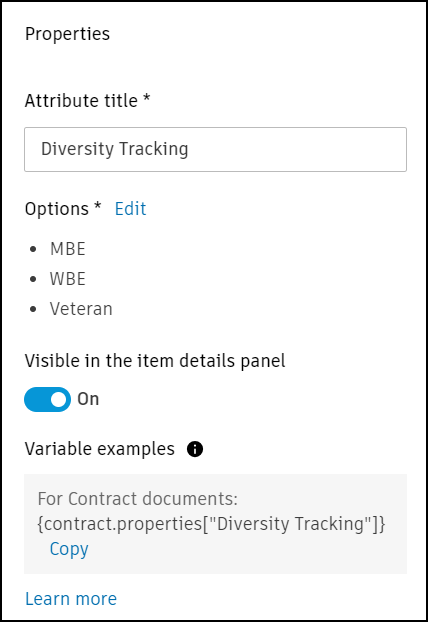
You can use a combination of custom attributes and filtering to access specific items in your budget, contracts, or change orders. Custom attributes can be created for the different areas of Cost Management. In this example, we create a custom attribute Diversity Tracking and assign values to contracts.
First, add a custom attribute:
Go to the Settings tool, switch to the Cost tab.
Scroll down to Custom Attributes.
Click Add.
Click Dropdown to add it to the custom attributes list.
Fill out properties. In our example, the properties will look like this:
Click Finish.
Then, to assign values to a contract:
Go to the Contract tab.
Click the contract name to open the flyout panel.
Scroll down to the Custom Attributes section.
See the Diversity Tracking attribute on the list of the available custom attributes. Choose the right option for this particular contract.