Create Custom Columns
In Cost Management, project administrators can customize budget and contract overview columns. You can change system column formulas in place, create custom project values with your own filters, and build custom calculated columns from project values or other columns. Change order and actual cost audit trails stay intact when you adjust how values roll up.
In this article:
- Open Manage columns in Settings
- Change column name, group, and position
- Use presets
- Edit conditional formulas
- Custom calculated column equations
- Create a custom project value
- Understand the default rollup
- Create an Accepted owner changes column
Check out the overview video:
Open Manage columns in Settings
Select the Settings tool from the left navigation.
Select the Budget tab for budget columns, or the Cost tab for contract columns.
Expand Budget Overview Columns or Contract Overview Columns, then click Manage.
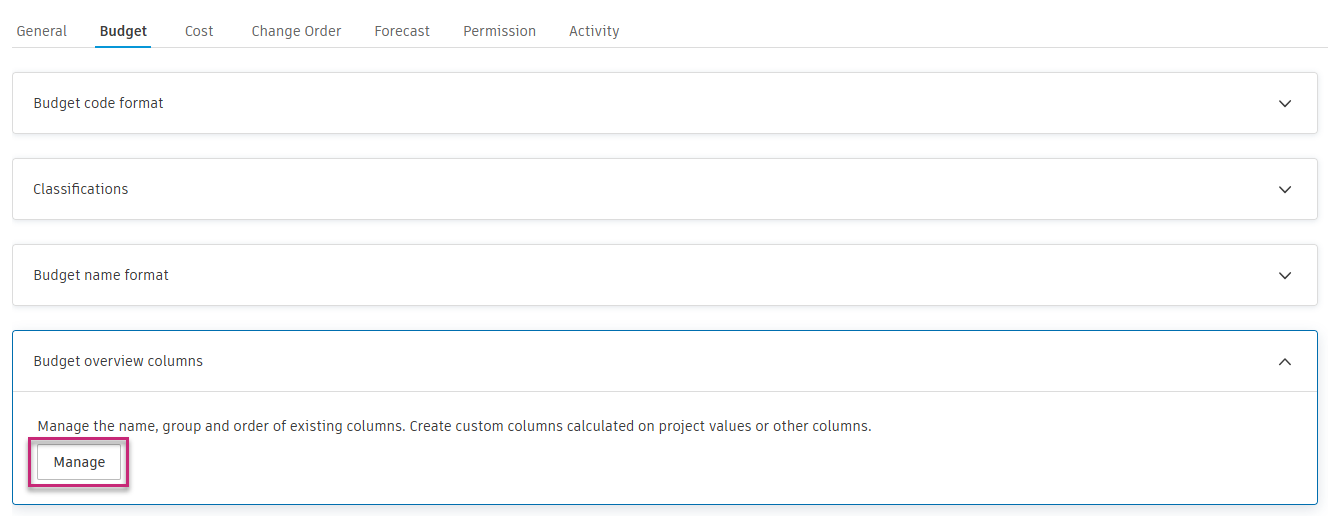
Select a column in the list (for example, Orig. Commitment, Projected Cost, or Actual Cost).
Customize System Budget Columns
In Manage columns, project administrators change how budget and contract overview columns appear and calculate. You can rename columns, change their group and position, duplicate or add columns, and—for system columns—review built-in if/else logic, apply presets, or edit conditions without duplicating the column.
To add a column with a new formula from scratch, see Create or Duplicate a Custom Column.
Change column name, group, and position
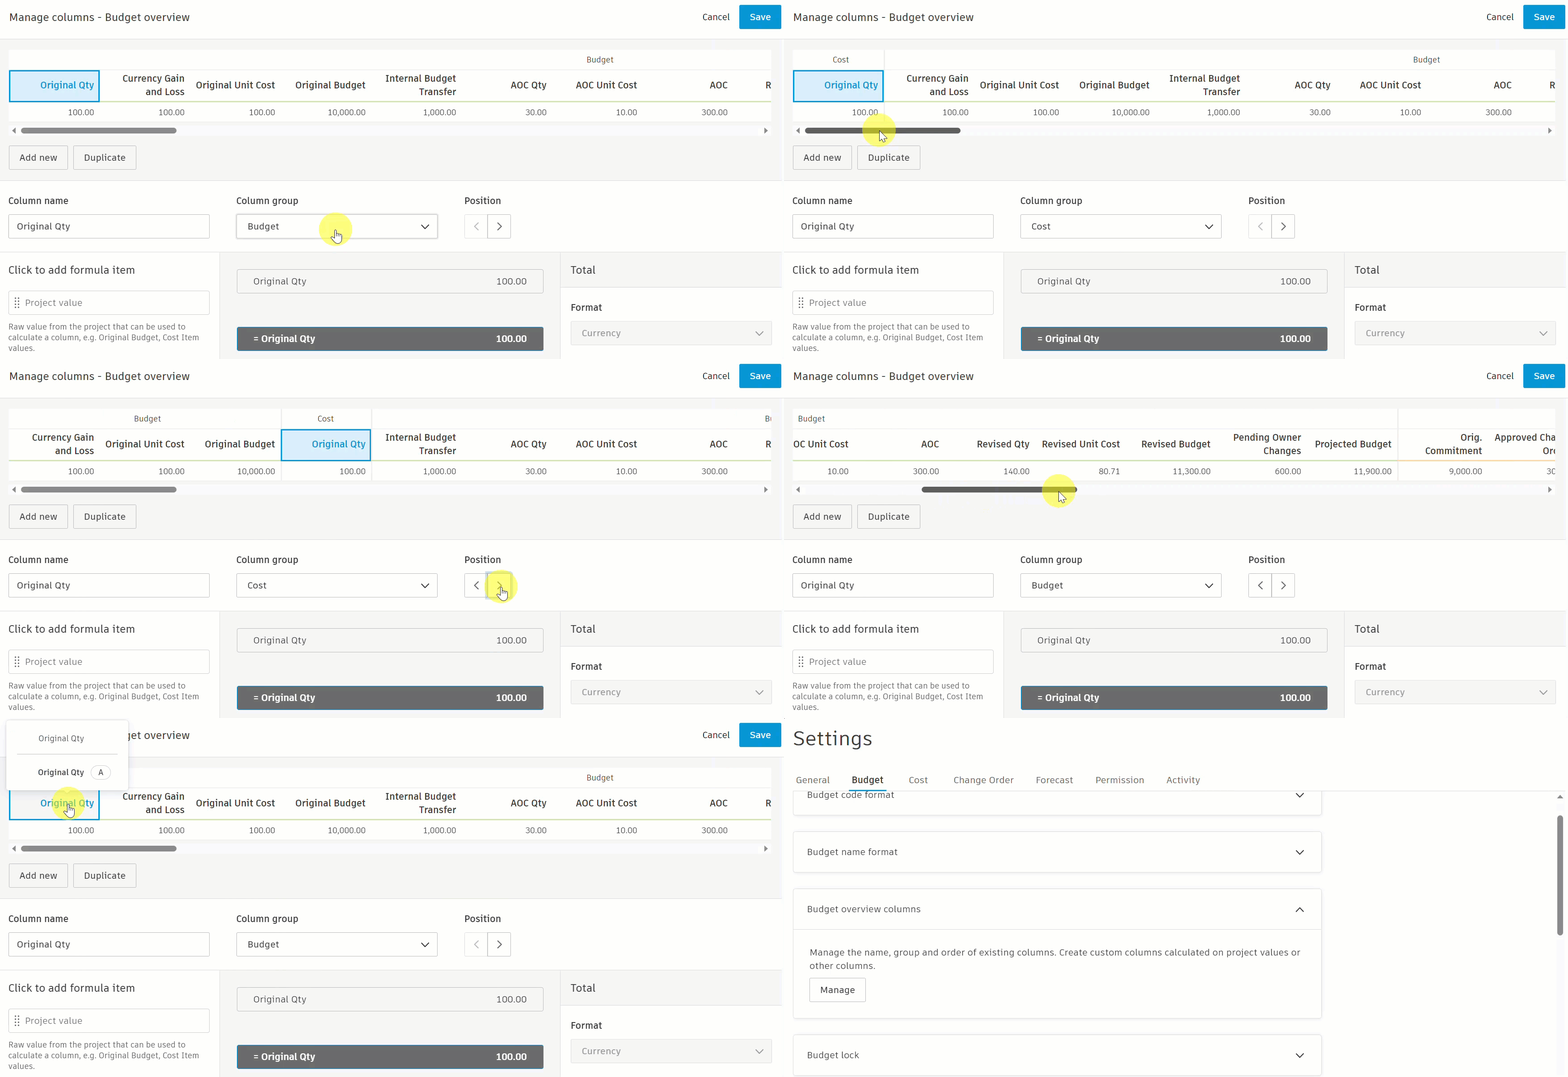
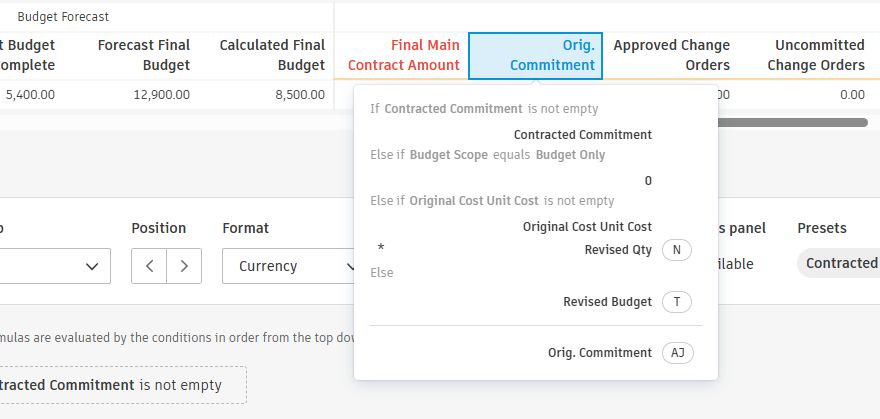
For the selected column, you can do any of the following:
- Click Add new to make a new column to the right of the selected column.
- Click Duplicate to make a copy of the selected column (including the math operations).
- Change the column name.
- Change the column group.
- Change the default position in the table.
Use presets
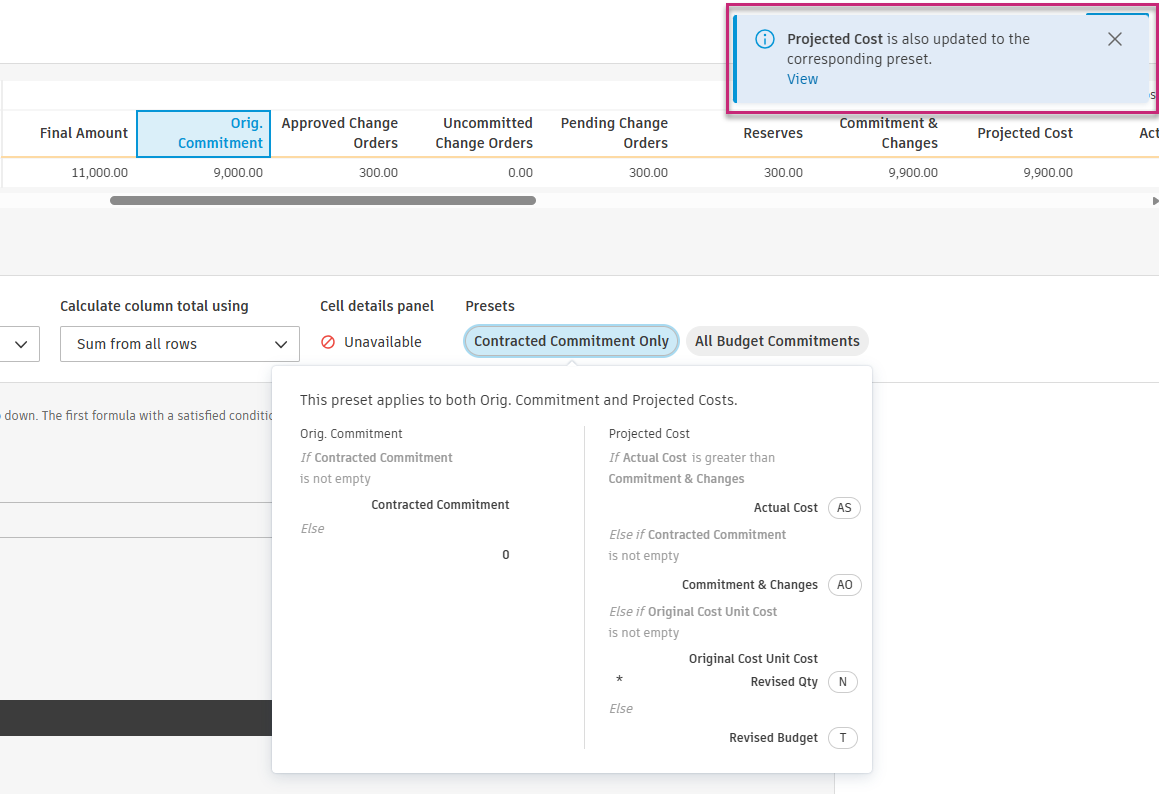
Some system columns offer Presets that reconfigure if/else logic in one click.
| Preset | Applies to | What it does |
|---|---|---|
| Contracted Commitment Only | Orig. Commitment, Projected Cost | Uses Contracted Commitment when present; otherwise Orig. Commitment is 0 and related logic moves to Projected Cost so day-one variance can stay at zero. |
| All Budget Commitments | Same columns | Uses the broader default commitment rollup. |
| Gross (includes retention) | Actual Cost | Includes retention in actual cost. |
| Net (excludes retention) | Actual Cost | Excludes retention from actual cost. |
Select a preset.
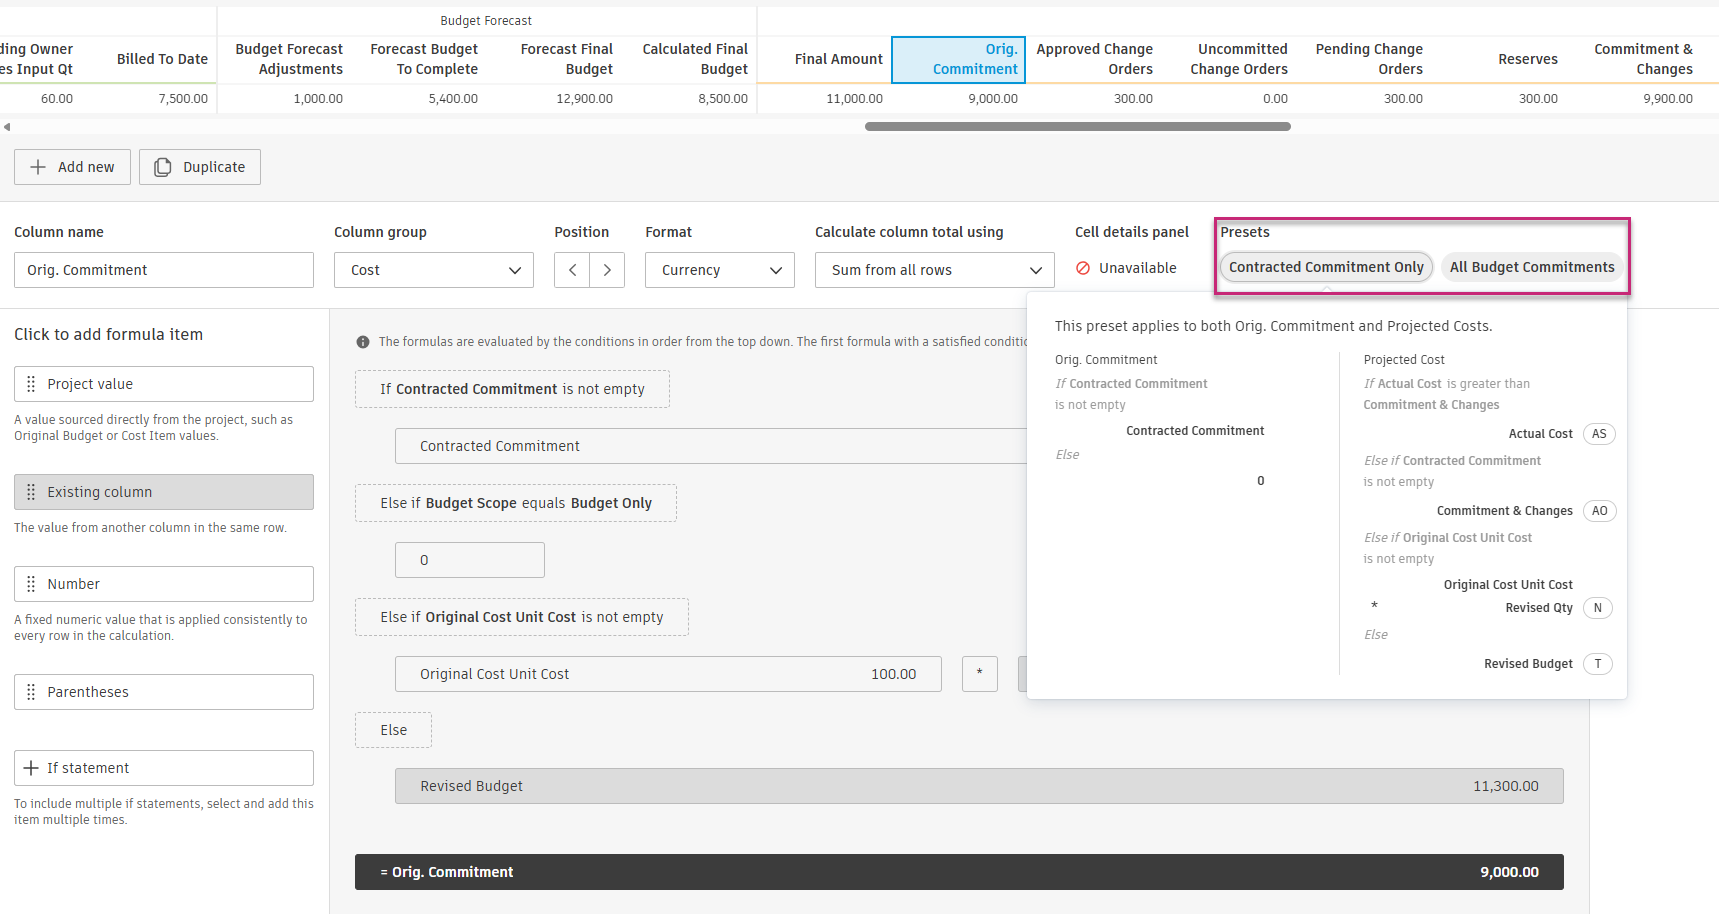
If Cost Management updates a linked column (for example, Projected Cost), review the notification and open the related column if needed.
Edit conditional formulas
System budget and contract columns use built-in If, Else if, and Else logic. You can change conditions in place without duplicating the column.
In the formula area, adjust If, Else if, and Else blocks.
Note: Formulas evaluate from top to bottom. The first satisfied condition applies.Drag items from the left panel to build or change a condition. See Custom calculated column equations for Project Value, Existing Column, Number, Parentheses, If Statement, operators, and column totals.
Click Reset to default to restore the original system formula.

Click Save.
Custom calculated column equations
Use these building blocks when you edit a system column formula or create a custom column. Drag items from the left panel into the formula area:
Project Value: The drop-down menu on the right allows for the selection of raw values from the project to be used. For example, the status and scope are included for budget items. Custom project values you create also appear here. Forecast-related base values are also available, including Calculated Final Budget, Calculated Final Cost, Calculated Budget to Complete, Calculated Cost to Complete, and Output Complete Qty. These values are derived from Date Range Based Resources and update based on the configured frequency schedule. Users with Full Control permission can also manually refresh these values using the Update button in the budget overview.
Existing Column: The drop-down menu on the right allows the column to have the exact value used.
Number: Allows you to enter a specific number in the area to the right.
Parentheses: Allow for any necessary order of operations that you can drag other values into the parentheses.
If Statement: Allows you to create conditions for information to populate the column. For example, calculating the variance by the larger value projected budget minus actual cost or projected budget minus projected cost.
Tip: You can add up to 20 If Statements by clicking the item multiple times. Each newly added If Statement will be placed above the Else Statement.
Addition is the default math operator when a value is dragged into the math area. Click the operator and use the drop-down menu on the right to change the operator. Supported operators:
- Addition
- Subtraction
- Multiplication
- Division
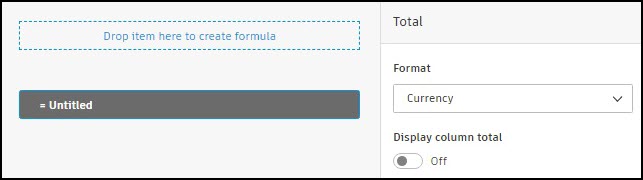
The following animation shows the creation of a custom column using If Statements:
Create Custom Project Values
A custom project value is a named filter on a system aggregation. You choose what it is Calculated on (for example, Submitted Owner Changes), then set Budget Status, Scope, and Change Order Type conditions. Use custom project values in system or custom column formulas.
Create a custom project value
Open Manage columns in Settings, select a column, and open its formula.
In the formula, select a system Project value.
In the details panel, click Customize from this project value.
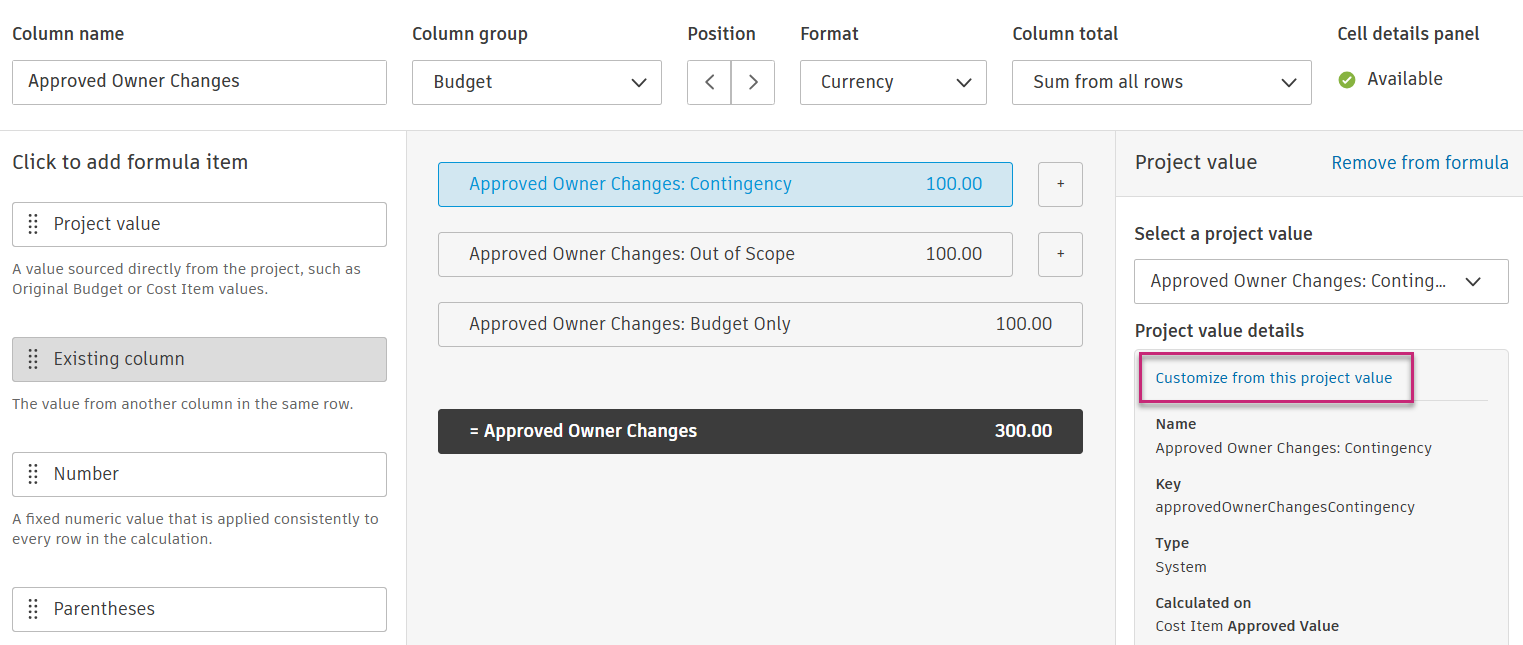
In Create custom project value, enter a Name. Cost Management generates a unique Key.
Confirm Calculated on (the system expression).
Set Condition filters:
- Budget Status
- Scope: Out of Scope, Contigency, or Budget Only
- Change Order Type (select All types or specific types)
Click Save.
Custom project values recalculate when underlying cost items change. On large projects, recalculation can take time after you create or edit a value.
Create or Duplicate a Custom Column
Duplicate an existing column or create one to make new or more individual calculations on your budget and contract tables.
For example, creating a column next to Approved Change Orders in the Cost group titled Recoverable Change Orders shows what will be paid for by the owner. To do so:
Open Manage columns in Settings and select the Budget tab.
Select Add new.
Update the column name.
Choose the column group.
From the left side panel, drag a formula item and drop it to create formula.
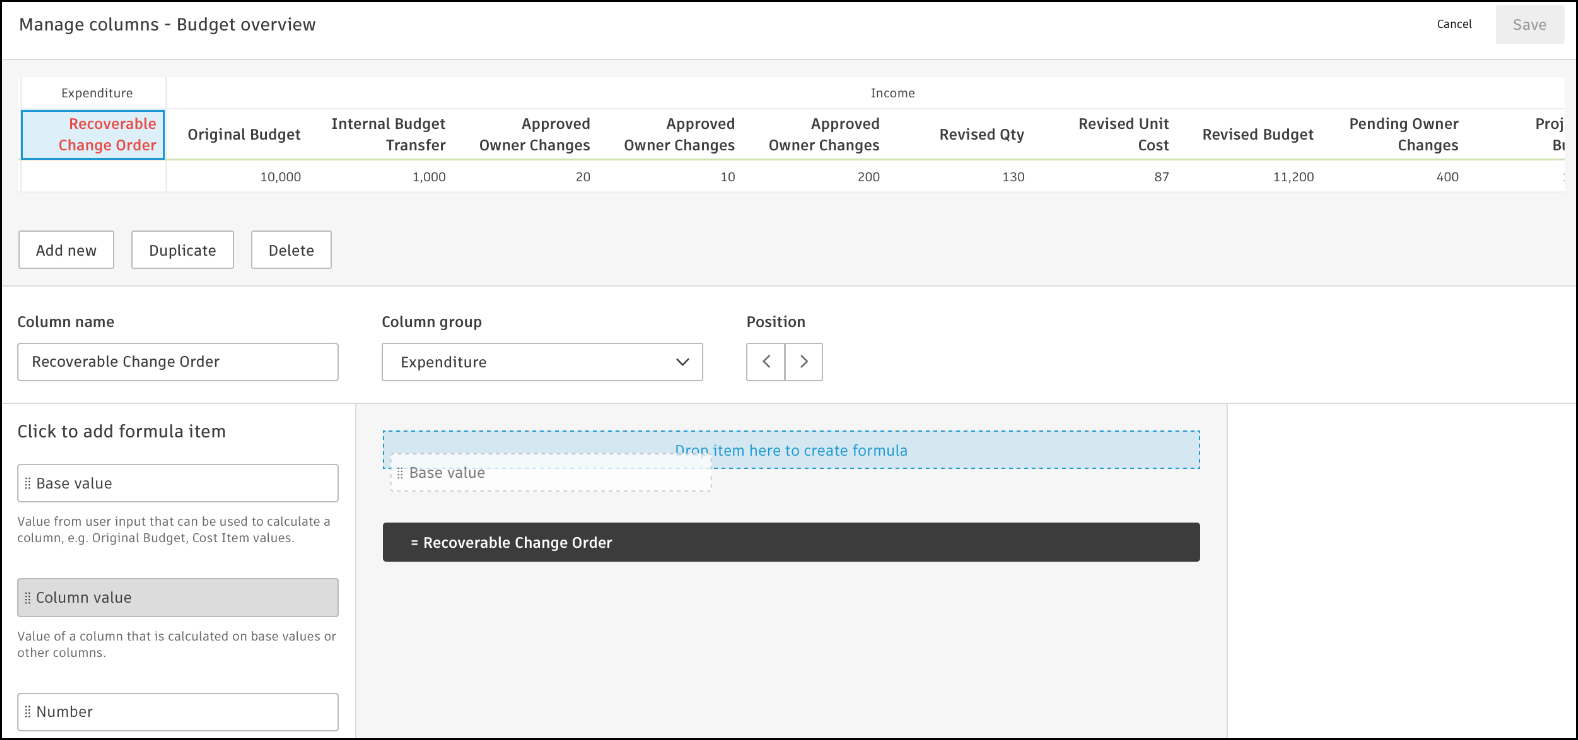
On the right side panel, select the value type and enter a value to preview.
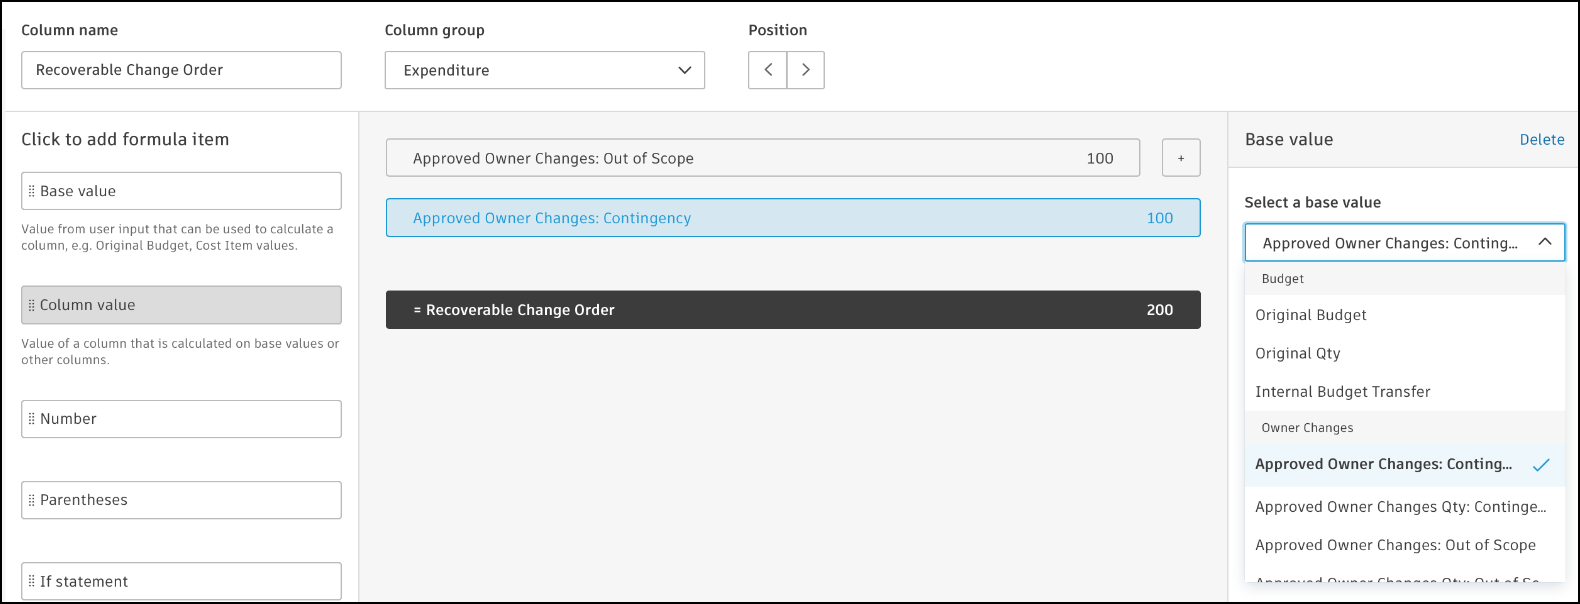
Update the column position and visibility option.
Select Save.
You have created the Recoverable Change Order column. There are many possibilities and combinations to create columns. See Custom calculated column equations for the formula building blocks, operators, and column total options.
Example: Reconcile Pending Owner Changes With a Custom Column
This example shows how administrators use Manage columns, custom project values, and a duplicated column to show which pending owner changes are Accepted compared with the full Pending Owner Changes total. Change order and budget audit trails stay intact.
For how default and custom columns appear in the Budget tool, see Reconcile Pending Owner Changes in the Budget Table. To set PCO budget statuses and compare totals after setup, see Submit and accept PCO budget statuses and Compare pending and accepted totals.
Understand the default rollup
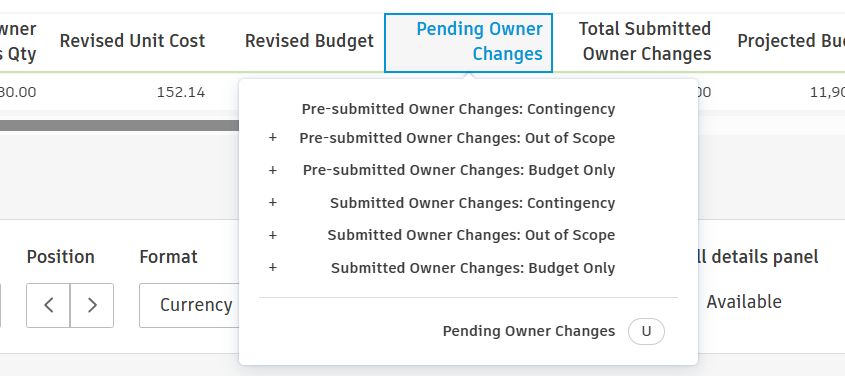
The system Pending Owner Changes column sums pre-submitted and submitted owner changes across Contingency, Out of Scope, and Budget Only scopes. See Budget and Contract Tables for default definitions.
Create an Accepted owner changes column
Open Manage columns in Settings, select Pending Owner Changes, and click Duplicate.
Rename the column (for example, Accepted Owner COR).
Remove all Pre-submitted Owner Changes items from the formula. Keep the Submitted Owner Changes items for each scope.
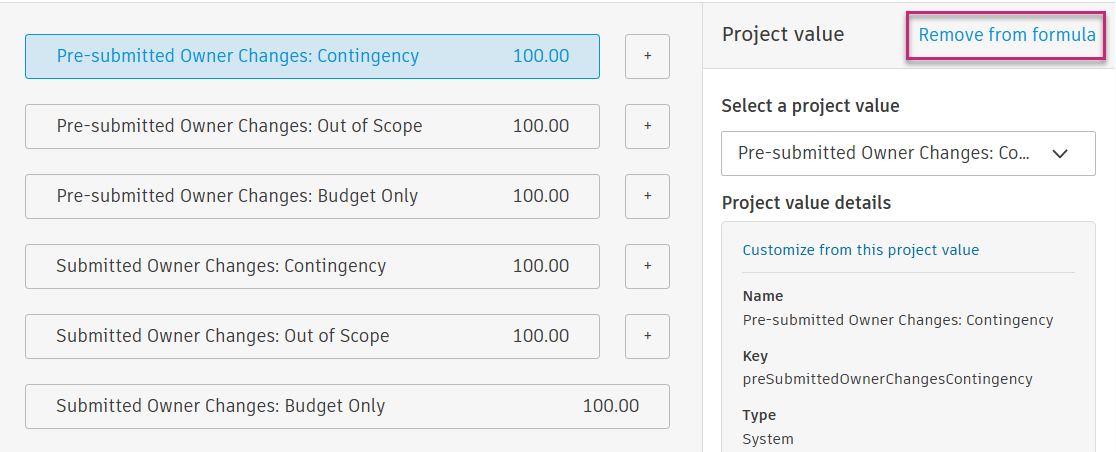
For each remaining Submitted Owner Changes item, click Customize from this project value.
In Create custom project value, set Budget Status to Accepted only. Adjust Scope and Change Order Type if needed, then click Save.
Repeat for each scope (for example, Contingency, Out of Scope, and Budget Only).
Confirm the formula sums the custom (copy) values.
Click Save.
After you save the column, submit and accept PCO budget statuses so values roll into the new column. Then compare pending and accepted totals in the budget table.