Admin Deployment Guide
- Best Practices for installing Desktop Connector
- Best Practices for Upgrading Desktop Connector
- Download Options for Deployment
- Preparing for an Installation or Upgrade
- Example Deployment Script
- Changelog Revision History for Deployment Script
- First Time Installation
- Uninstalling with Setup.exe (Option 1)
- Uninstalling with Standalone Uninstall (Option 2)
- Unusable "Ghost" Drive Left Behind after Administrative Uninstall
- Major release upgrades (e.g., 15.x or 16.x to 17.x)
- Minor release upgrades (e.g., 16.14 to 16.16 or 17.0 to 17.2)
- Display version vs. MSI ProductVersion
- Installing Desktop Connector using MSI vs. EXE
- Configuring Delete Notification Settings
- Preparing for a network domain change
Best Practices for installing Desktop Connector
These instructions are intended for IT specialists with an understanding of Configuration Manager (formerly called SCCM). For more information on deploying Autodesk software using Configuration Manager, refer to this Using Microsoft Configuration Manager to deploy and manage Autodesk products.
Always use the .EXE (ODIS installer) for installations and upgrades. This ensures that all necessary dependencies (like Identity Manager and ADSSO, .Net runtime, C++ runtimes, etc.) are installed along with the software.
If you choose to use the .MSI file for installation, be aware that it does not bundle any dependencies - you are responsible for installing these separately.
Avoid mixing the installation methods (MSI/EXE). Use the same method for both the initial installation and any subsequent upgrades. This can help prevent dual entries in the Programs list or other potential issues.
Refer to Installing Desktop Connector using MSI vs. EXE within this document for more detailed information.
Autodesk has changed the way the installers are extracted and files are downloaded prior to installation.
- Refer to the next section Preparing for an Installation or Upgrade for additional information.
Best Practices for Upgrading Desktop Connector
Major vs. minor release upgrades
The recommended upgrade method depends on whether users are upgrading to a minor release or a major release:
- Minor release (e.g., 16.14 → 16.16 or 17.0 → 17.2): Deploy the new version as an in-place upgrade. Do not uninstall first. User project selections and settings are preserved.
- Major release (e.g., 16.x → 17.x): We recommend running the reset utility, uninstalling, and then reinstalling. This ensures all components and configuration are properly cleared before installing the new release, providing the most predictable and stable outcome.
For detailed user-facing upgrade steps, see Update Desktop Connector.
Deployment planning guidance
When planning Desktop Connector upgrades across your organization, consider the following:
- Validate before broad rollout. Test the new version in a controlled environment or with a pilot group before deploying organization-wide.
- Upgrade when fixes or improvements are relevant. Review the Latest Release Notes to understand what each release includes. Consider upgrading when the release addresses reliability, performance, or workflow issues relevant to your environment.
- Align versions across teams. Maintaining a consistent Desktop Connector version across teams and offices is recommended to reduce complexity for both users and support.
- Plan for major release transitions. Upgrading to a new major release (e.g., 16.x to 17.x) involves a reset, uninstall, and reinstall cycle. Factor this into your change management and deployment schedules, including communication to end users.
- Coordinate with your internal deployment cycles. Schedule upgrades during planned maintenance windows when possible, and ensure your team has time to validate the upgrade before rolling it out broadly.
Download Options for Deployment
Standard Download
Download the latest version of Desktop Connector from the Latest Release Notes Page.
Custom Install Packages
For organizational deployments, you can create Custom Install packages through manage.autodesk.com:
- Go to manage.autodesk.com
- Navigate to Custom Install
- Create your custom deployment package for Desktop Connector
- Download the custom package for deployment across your organization
Custom Install packages are available starting with v17.0 and are supported for Global Launch and regular upgrades.
Preparing for an Installation or Upgrade
Download Desktop Connector using one of the methods described in the Download Options for Deployment section.
Open the downloaded package and allow it to extract.
The installer for version v16.8 and below will be downloaded to the default folder in Windows similar to the one shown.
C:\Autodesk\Autodesk_Desktop_Connector_16_8_0_2169_Win_64bitThe installer for version v16.9 and above will be downloaded to the default folder in Windows similar to the one shown.
C:\Autodesk\Desktop Connector 16.9 Install Files- Refer to Install Walk-Through for Version 16.9 and Above for specific installation instructions.
Example Deployment Script
- This PowerShell script demonstrates how Desktop Connector can be deployed as an IT administrator.
- It is intended as a reference for IT administrators using Configuration Manager (formerly SCCM) deployments.
- Do not run this script directly without first reading through the contents and making necessary changes.
- This script supports install, upgrade, and uninstall operations.
- For install workflows, this script should be run in the same directory as the Setup.exe executable.
Changelog Revision History for Deployment Script
| Version | Date | Changes |
|---|---|---|
| 4 | 5/11/2026 | Added support for local workspace cleanup and major release upgrades |
| 3 | 3/24/2023 | Improved documentation in the scripts comments and console outputs |
| 2 | 3/21/2023 | Correctly stop DC before attempting install operations |
| 1 | 3/07/2023 | Initial version of sample script |
First Time Installation
When installing for the first time, the installer prepared in the preceding section can be run directly.
When running the installer in a deployment, verify that you are providing the appropriate flags to run silently.
- Refer to Modify a deployment from Autodesk Account for additional information on executing a silent installation.
Uninstalling with Setup.exe (Option 1)
This is the first option for uninstalling Desktop Connector. This option requires the original Setup.exe to still be available
Shut down all running Desktop Connector processes.
Run the Reset Utility
Execute the original Setup.exe
- Example usage:
Setup.exe --silent -i uninstall
- Example usage:
For more information, refer to Modify a deployment from Autodesk Account for additional information.
Uninstalling with Standalone Uninstall (Option 2)
The second option for uninstalling the Desktop Connector does not require any of the original install files. This method, which is used in the example deployment script, is shown as follows:
Shut down all running Desktop Connector processes.
Run the Reset Utility
Obtain the uninstall string for the installed version of desktop connector.
This can be obtained from the registry under the following key:
HKLM:\Software\Microsoft\Windows\CurrentVersion\Uninstall\
Execute the uninstall string
- Include the silent flag, "silent", to verify that no GUI is shown.
Unusable "Ghost" Drive Left Behind after Administrative Uninstall
After uninstalling Desktop Connector with Configuration Manager or other administrative means, users may be left with an unusable "ghost" drive like in the following picture:
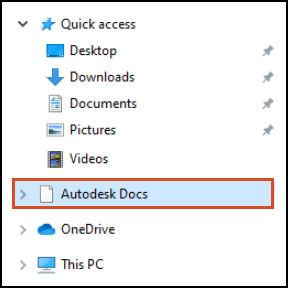
If you are planning on reinstalling Desktop Connector, no further action is required. Desktop Connector will automatically clean up any disconnected drives when it starts up.
If you need to remove this "ghost" drive, have the affected user:
Download the ZIP file from this link: DC Reset Utility.
- Extract the contents of the ZIP file to a local folder or your desktop.
- Run the
ResetDesktopConnector.exefile included. - Verify that the "ghost" drive is removed
For further information on the Reset Utility, refer to this video Reset Desktop Connector Automated Utility.
Major release upgrades (e.g., 15.x or 16.x to 17.x)
When upgrading to a new major release of Desktop Connector, we recommend running the reset utility, uninstalling, and then reinstalling. This ensures all components and configuration are properly cleared.
Shut down all running Desktop Connector processes.
- Exit Desktop Connector by right clicking the tray icon
 and selecting Exit.
- Exit Desktop Connector by right clicking the tray icon
Run the Reset Utility:
- See the Reset Utility page for detailed instructions.
Verify the Reset Utility deleted local workspaces for all users. The Reset Utility should have automatically deleted these folders. Confirm the following locations no longer exist (to quickly navigate to your user profile folder type
%userprofile%in File Explorer address bar):C:\Users\<username>\AppData\Local\Autodesk\Desktop ConnectorC:\Users\<username>\AppData\Local\Autodesk\Web Services\DesktopConnectorC:\Program Files\Autodesk\Desktop ConnectorC:\ProgramData\Autodesk\Desktop Connector
Uninstall Desktop Connector.
- Refer the Uninstalling Desktop Connector page for additional information and steps to perform a clean uninstall.
Install the latest version using the same steps described in the First-Time Installation section.
You may have to perform a reboot for Desktop Connector to become available in your system tray. Upon installation you can select your projects to be added to your local drive.
Minor release upgrades (e.g., 16.14 to 16.16 or 17.0 to 17.2)
For minor release upgrades, use an in-place upgrade:
Deploy the newer installer using the same steps described in the First-Time Installation section.
The older version will be automatically removed during the upgrade. User project selections are preserved.
Do not uninstall first. An in-place upgrade preserves user settings and project selections.
Display version vs. MSI ProductVersion
Starting with v2027.0, Desktop Connector uses a year-based version format (for example, 2027.0.0.XXXX). Because Windows Installer requires the first field of the MSI ProductVersion to be 255 or less, the year is shortened in the MSI ProductVersion: 2027 becomes 27, 2028 becomes 28, and so on.
The display version (the full year format) is what users see in the Desktop Connector tray, Programs and Features, and Add or Remove Programs. The MSI ProductVersion (the shortened year format) is the version recorded in the Windows Installer registry and returned by MSI queries.
| Version type | Format | Example | Where it appears |
|---|---|---|---|
| Display version | YYYY.Major.Minor.Build | 2027.0.0.XXXX | Desktop Connector tray, Programs and Features, Add or Remove Programs |
| MSI ProductVersion | YY.Major.Minor.Build | 27.0.0.XXXX | Windows Installer registry (HKLM:\Software\Microsoft\Windows\CurrentVersion\Uninstall\), deployment scripts, MSI property queries |
If your deployment scripts or Configuration Manager detection rules query the MSI ProductVersion, use the shortened year format (for example, 27.0.0.XXXX). For user-facing communication and documentation, use the display version (for example, 2027.0.0.XXXX).
Installing Desktop Connector using MSI vs. EXE
What are MSI and EXE files?
A MSI (Microsoft Installer) file and an EXE (executable) file are both types of installation files.
- The main difference between them lies in their customization and deployment capabilities.
MSIfiles are database files, used by Windows Installer, that store installation settings for software applications. They allow for more customization and are used for network-wide software deployment. - On the other hand,
EXEfiles are standalone executable files that initiate an installer for a software program. They are simpler and less customizable.
Desktop Connector Installation Files
The recommended method for installing the Desktop Connector is by running the downloaded .exe file located in the Downloads folder for the current user. When you download the desktop connector .exe it will be found at the following location:
C:\Users\<username>\Downloads
You will have to run the
DesktopConnector-x64.exeand allow it to self-extract to the default location:C:\Autodesk. By allowing it to self-extract you may find the CDX.msi at the following location on your hard drive: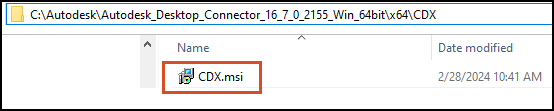
FAQs for using MSI vs. EXE installs
Can I use the .msi file for installation?
Yes, you can use the .msi file for installation, but it does not bundle any dependencies. You will need to install these separately.
What happens if I use the .exe for installation and the .msi for upgrade (or vice versa)?
Using different methods for installation and upgrade might result in dual entries in the Programs list. It's best to use the same method for both.
What are the dependencies that I need to install if I choose the .msi file?
The dependencies include but are not limited to Identity Manager/ADSSO, .Net runtime, and C++ runtimes.
Where can I find information about changes in dependencies if I decide to handle them myself?
Remember, these practices and FAQs are based on feedback and customer testing and might not cover all possible scenarios or questions. For the most accurate and comprehensive information, always refer to the official Autodesk support and documentation.
Configuring Delete Notification Settings
Starting with Desktop Connector v17.1, administrators can configure delete notification behavior through the Windows Registry. This allows you to:
- Disable delete notifications entirely for specific machines or users
- Adjust the file threshold that triggers a delete notification
Disabling delete notifications is not recommended. Delete notifications serve as a critical safeguard to prevent accidental data loss. If you choose to disable this feature, you do so at your own risk. Consider adjusting the file threshold instead of disabling notifications entirely.
These settings are useful for organizations that run automations where delete confirmations can interfere with workflows, or for users who find the default threshold of 1 file too low.
Registry Location
The settings are stored in the Desktop Connector Advanced Settings registry key, the same location used for workspace configuration.
To apply to all users on the machine (HKLM):
Computer\HKEY_LOCAL_MACHINE\SOFTWARE\Autodesk\Desktop Connector Advanced Settings
To apply only to the current user (HKCU):
Computer\HKEY_CURRENT_USER\SOFTWARE\Autodesk\Desktop Connector Advanced Settings
Available Settings
| Value Name | Type | Description | Default |
|---|---|---|---|
FeatureFlag.DeleteConfirmation |
String | Enable or disable delete notifications. Set to true to enable or false to disable. |
true |
FeatureFlag.DeleteConfirmationFileThreshold |
String | The minimum number of files that must be deleted to trigger a notification. Set to any number (e.g., 5, 10, 100). |
1 |
If the registry values are not properly configured (e.g., typos or incorrect value types), Desktop Connector may not launch successfully.
How to Configure Delete Notification Settings
Open the Registry Editor (search for regedit in the Windows taskbar).
Navigate to:
Computer\HKEY_LOCAL_MACHINE\SOFTWARE\Autodesk\Desktop Connector Advanced SettingsIf the key doesn't exist, create it by right-clicking Autodesk and selecting New > Key, then name it
Desktop Connector Advanced Settings.Create the string values:
- Right-click in the right pane and select New > String Value
- Name it
FeatureFlag.DeleteConfirmationorFeatureFlag.DeleteConfirmationFileThreshold - Double-click the value to set it
Restart Desktop Connector for the changes to take effect.
Example Configurations
Disable delete notifications entirely:
FeatureFlag.DeleteConfirmation=false
Only show notifications when 10 or more files are deleted:
FeatureFlag.DeleteConfirmationFileThreshold=10
Combine both settings (show notifications only for large deletions):
FeatureFlag.DeleteConfirmation=trueFeatureFlag.DeleteConfirmationFileThreshold=25
Modifying the Windows Registry can have serious effects on a system. Always back up the registry before making changes.
These registry settings are logged in diagnostic logs, which can help support teams troubleshoot issues related to delete notification behavior.
Preparing for a network domain change
Certain network changes can impact the stability of Desktop Connector and should be approached with caution and planning. Events like changing the network domain name will impact Desktop Connector and will require steps to restore normal Desktop Connector behavior. Properly planning the activities following a domain name change will ensure Desktop Connector continues to function as expected.
- Refer the Planning a network domain change page for additional information and steps for a network domain name change.
Related Concepts:
- Desktop Connector Folder needs to be cleared displays after installing or upgrading Desktop Connector
- You must be an administrator on this computer to start services when Autodesk Desktop Connector starts
- Desktop Connector System Requirements
- Reset Desktop Connector Automated Utility