Open, Update, and Delete Views
Open views
Open a view to review the group of models and 3D views that represent a specific part of your project. Use public views to enable your project members to work from the same subset of data.
Open from the Views tool
Open the Views tool to see a list of the existing views that you have access to.
Tip: You can update the privacy settings of views to make them available to other project members, or keep them private.In the view list, click in the Title column of a view to open it in the viewer.
Open in the viewer
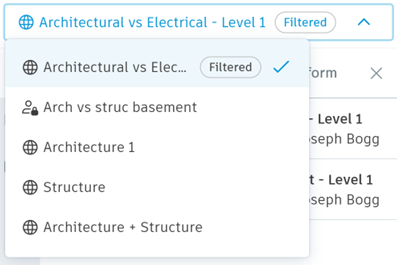
Use the Views drop-down list to switch between views while in the viewer:
Click the X icon at the top-right of the viewer to return to the Views tool.
See About the Views Tool for more information.
Update Views
When a view is open in the viewer, you can add or remove models from the view, and customize the displayed models.
Open the Views tool, and click in the Title column of a view to open it in the viewer.
On the Models
 panel in the viewer, click Select models to change the models included in the view.
Customize the displayed models as required. See Create and Use Views to see a table of which customizations will save to a view.
Click Update view to open the dialog box where you can edit the view title, description, or change the privacy status.

Click Update view to save any changes to the existing view, or click Save as new to make a new view.
Delete views
Open the Views tool, and click in the Details column to open the Details panel.
Click Delete.