Add and Remove Form Templates from Projects in Library
You can add form templates to projects and project templates after you create or import them in Library.
- Add Form Templates to Projects and Project Templates in Library
- Remove Form Templates from Projects and Project Templates in Library
Add Form Templates to Projects and Project Templates in Library
You can add form templates from Library to one or more projects and project templates in your account. If you add a form template to a project template, it appears in all projects created from that project template.
In Account Admin, click Library in the left navigation.
Select the Forms card.
In the Forms tab, click the form template you want to add to projects or templates.
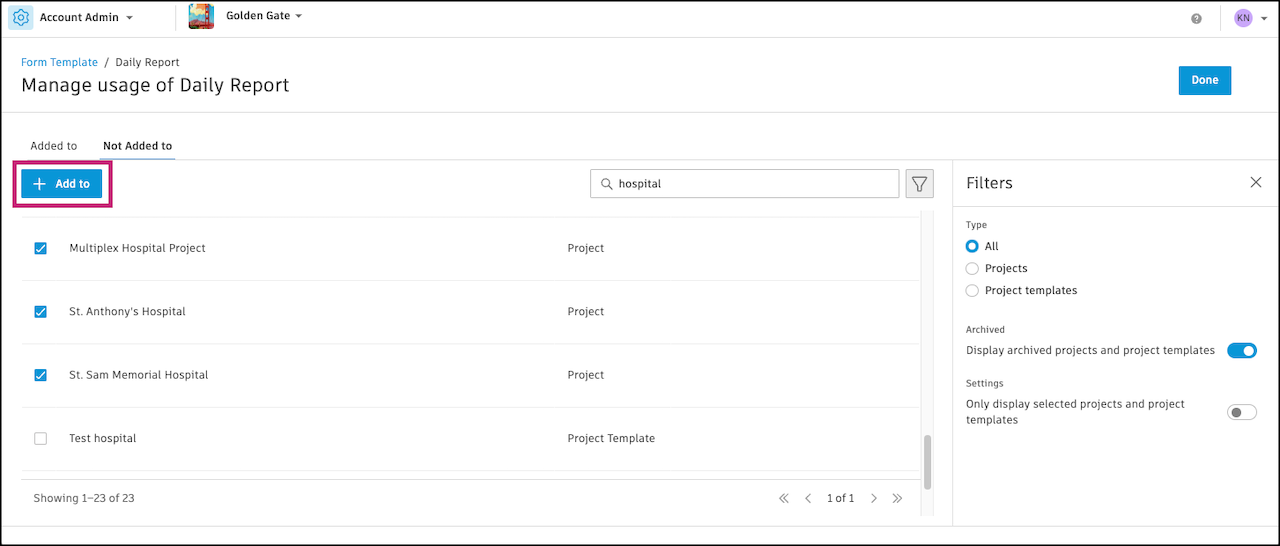
In the panel that appears, click Add to.
The Manage usage page lands on the Not Added to tab by default. There is a list of projects and project templates that don’t have the form template. You can:
- Search for projects and templates by name or browse the list.
- Use Filters to show only projects or project templates. You can also click the toggle in Settings to show only the projects and project templates you select.
Select projects and templates to add the form template to.
Click Add to.
You see a confirmation dialog. The dialog lists the projects or project templates that you select. To confirm, click Add.
You return to the Manage usage page. The projects and project templates you select show a processing message in the Status column.
If you don’t leave the page, you see a success banner when the process finishes. Click Done.
If you leave the Manage usage page, you still get a notification when the process finishes. You also see a progress indicator on the Forms page, in the row of your form template, under the Added to column.
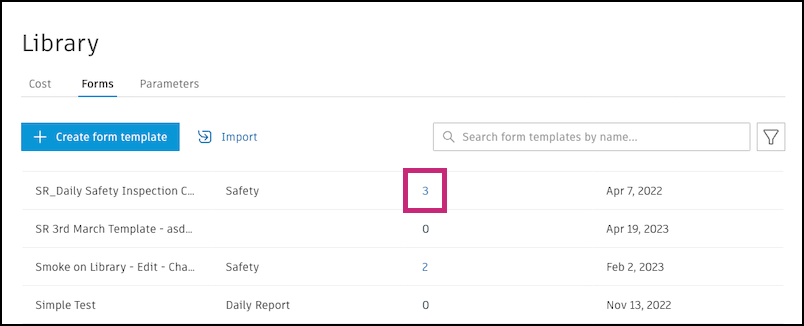
The Added to column in the Forms tab now shows the number of projects or project templates that have the form template.
Remove Form Templates from Projects and Project Templates in Library
In Account Admin, go to the Forms tab in the Library tool.
Click the number in the Added to column.
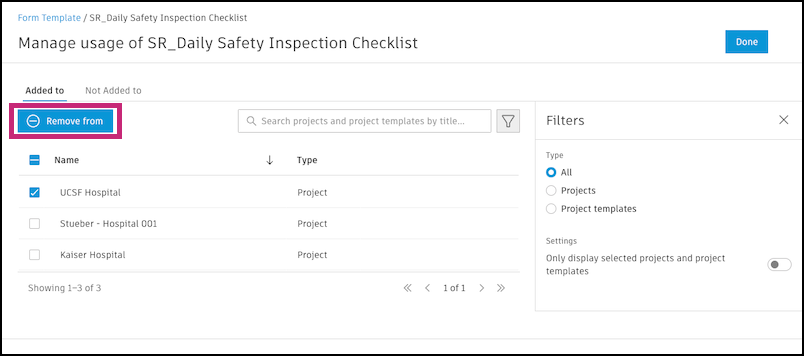
Select projects or templates and click Remove from.
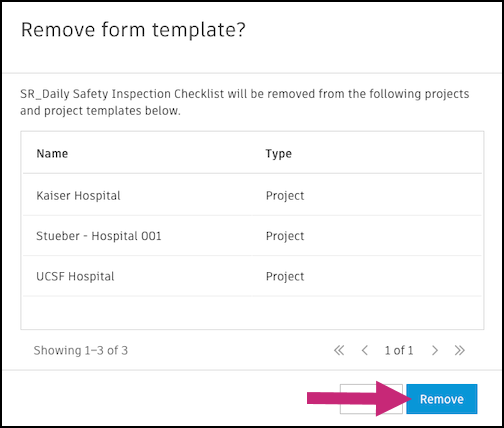
You see a confirmation dialog. The dialog lists the projects or project templates that you select. To confirm, click Remove.
You return to the Manage usage page. The projects and project templates you select show a processing message in the Status column.
If you don’t leave the page, you see a success banner when the removal finishes. Click Done.
If you leave the Manage usage page, you still get a notification when the removal finishes. You also see a progress indicator on the Forms page, in the row of your form template, under the Added to column.
 to Remove from or Archive. If the form template has no projects or project templates, you see only the Remove from option. The Archive action is not available.