Create and Import Form Templates in Library
You can create form templates in Library for your account or import them from projects or templates. Templates in Library help standardize your team's forms. You can add templates to projects or project templates.
In this topic, you'll learn how to:
Create Form Templates in Library
In Account Admin, click Library in the left navigation menu.
Select the Forms card.
Click Create form template to open the form template builder.

Build your form template. Select where to start, then add sections, questions, and logic as applicable.
The process for creating a form template in the Library is similar to creating a template in the Forms tool. The process changes when you set permissions. See Create Form templates for more details. When you finish building your template, continue with the next steps to set permissions.
Note: You can't set section assignees in form templates in the Library.Click Save.
(Optional) Click the toggle to manage a form template's permissions from Library. This feature lets you set permissions by role. When these permissions are in projects, they can't be removed by project teams. So adding permissions here can help standardize more of your project to meet your organization's requirements. Learn more
If you don’t want to set permissions in Library, click Save to finish.
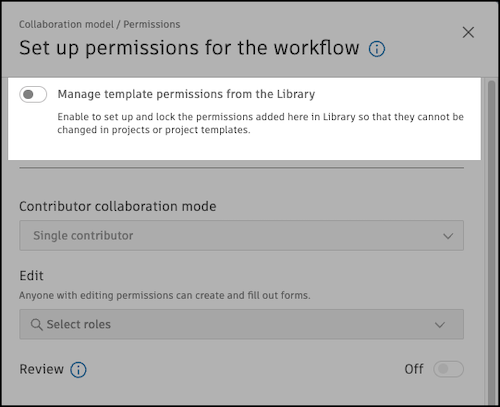
In the dialog, click Enable.
Select the contributor collaboration mode, editors, reviewers, viewers, and managers.
Click Save.
Import Form Templates into Library
You can import form templates from projects or templates into Library.
Click the arrow next to Create form template and select Import form templates.
Select an Autodesk Construction Cloud project or project template.
Note: The list shows your first 200 projects sorted by name. If you can’t find your project, edit the name to appear higher. For example, start with a number, such as 1 - Migrate Form Template Project.Click Next.
Select up to 50 templates. The templates you select are added to the Library with their names.
Click Import.