BIM 360 Import (Beta)
Use Data Transitions in BIM 360 Classic to move data from BIM 360 Classic projects to Forma Data Management. This tool lets you transfer project files, issues, and other data.
Data Transitions helps you migrate data and keeps all necessary information. You can move documents, models, and project settings.
BIM 360 Classic
To move data from BIM 360 Classic to Forma Data Management:
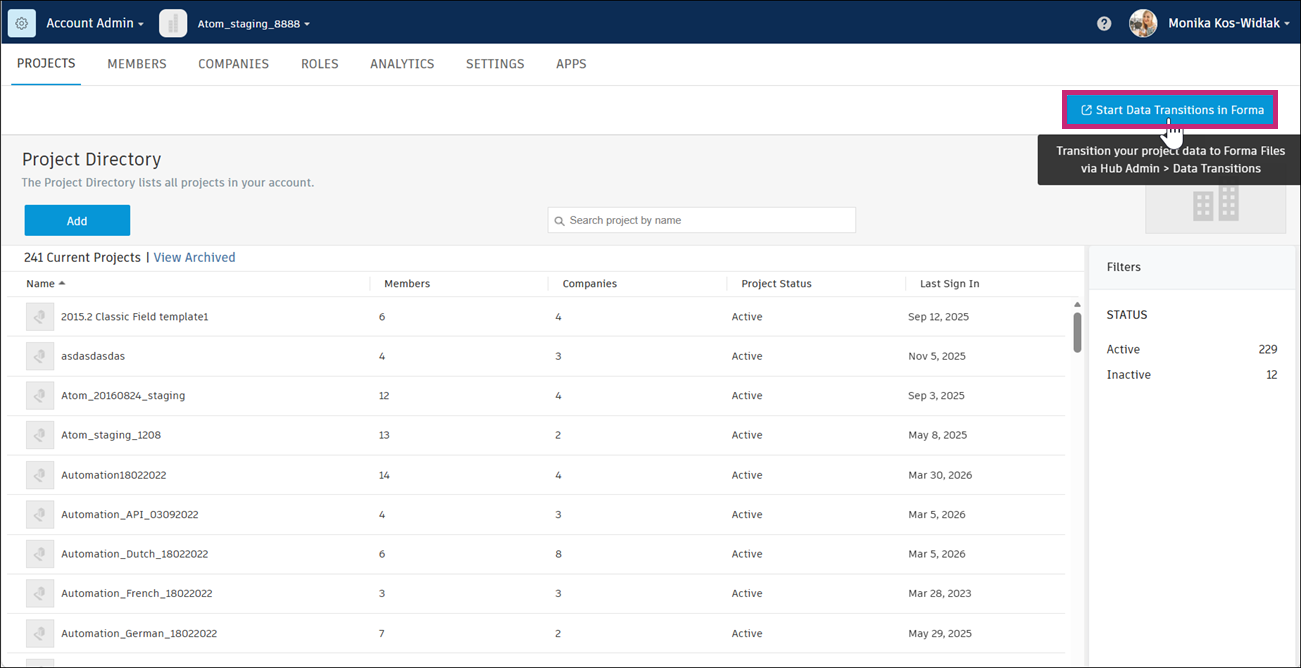
In BIM 360, open Account Admin module.
Click Start Data Transitions in Forma in the upper right of the page.
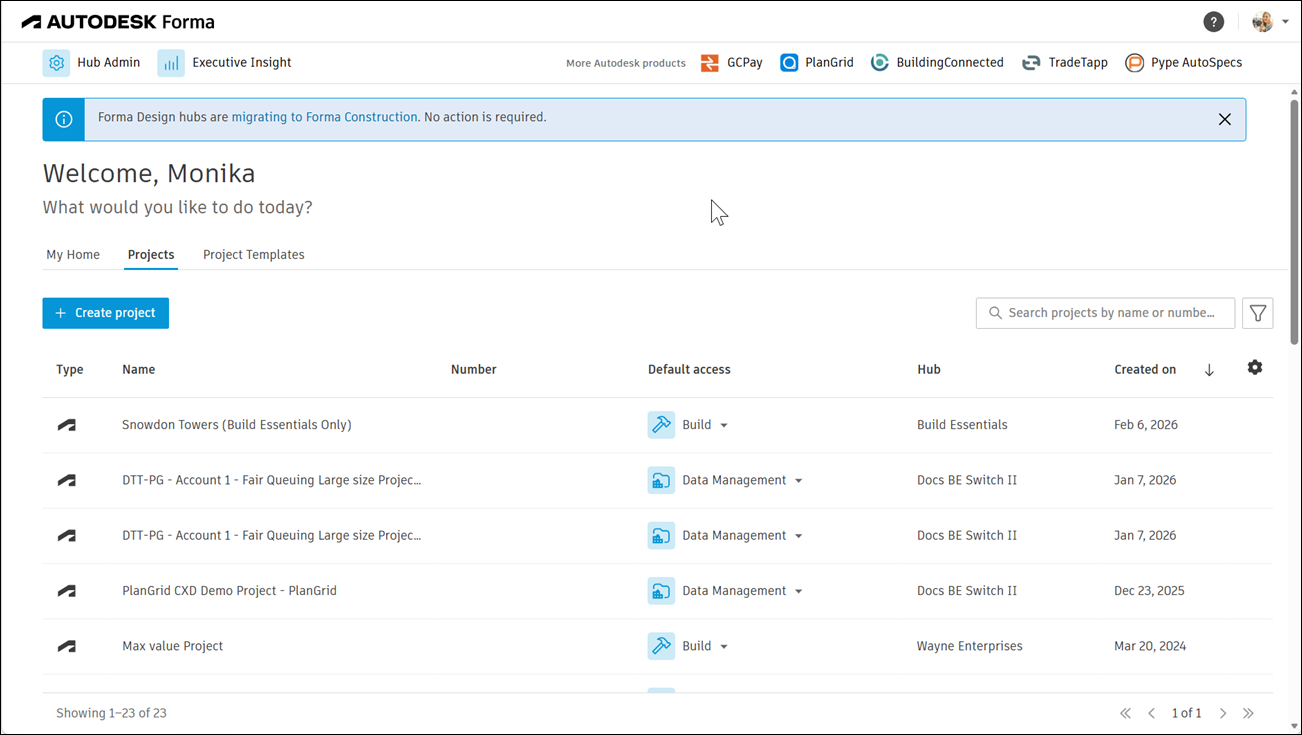
In Autodesk Forma, select the project you want to transition your BIM 360 data to.
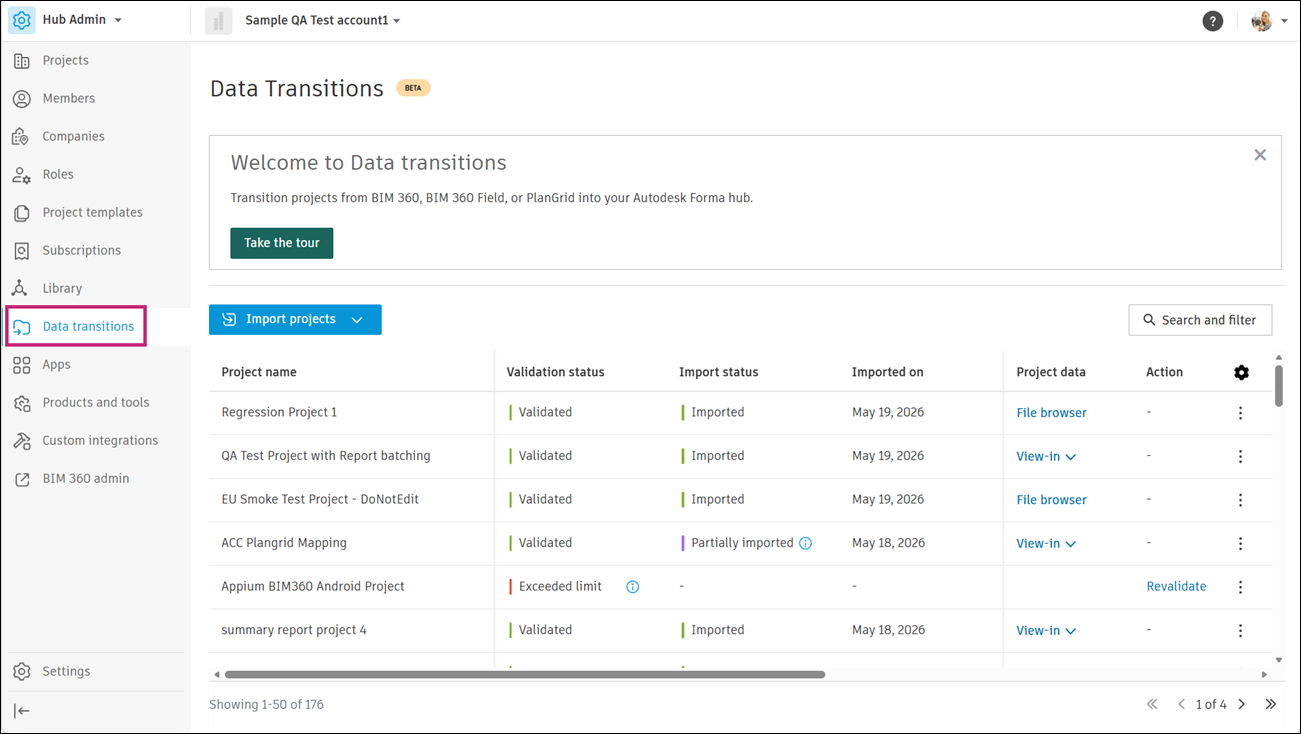
In the upper left of the page, click Hub Admin module > Data transitions.
Click Import projects > BIM 360/BIM 360 Field.

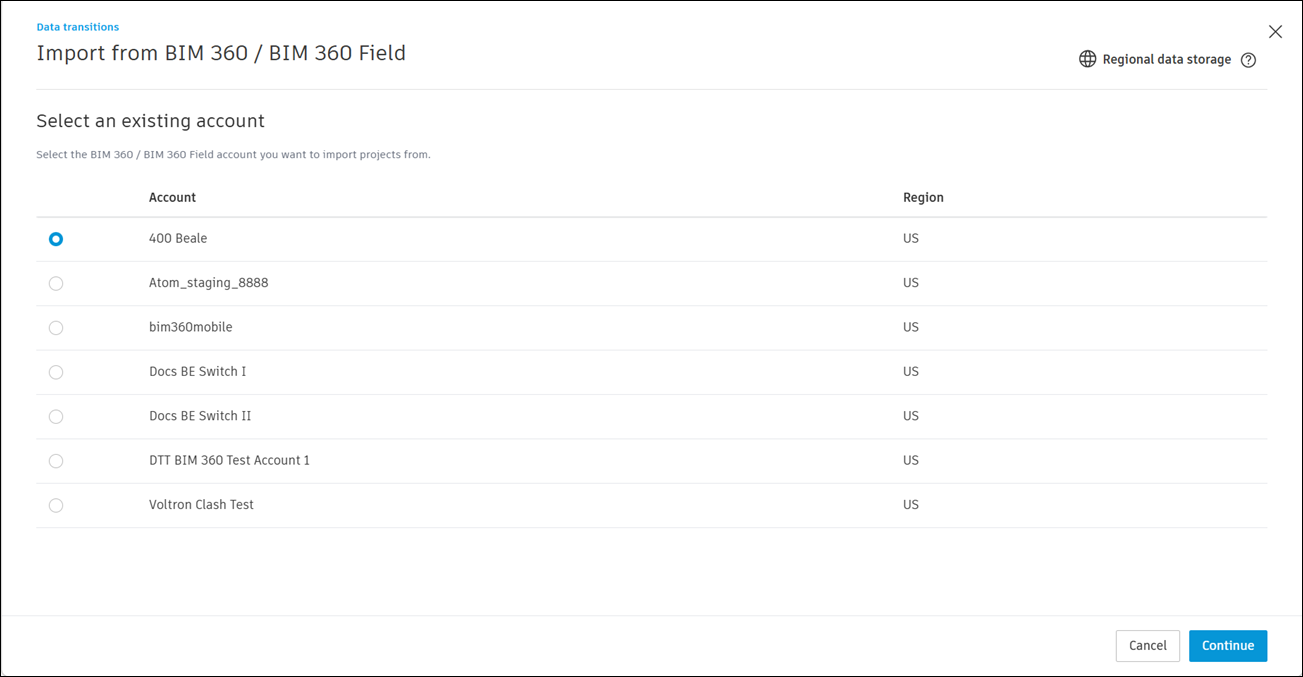
Select the BIM 360/BIM 360 Field account you want to import projects from, then click Continue.
Select one or more projects for which you want to transition your data, then click Continue.
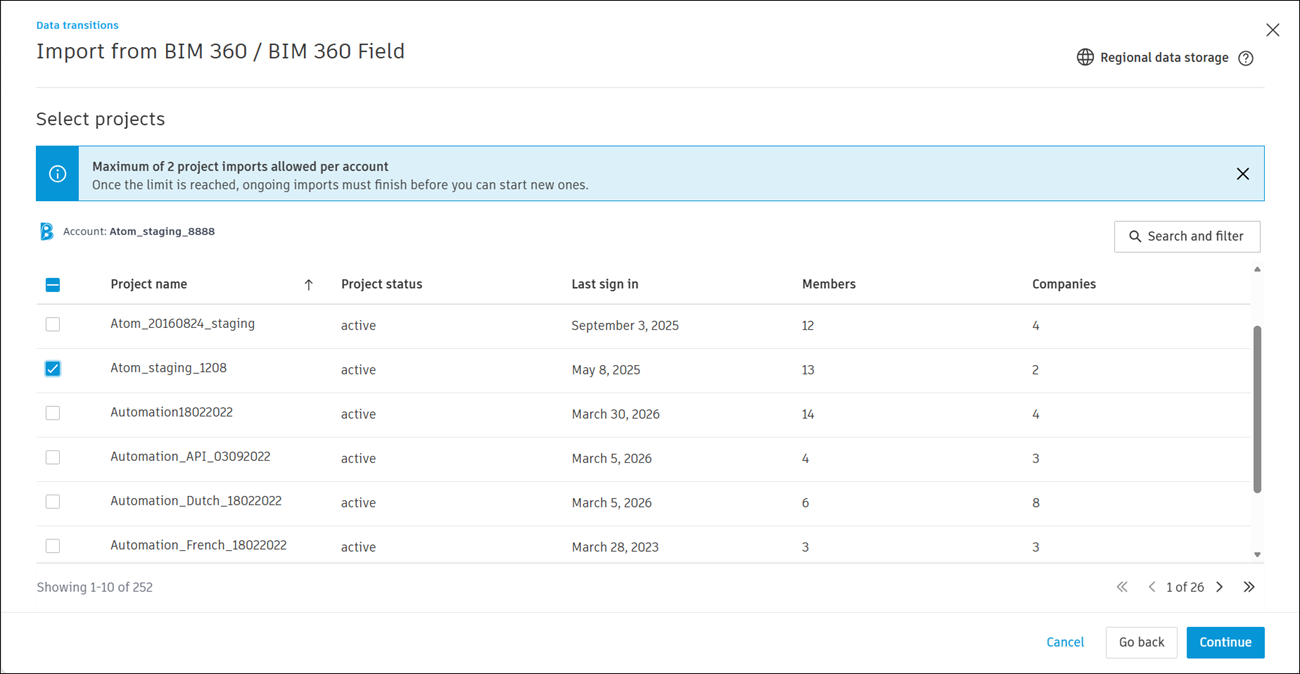
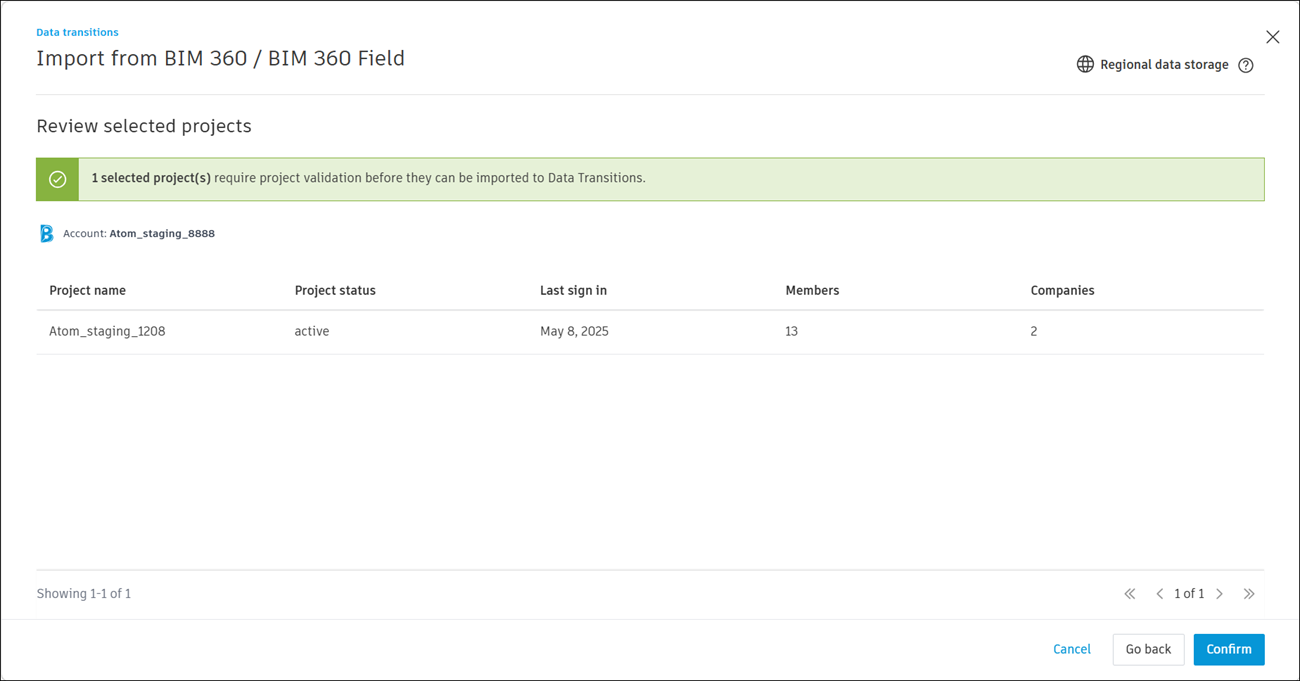
If needed, validate your projects before import by clicking Confirm.
If you're not a member of the selected projects, you are prompted to join them by clicking Add and continue.

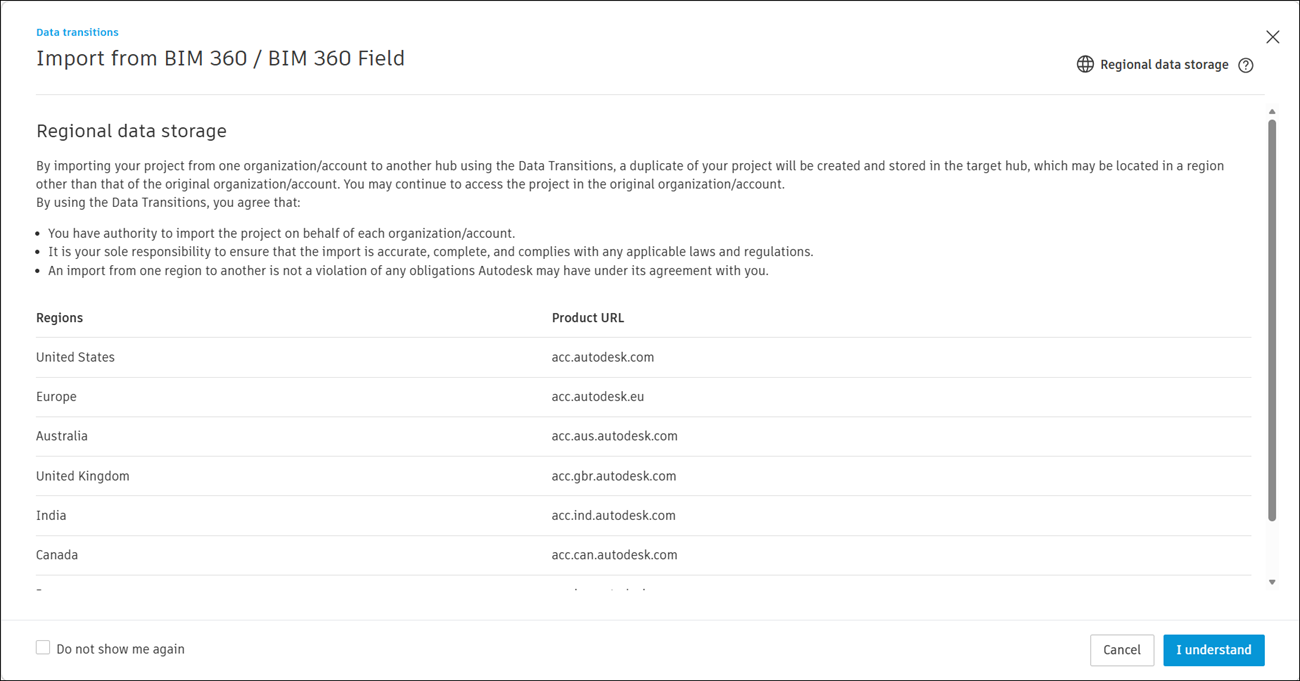
Review the data storage information and click I understand to proceed.
You are redirectd to Data Transitions page. Validating your project may take some time. Depending on the size of the project, the data transition may take some time.
Tip: You will receive a notification when the migration is complete.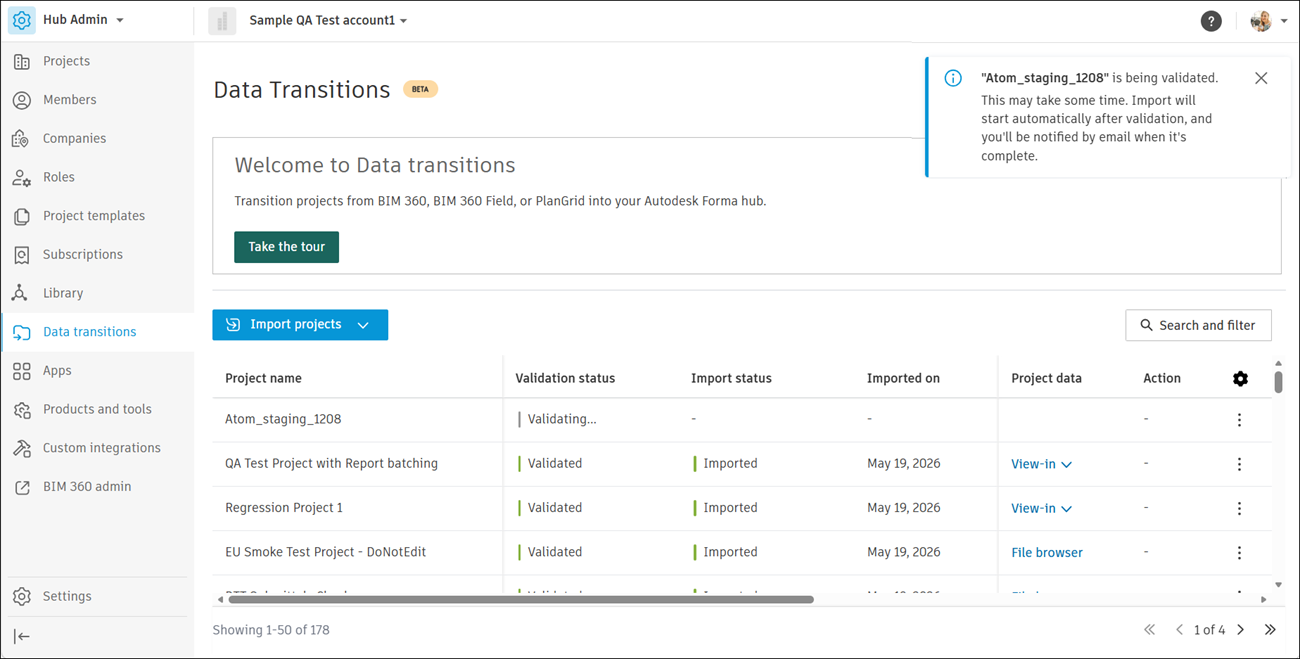
Click the More menu
 on the right of the project to access the following options:
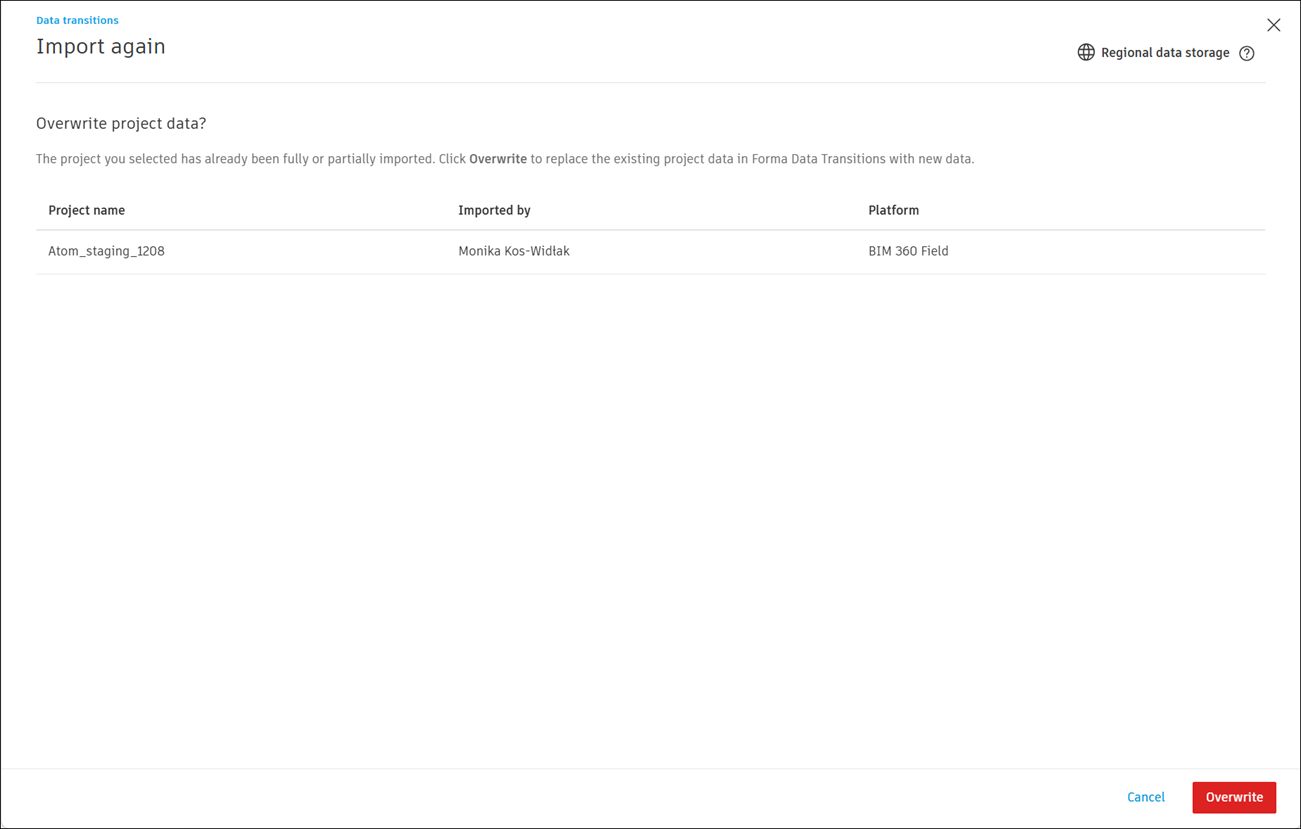
Import again: Replace existing project data with a fresh import. Opens an Overwrite confirmation.
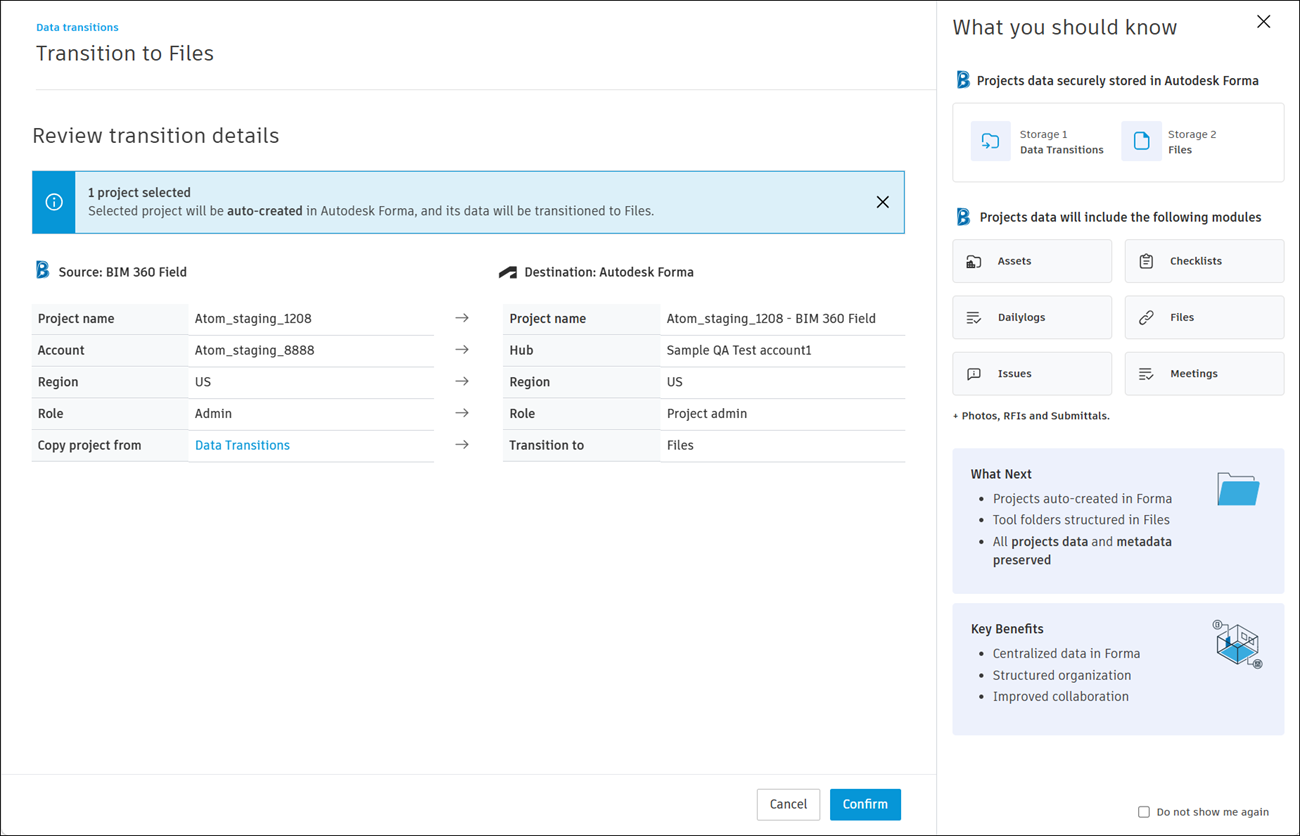
Transition to Files: Move the imported project into Forma Files. Review source and destination details, then confirm.
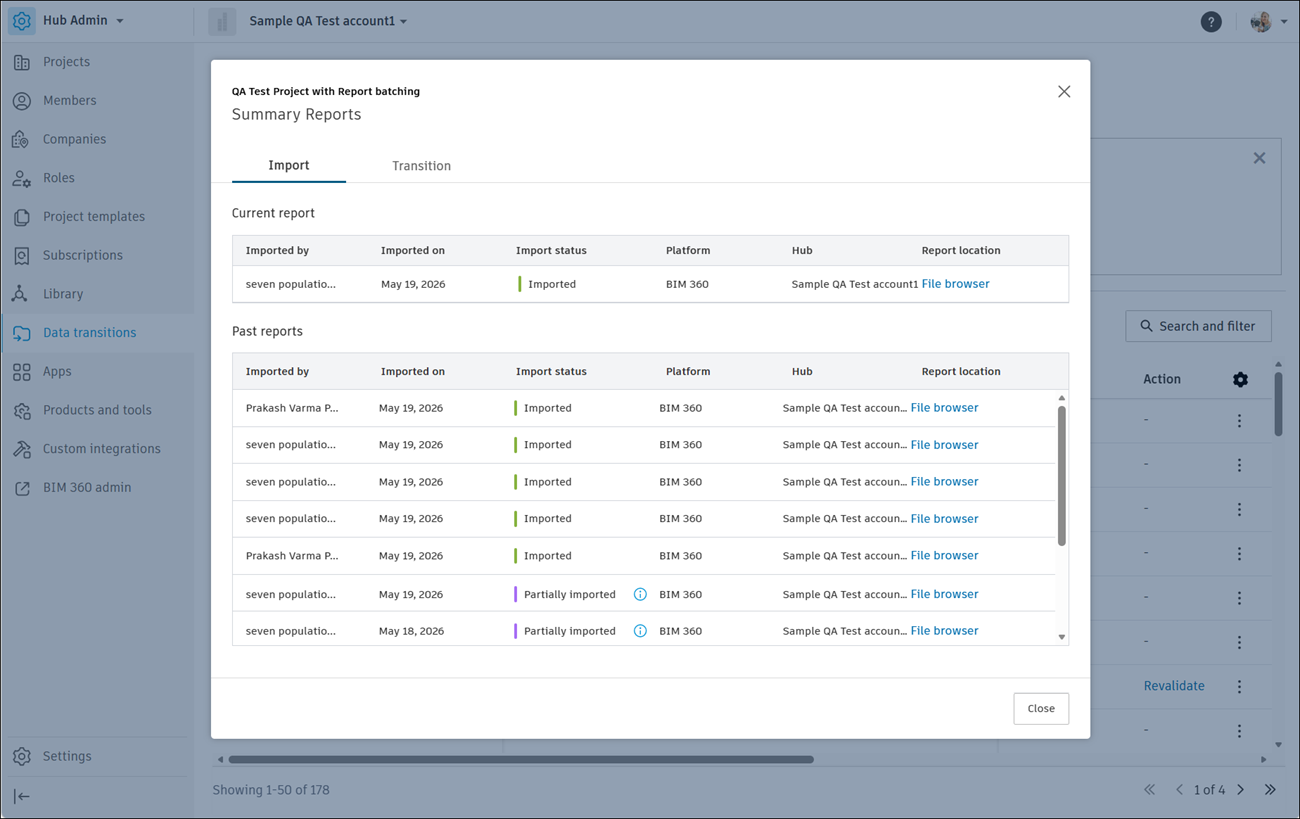
View summary reports: Open reports summarizing the transition outcome.
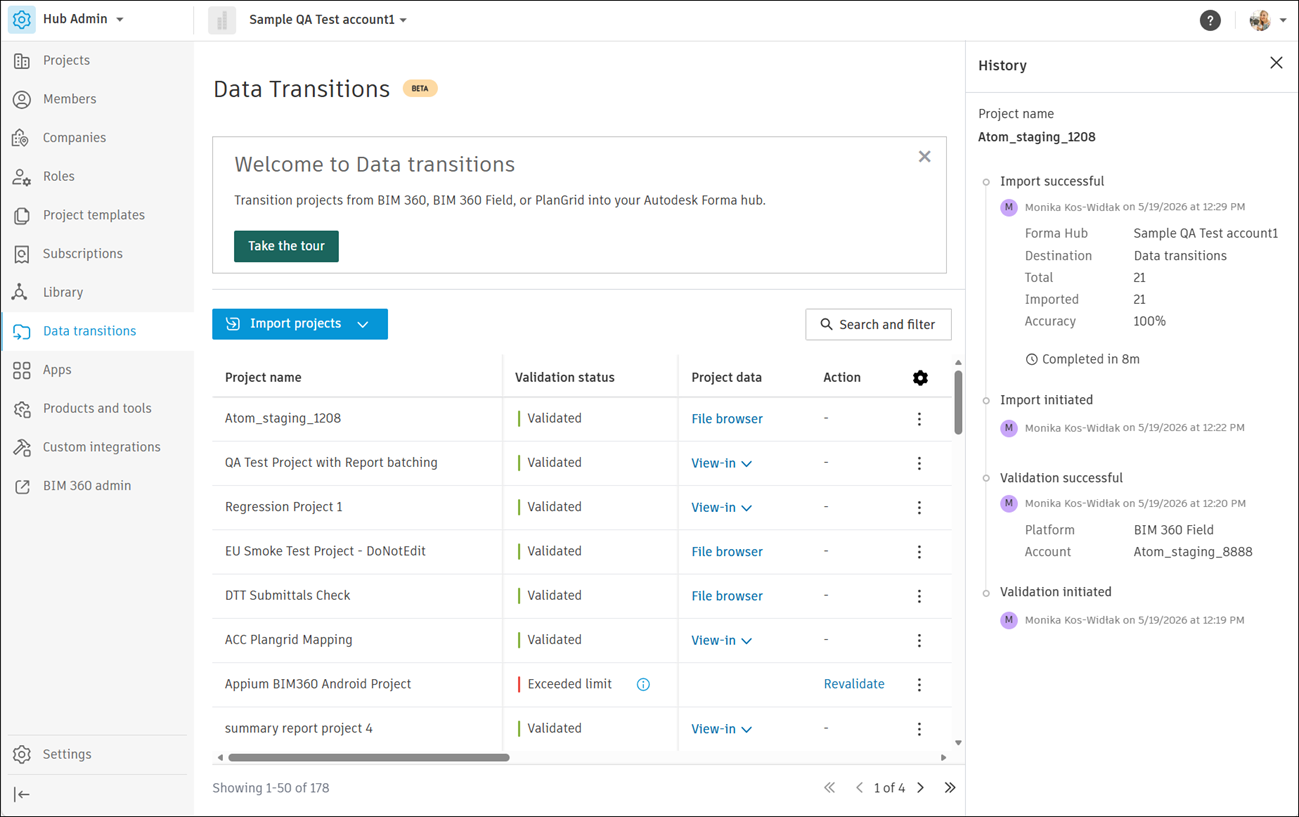
History: View a timeline of validation and import events for the project.
Review Transition Information
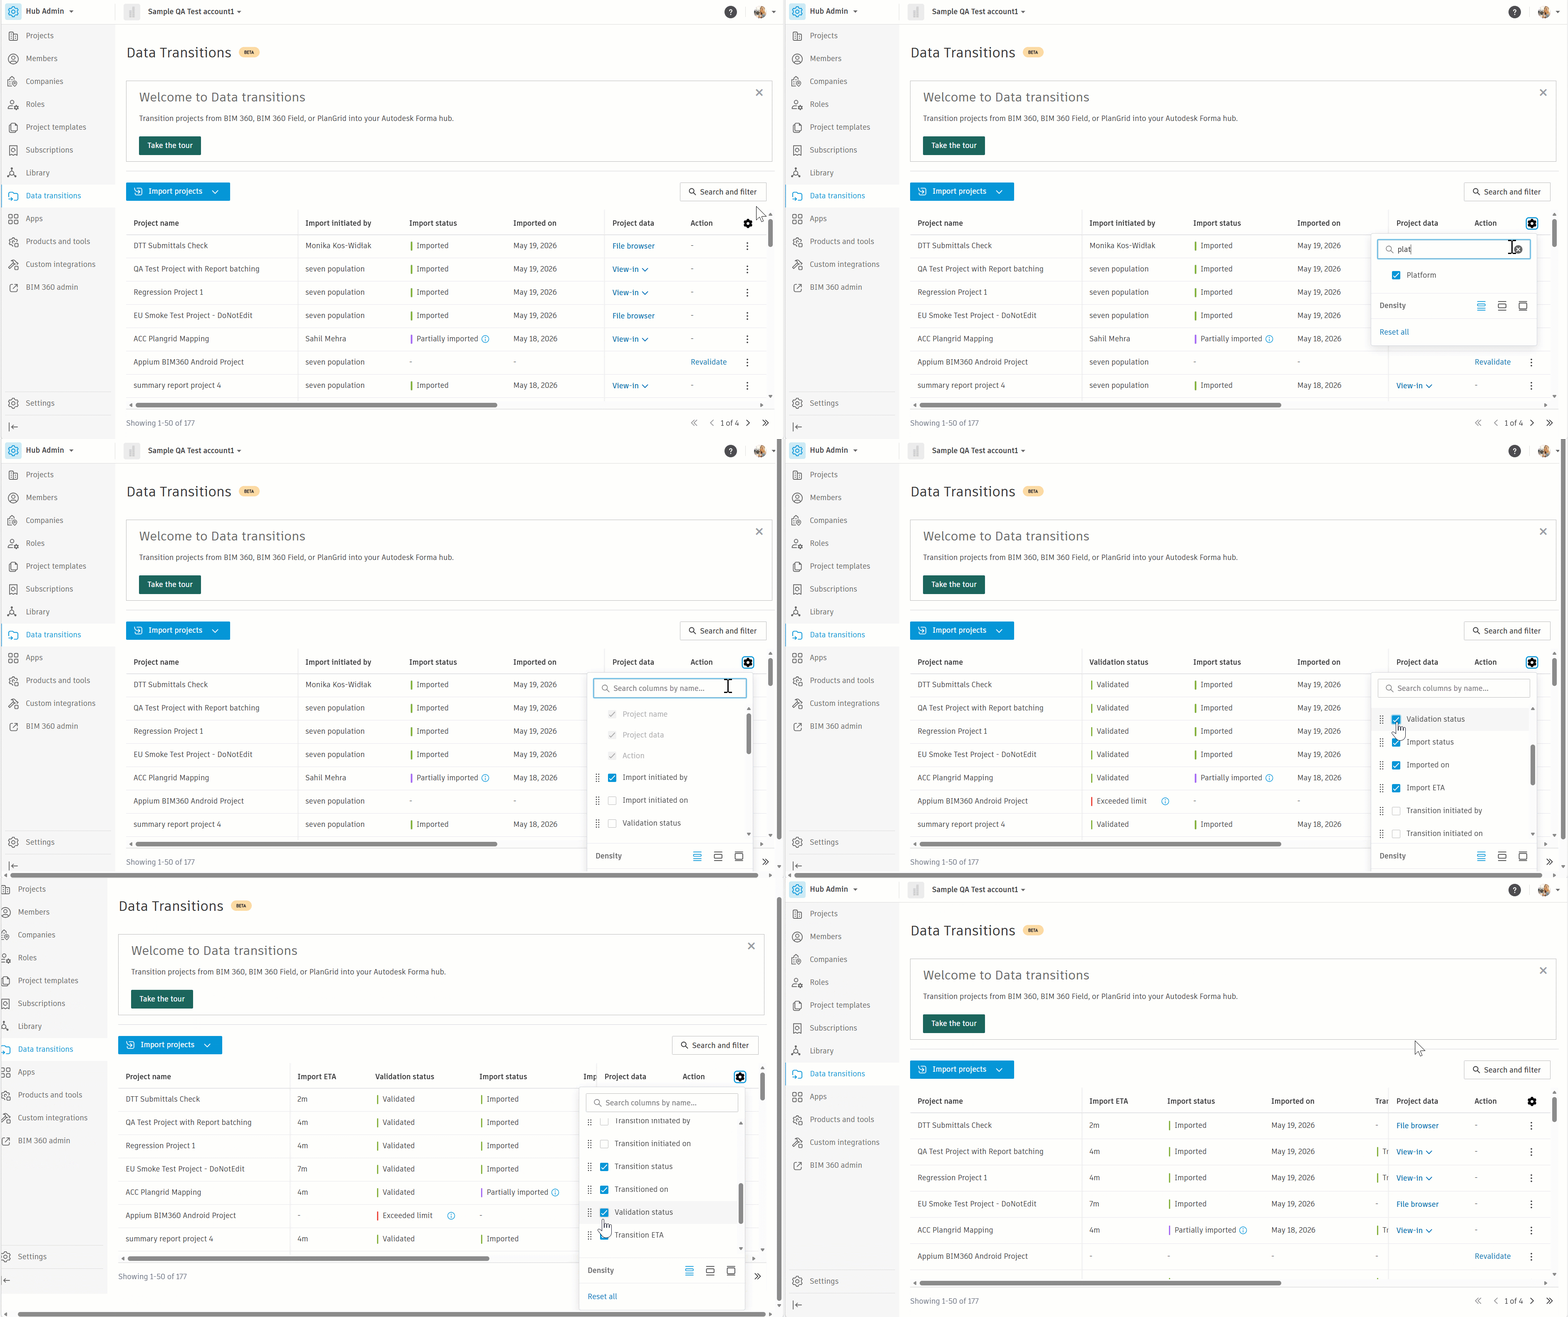
The Data Transitions table lists every project you've imported or attempted to import, along with its current state. Each row represents a single project and, by default, includes the following columns:
- Project name: The name of the project as it appears in the source platform.
- Validation status: The result of the pre-import validation check, such as Validated, Exceeded limit, or Failed.
- Import status: The result of the import operation, such as Imported, Partially imported, or Failed. A hover tip on Partially imported shows which items were skipped.
- Imported on: The date the project data finished importing.
- Import ETA: The estimated time remaining to complete the import.
- Transition status: The result of the move to Forma Data Management, such as Transitioned or Failed.
- Transitioned on: The date the project finished transitioning.
- Transition ETA: The estimated time remaining to complete the transition.
- Platform: The source platform the project came from, such as PlanGrid, BIM 360, or BIM 360 Field.
- Project data: A link, such as File browser, that opens the imported data for review.
- Action: Context-specific actions for the project, such as Retry or Revalidate.
To customize the table view:
Click the Settings icon
 on the right of the table.
Check the columns you want to display.
Drag rows to reorder them as needed.
Use the search box to filter columns by name.
BIM 360 Next Generation
From BIM 360 Next Generation, you can use Data Transitions to move data to Autodesk Docs. This tool allows you to transfer project files, issues, and other data.
In BIM 360, open Account Admin.
Click Go to Data Transition Tool in the upper right of the page.
Enter your email address and click Next.
Once you've logged in, you will see a list of projects available for migration.
Select the BIM 360 Next Generation projects to move, and click Transition data.
Decide if you want to add a Secure Service Account (SSA) user to the selected projects.
From the Account menu, select an Autodesk account to host the moved data, then click Continue.
Depending on the size of the project, the data transition may take some time. You will receive a notification when the migration is complete.
Review the regional data storage information and select I understand.
Tip:You can review the transition status for each transitioned project on the Autodesk Docs tab. Upon successful completion, you will see the following message in the top right of the page:
Select Go to Autodesk Docs to be redirected to the Files tool in ACC where you can review your moved data.