PlanGrid Import
You can move your project data from PlanGrid to Forma Data Management. You can transfer files, models, issues, and project settings, and your information stays intact.
This transition minimizes disruption to active projects. It also improves collaboration and data management in Autodesk Forma.
Transitioning a project takes two steps. First you import the project, then you transition the data to create an active project in Autodesk Forma.
Import Projects from PlanGrid
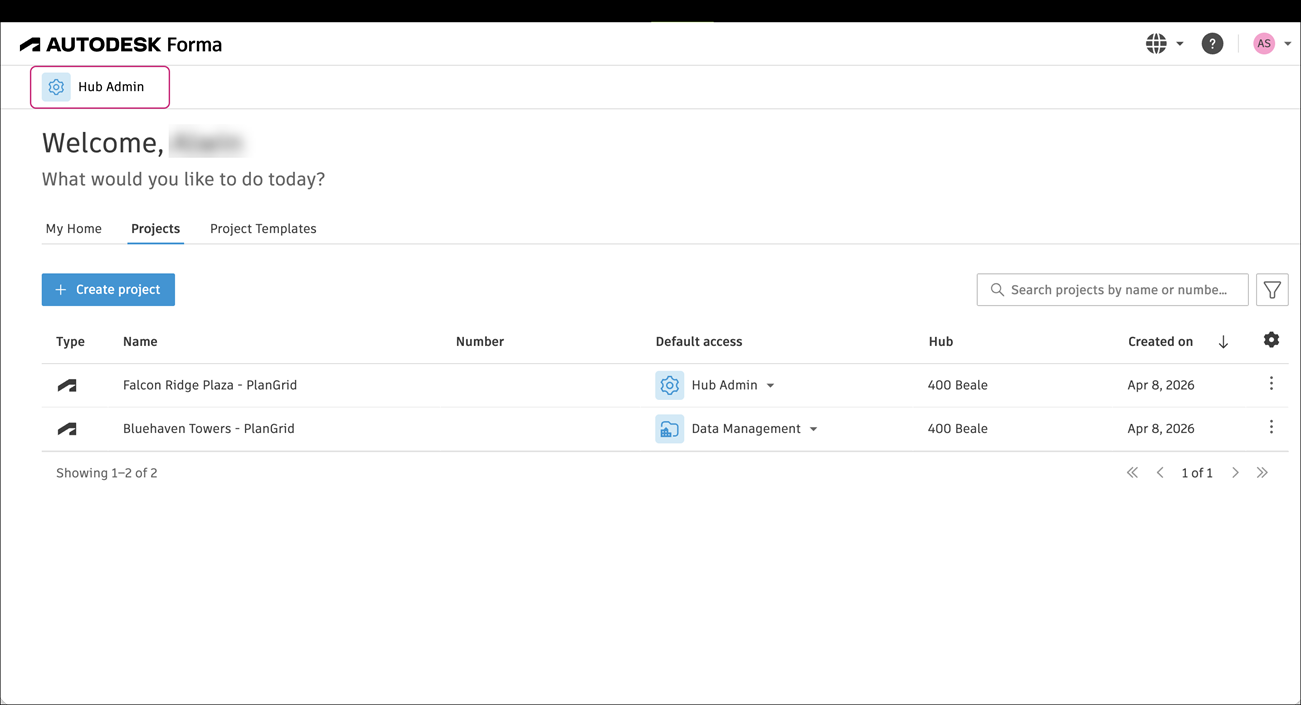
The data transition process is done in the Autodesk Forma Hub Admin.
From the project list select Hub Admin.
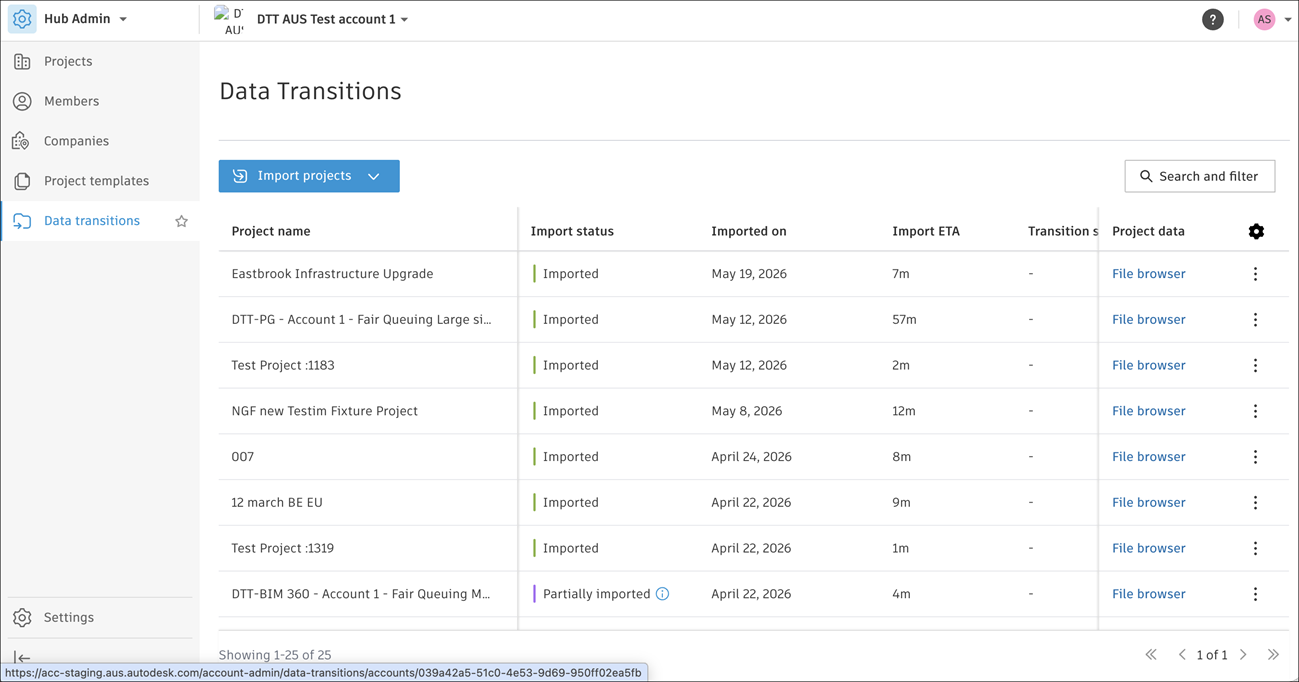
On the left side select Data Transitions.
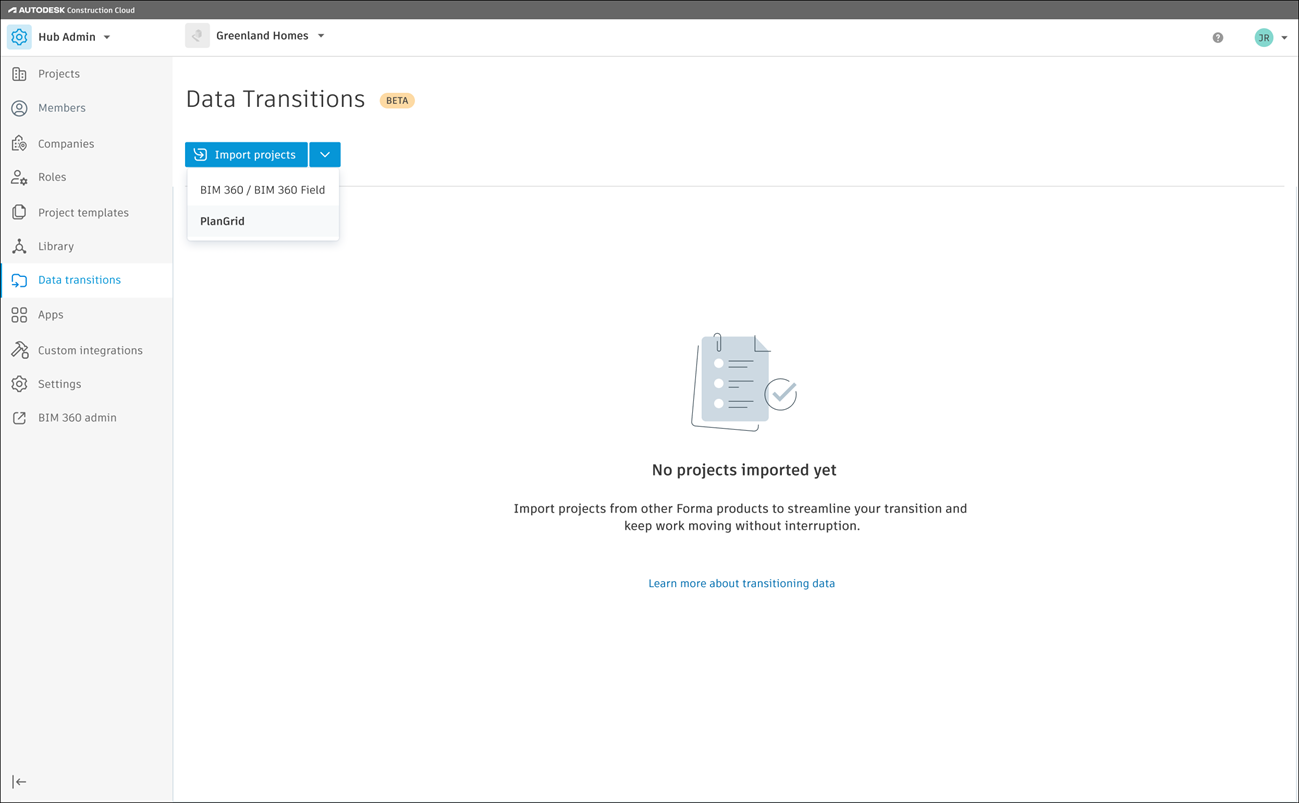
Click Import projects, then select PlanGrid.
Select an existing organization.
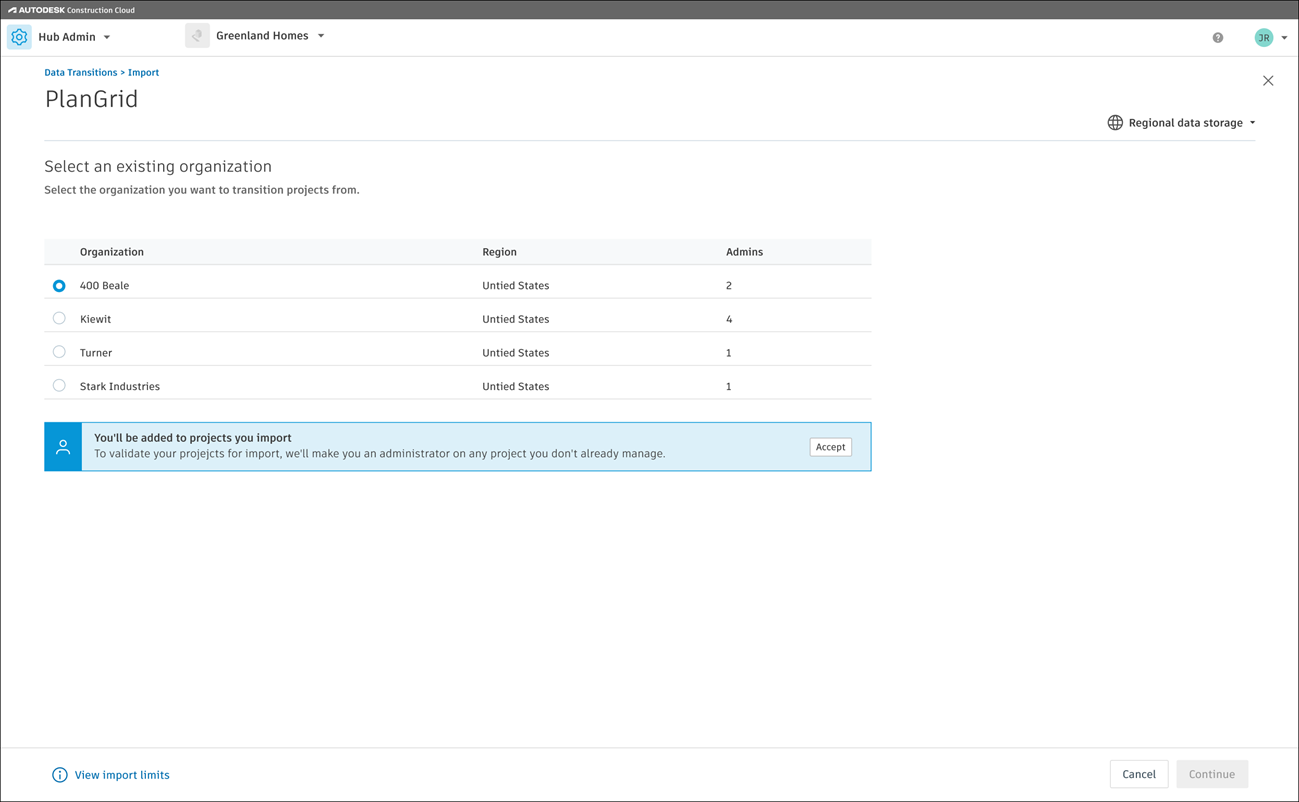
Click Accept the administrator notice, then click Continue.
Review import limits, then click Done.
Select the projects you want to import and click Import.
Tip: To narrow the list, use the Search and filter field. You can select up to 50 projects to import.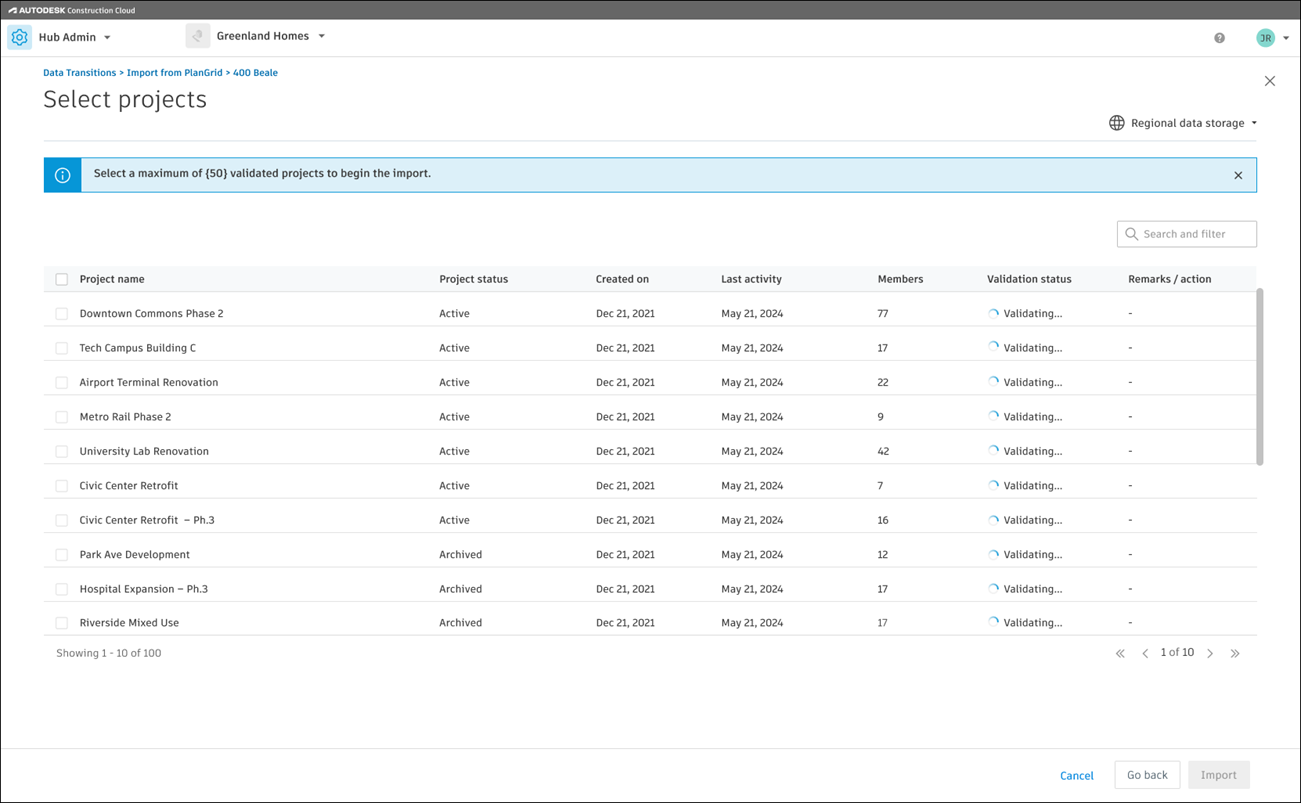
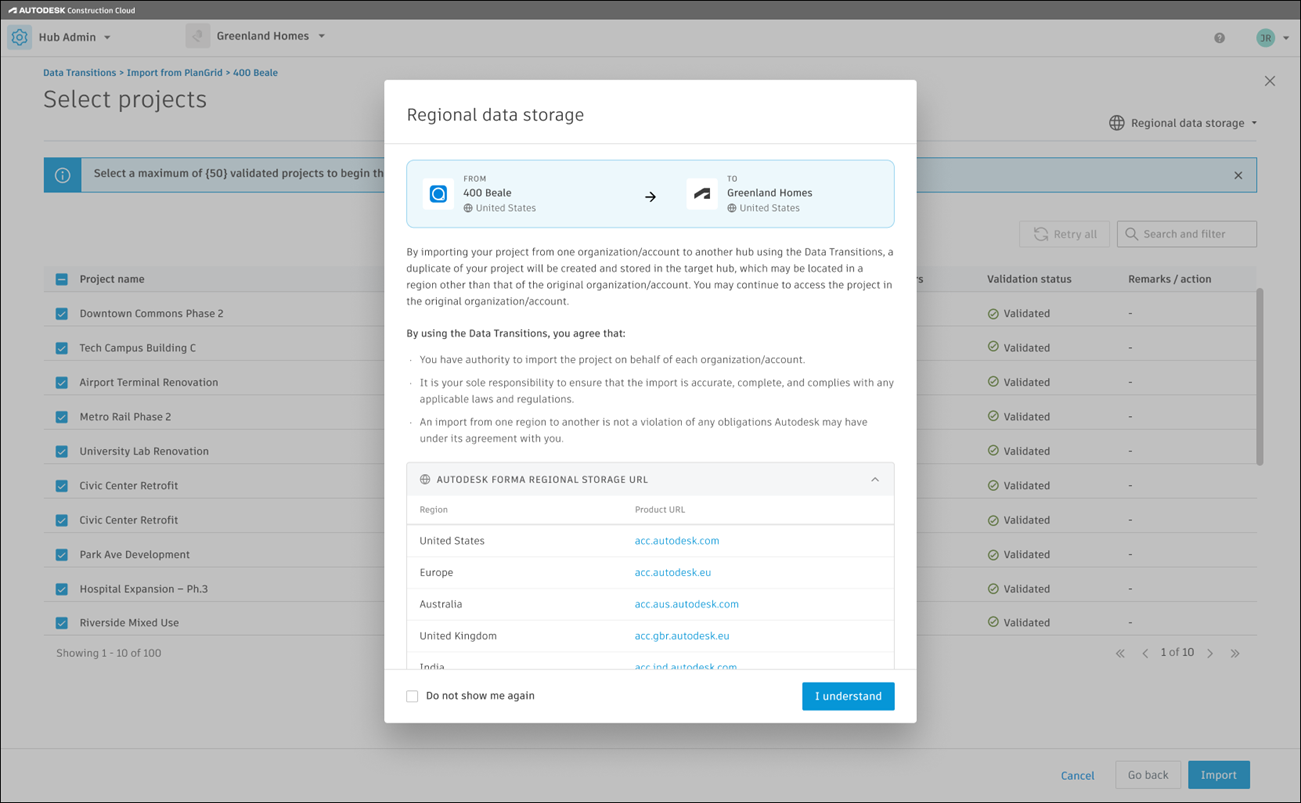
Review the regional data storage notice, then click I understand.
The import will take some time to complete. There are some system checks before the import starts. You can track progress with the Status column.
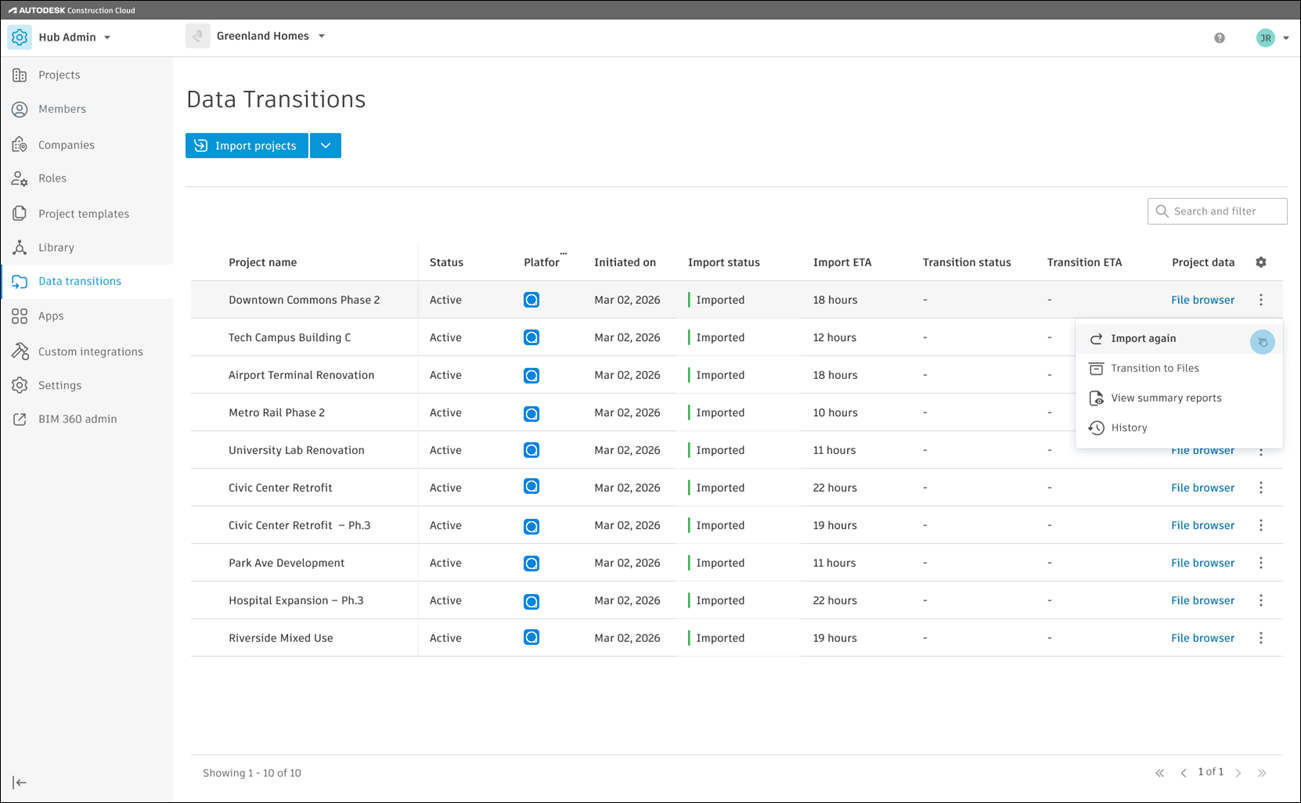
After you import a project, select the More menu  to see the available actions:
- Import Again
- Transition to Files
- View Summary Report
- View History
Import Email Notifications
When an import finishes, you receive an email for the outcome:
- Successful import: Confirms the import succeeded and includes details such as the accuracy rate and item counts.
- Partially successful import: Notes that the import finished with some issues and summarizes the imported items and any exceptions.
- Failed import: Explains that the import didn't succeed and includes any available error details.
Data Transition Statuses
There are a few stages that a project goes through during the data transition process. While importing the project there is a validation and an import stage. Once the import is complete you can see your project data using our file browser. You can also transition the project to become an active project in Autodesk Forma. The following lists the statuses that you may see throughout the process.
- Validating: The project is being validated against the maximum limitations of the Data transition tool. The system adds you as a project administrator to run the validation.
- Importing: The project passes all of the system checks and is being imported into Autodesk Forma.
- Partially imported: The project passes all of the system checks. Some items were not imported due to corruption or other issues. Check the summary report to see which items were not imported.
- Imported: The project has completed the import into Autodesk Forma. You can now open the project in the file browser.
- Transitioning: The project is being transitioned to the Files or Forma module.
- Limit exceeded: The project exceeds the maximum limitations of the Data transition tool and is not imported.