Validate Transitions
When a project has completed its transition, you should look through the report to see if there are any files that didn't transition. The report can show you files that didn't transition for different reasons.
There may be data that doesn't transition; if that happens, you cannot manually bring that over. You can, however, transition again or check to see if there may be something wrong with the source data that is preventing the transition.
- Transition Your Project Data
- Cancel a Data Transition
- Transition Project Data Again
- View Summary Reports
- View History
Transition Your Project Data
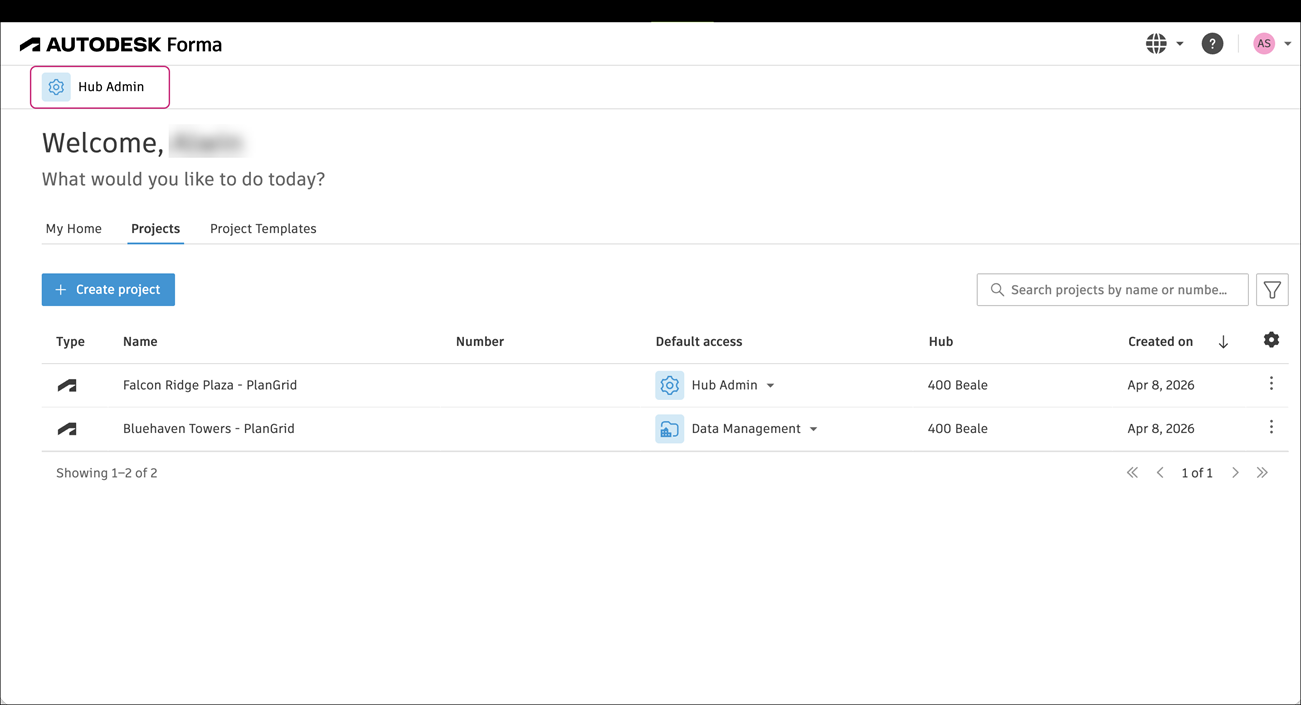
From the project list select Hub Admin.
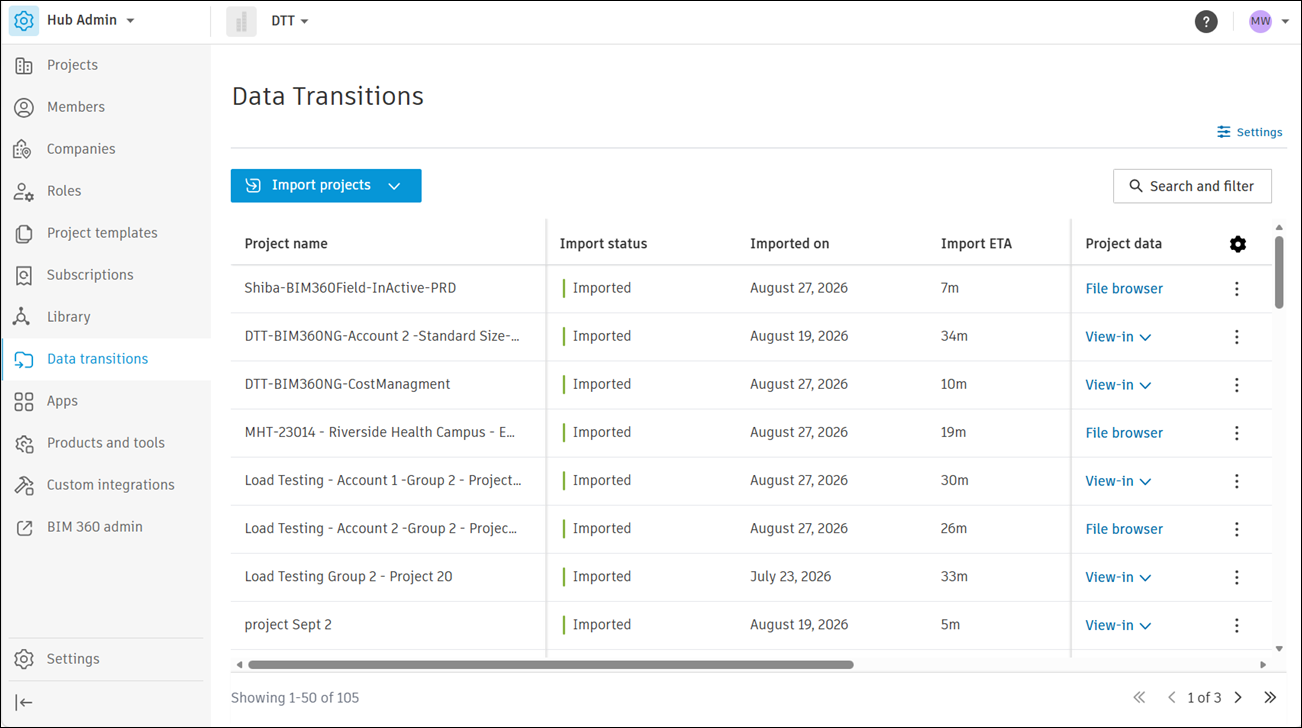
On the left side select Data Transitions.
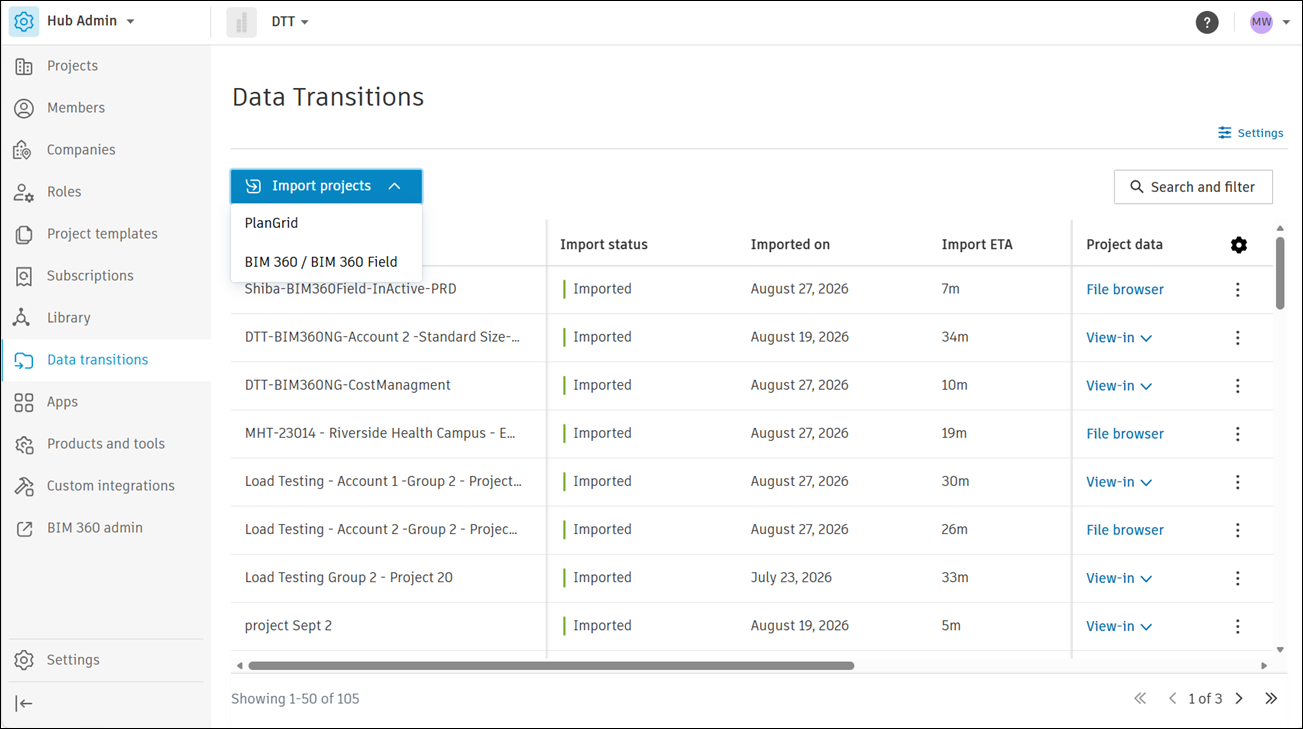
Click Import projects, then select PlanGrid/BIM 360 / BIM 360 Field.
See BIM 360 Import (Beta) and PlanGrid Import for step-by-step instructions on importing project data.
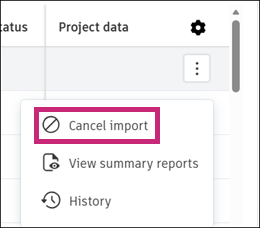
Cancel a Data Transition
If data transition has not been started yet, you can cancel it by going to the More menu  next to the project name and selecting Cancel import.
Transition Project Data Again
Transitioning a project again overwrites any previously transitioned data in the target hub.
Click the More menu
, then select Import again next to the project name.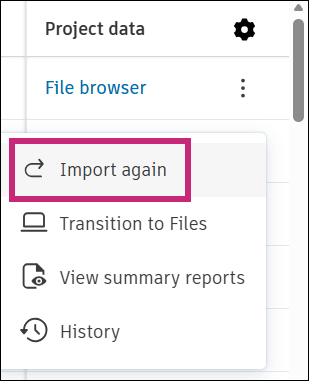
Once validation for the selected project completes, click Overwrite.
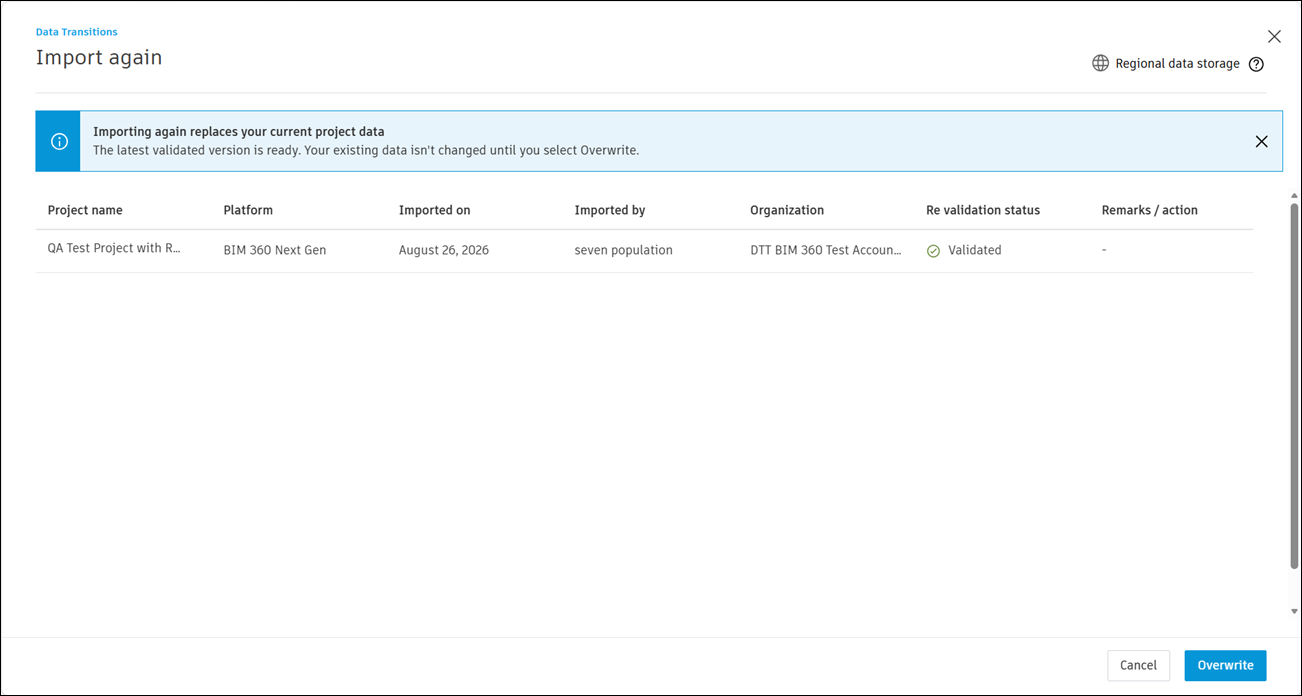
On success, you should see a screen similar to the following:
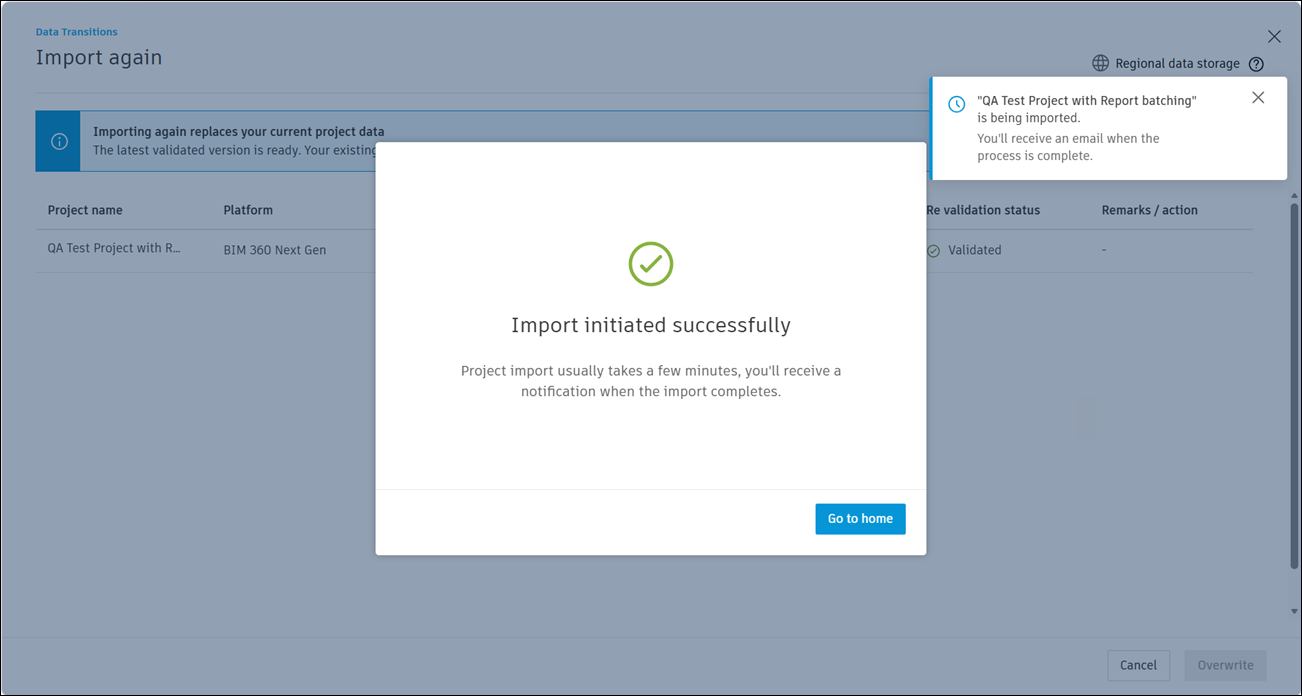 Note: If the project was previously fully or partially transitioned to the same hub, you will see a warning message. Click Overwrite to proceed with the transition.
Also note that depending on the project size, the transition process may take some time. You can navigate away from the page while the transition is in progress. You'll receive a notification when the transition is complete.
View Summary Reports
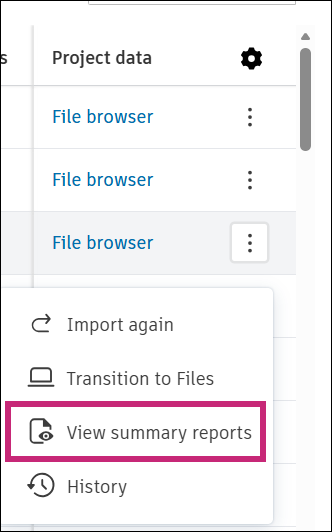
Click the More menu , then select View summary reports next to the project name.
View History
Click the More menu , then select History next to the project name.
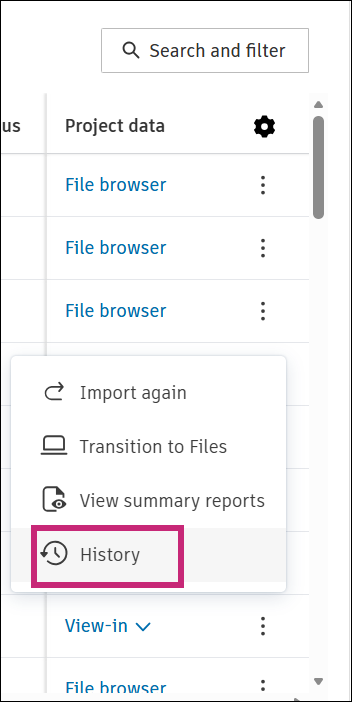
This opens a History panel on the right:
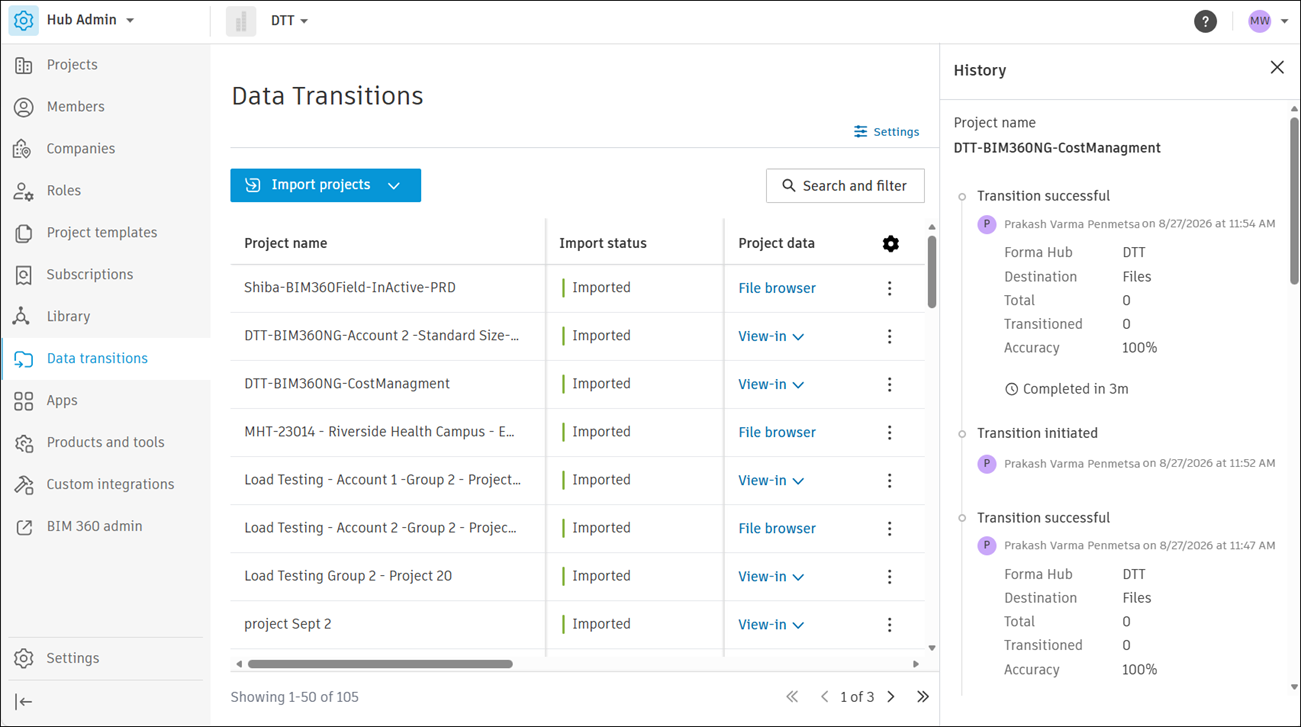
Use the panel to review the following information:
- Import status
- Who initiated import and when
- Hub name
- Destination
- Total number of available and imported items
- Accuracy