Create Support Files Templates in Library
In the Library in Autodesk Forma, you can create templates for Connected Support Files that can be used across multiple projects.
In this topic, you'll learn how to create support file templates and manage the search paths and settings for the support files that AutoCAD uses.
Create Support Files Templates in Library
Hub administrators and standard administrators can create support files templates in Library for their hub and add them to projects.
To create a support files template:
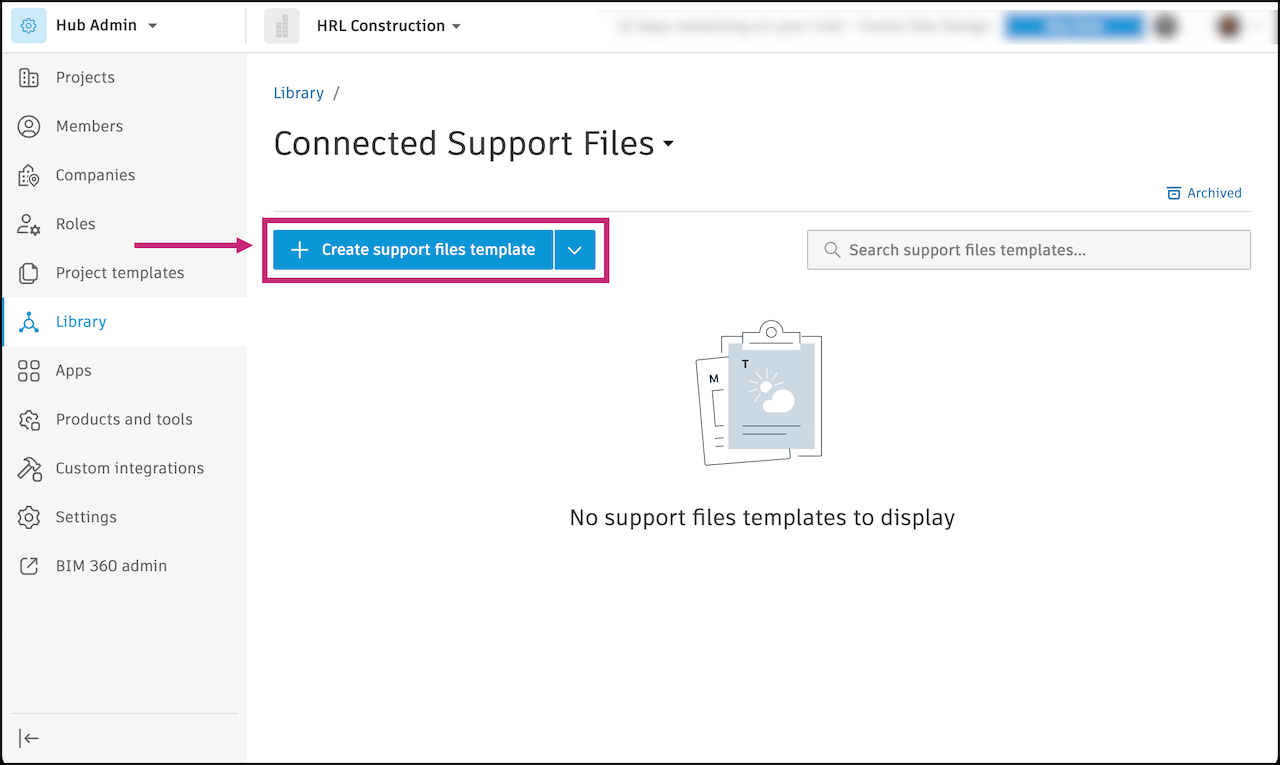
In Hub Admin, click Library in the left navigation.
Select the Connected Support Files card.
Click Create support files template.
Enter a template title.
Note: Template titles:- Must be unique. A template can't have the same name as an existing template.
- Can't include these characters: < > : " / \ | ? *
- Can't start or end with spaces, tabs, or line breaks.
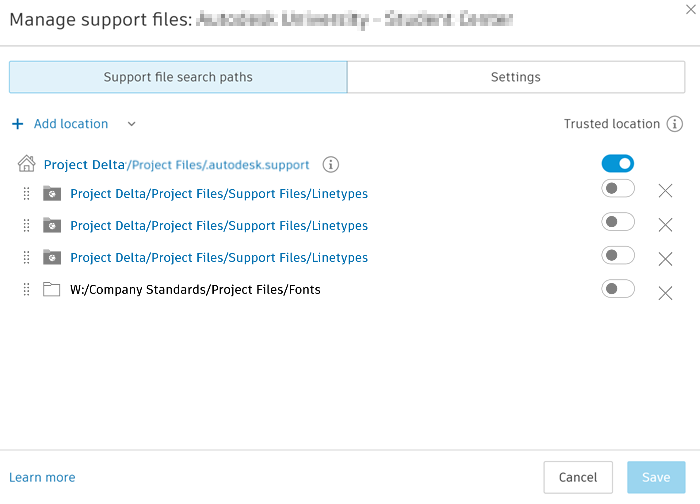
The Support files search paths tab opens by default and lists the folders AutoCAD will search for support files. You can add search paths to extend the scope of the search, remove, reorder, and mark folder locations as trusted as detailed in the following table.
| Location type | Description | Add | Delete | Reorder | Trusted location default state | Trusted location notes |
|---|---|---|---|---|---|---|
| .autodesk.support | AutoCAD searches the default .autodesk.support folder first for support files. The config file is also stored here. |
No | No | No | On* | *Trusted unless the path doesn't pass the trusted location check, or a project administrator turns it off. |
| Project folder locations | Add more project folder paths to extend the search for support files across multiple projects. | Yes | Yes | Yes | Off | Not trusted by default. A path can be trusted by turning it on, but it must pass the trusted location check. This setting is saved for future sessions. |
| Local folder locations | Add local folder search paths by pasting the path. | Yes | Yes | Yes | Off and disabled | Local folder paths can't be trusted locations. |
The following sections detail how to complete these actions.
Add project folder locations
If there are more support files stored in this or other projects which aren't in the .autodesk.support folder, you can add those project locations to the search list.
Click Add location.
Navigate to the project and folder containing the support files you want to add.
Click Open.
The location is added to the bottom of the list and shows the full folder path. You can click the path link to access the folder in the project.
Choose whether you want to make this a Trusted location. See Trusted Locations for details.
Add more locations as necessary.
Paste local location
You can also add local search path locations. A local path location is folder on a local storage device or a LAN network. It starts with a drive letter followed by a colon and backslashes to separate directories. Here is the general syntax for a local path in Windows:
| Type | Syntax Example | Description |
|---|---|---|
| Local folder | C:\Directory\Subdirectory\...\FolderName |
Folder on a local drive |
| Network folder | \\ServerName\SharedFolder\...\FolderName |
Folder on a LAN/shared network |
| Local example | C:\Project\Company standards\Plot Styles |
Example of a local folder path |
| LAN example | \\ServerName\Project X\Standards\Plot Styles |
Example of a network folder path |
Copy the local path.
Click the drop-down next to Add location.
Click Paste location.
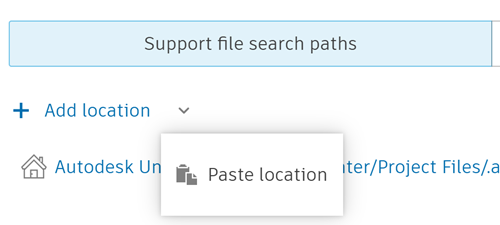
If the clipboard content is unavailable, Paste location is disabled.
Note: The following are not valid paths: URLs, relative paths, paths with forward slashes, paths with unsupported characters <>:"/|?*
Trusted Locations
Trusted locations are folders restricted as read-only for members so executable files can be securely loaded and run. Only project administrators can change the contents of a trusted location folder.
If you want to make a location trusted:
Click the Trusted location toggle next to the relevant path to turn it on.
The system checks that all folder permissions for the path are restricted to Create + Publish permission or lower. If the check passes, the trusted location is turned on. If the check fails, the Can't add as a trusted location error displays and explains that the folder permissions must be restricted for members.
Reorder or remove locations
AutoCAD searches the location paths from top to bottom and uses the first matching file it finds. The path order always starts with the .autodesk.support folder path. You can reorder the other paths to change their priority in the search.
Drag paths to change search order.
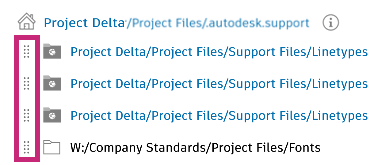 Note: You can't move any path above .autodesk.support.
Use the X icon to delete a path.
When a path is deleted, it is removed from configuration. To restore it, add it again.
Missing paths
If a configured path is missing:
- The folder icon changes to an error state. Hover the error icon to see: Path not found.
- The path and trusted toggle are disabled
- Project administrators can still remove the path
- Missing paths are read-only in the list until resolved or removed.
Settings
Click Settings to manage template and palette settings.
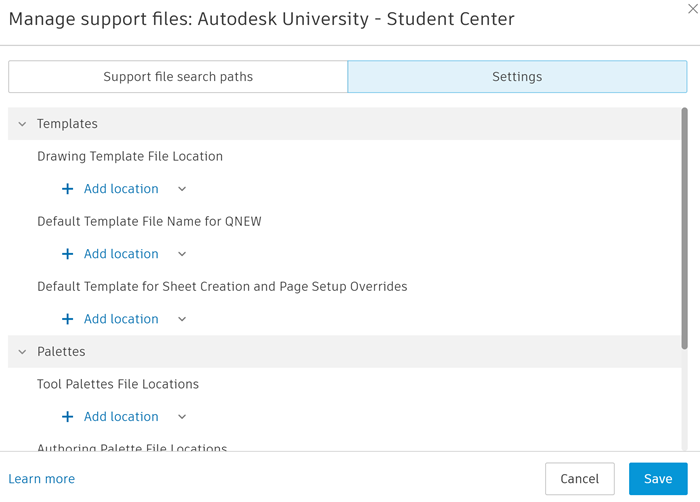
Templates
Template settings support one location path per setting.
| Setting | Location type | Description |
|---|---|---|
| Drawing Template File Location | Folder | Folder where drawing templates (.dwt files) are stored. |
| Default Template File Name for QNEW | File | The default template file used when creating a new drawing (QNEW). |
| Default Template for Sheet Creation and Page Setup Override | File | Template file used for new sheets and page setup overrides. |
- Click Add a location if no path is set.
- Select a file or folder as required.
- Remove and replace the path when needed.
Palettes
Palette settings support multiple folder paths.
| Setting | Description |
|---|---|
| Tool palettes | Folders containing tool palette files (.xtp, .atc) used in AutoCAD. You can add multiple folders to make palettes available to project members. |
| Authoring palettes | Folders containing authoring palette files for custom tools or standards. Multiple folders can be added for different authoring resources. |
- Click Add location.
- Select a folder.
- Repeat to add more folders.
- Remove paths with the delete icon as needed.
Save, Cancel, and Discard
Once you've configured the search paths and settings, you can:
- Click Save to save configuration changes to the config file.
- Click Cancel or X to close. If changes exist, you are prompted to:
- Discard: Close without saving.
- Cancel: Return to editing.