Import Locations, Sheets, and Areas from Revit
If your Revit model already contains rooms, you can reuse that data to set up locations in a single import. Import from Revit creates your location breakdown structure (LBS), links sheets to locations, and generates location areas on those sheets.
- Prerequisites
- Choose an Import Option
- Import from Revit
- Import to a Location Node
- Review Import Results
Prerequisites
To import locations from a Revit file:
- You must have project administrator permissions.
- The Revit (RVT) file must be uploaded to Files
- The Revit file must contain rooms with names and numbers in at least one phase.
To also link sheets and generate location areas:
- You need access to Forma Build, because the Sheets tool is part of Forma Build.
- The project must have at least one sheet in the Sheets tool.
- The sheets must be published from the same Revit model as the file you import.
- To import sheets and areas only, your project must already have an LBS that matches the rooms in the Revit file.
Known limitations for importing Revit files
The import fails if the Revit file was saved with a UI language other than English. To prevent this, switch the Revit UI language to English before you save the file. See Use Revit in Your Preferred Language to learn how to change language settings in Revit.
Choose an Import Option
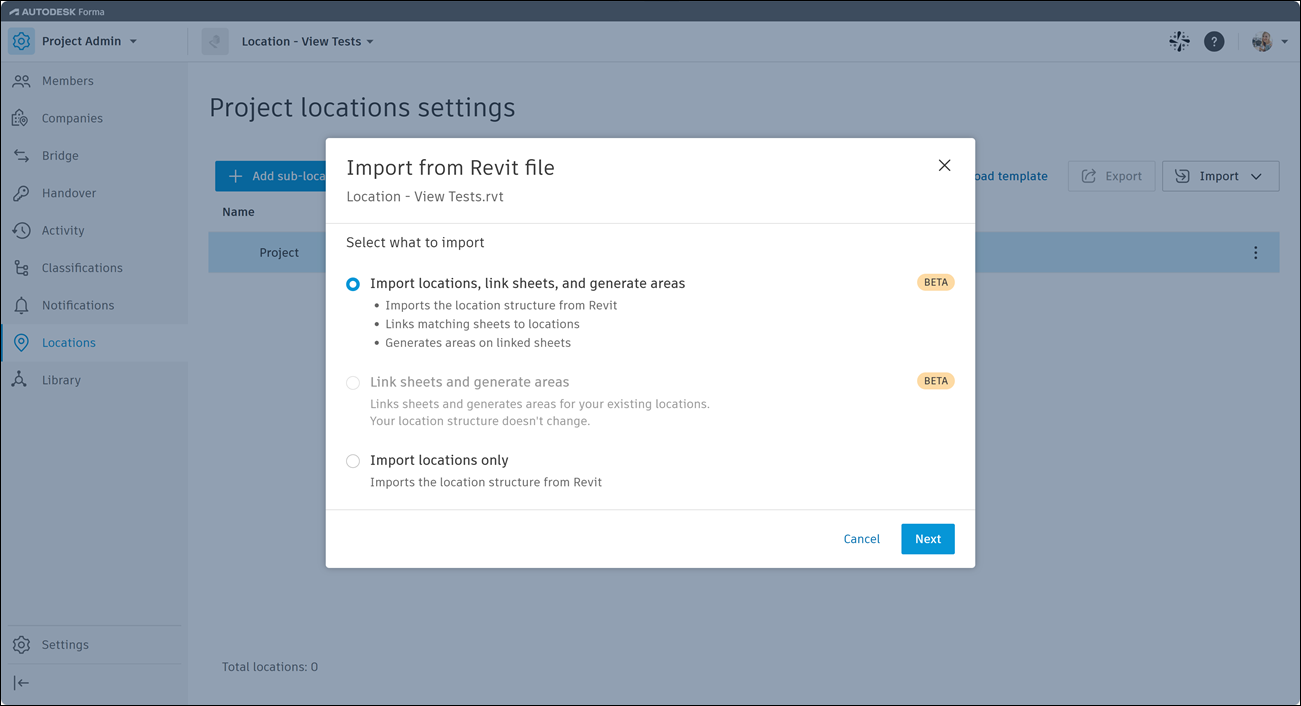
After you select a Revit file, you choose what to import. Each option creates different items in your project:
| Option | Creates | Changes existing locations |
|---|---|---|
| Import locations, link sheets, and generate areas (recommended) | Locations, sheet links, and location areas | Yes |
| Link sheets and generate areas | Sheet links and location areas | No |
| Import locations only | Locations | Yes |
Use Link Sheets and generate areas only when your LBS is already set up, for example after new sheets are published. If the project has no sheets, or you don't have access to Forma Build, only Import Locations only is available.

Import from Revit
To import from a Revit file:
In Project Admin, click Locations in the left navigation.
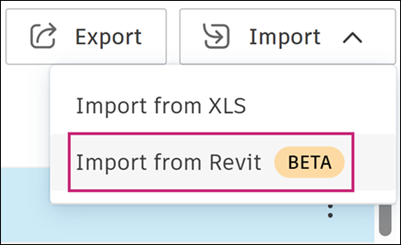
In the top right of the page, click Import > Import from Revit.
Select the Revit file, then click Next.
Note: If the file contains more than one phase, select the phase to import from. The phase determines which rooms the import uses.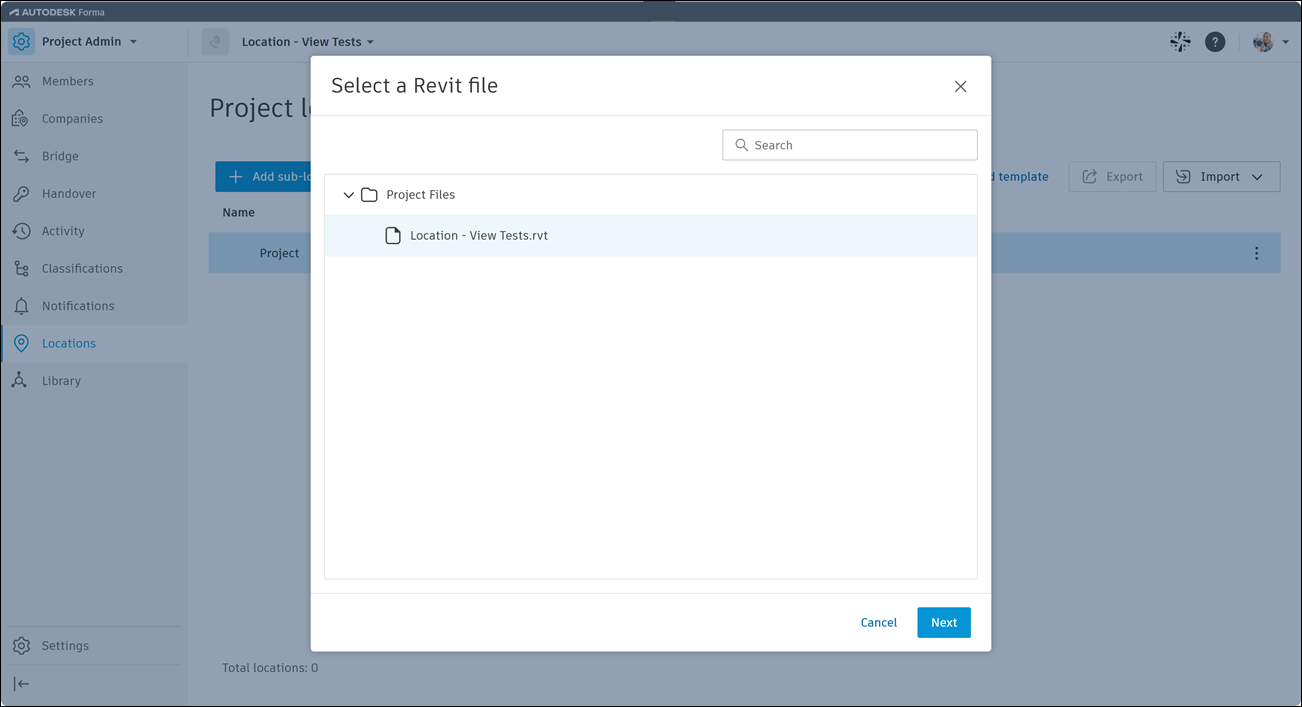
In the Import from Revit modal, select the preffered import option, then click Next.
If the option includes sheets, click Add sheets. Select the sheets to include, then click Add sheet.
Note: Only the sheets you select are linked to locations and get location areas.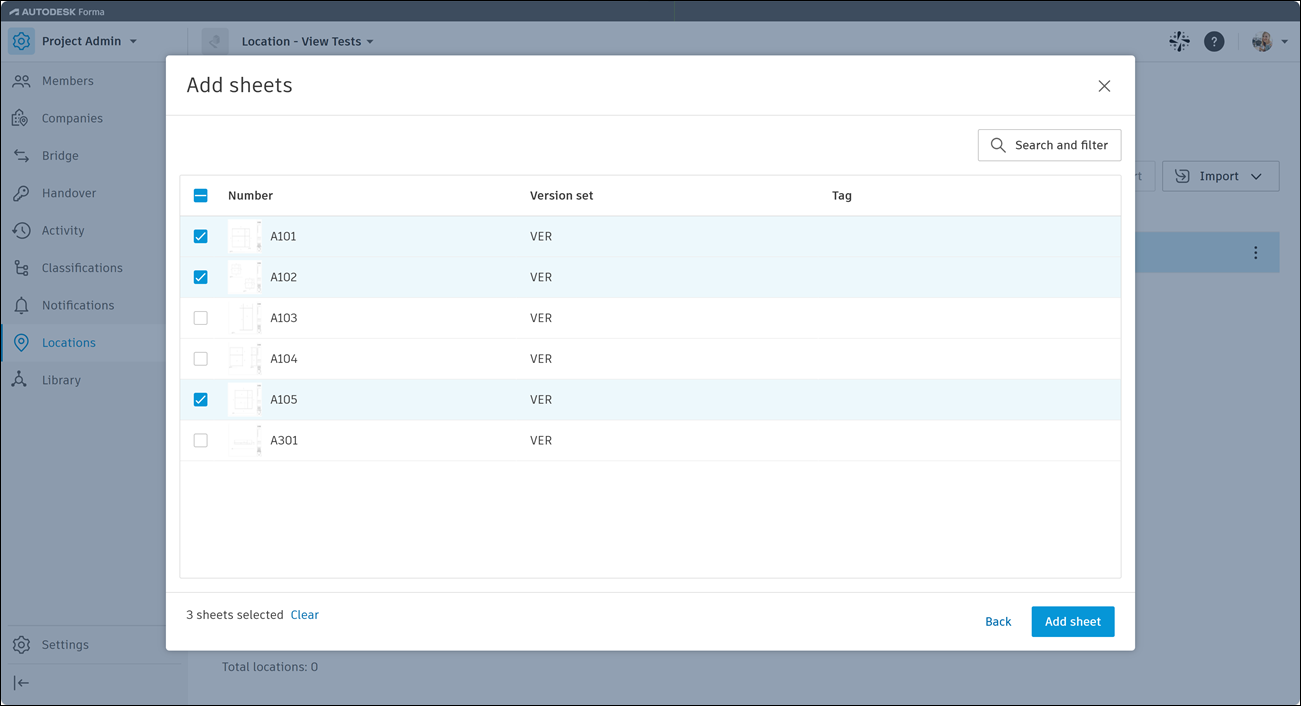
Review the preview of your LBS, then click Import.
The preview shows the locations that the import adds, modifies, or deletes. Sheet links and location areas appear in the results after the import finishes.
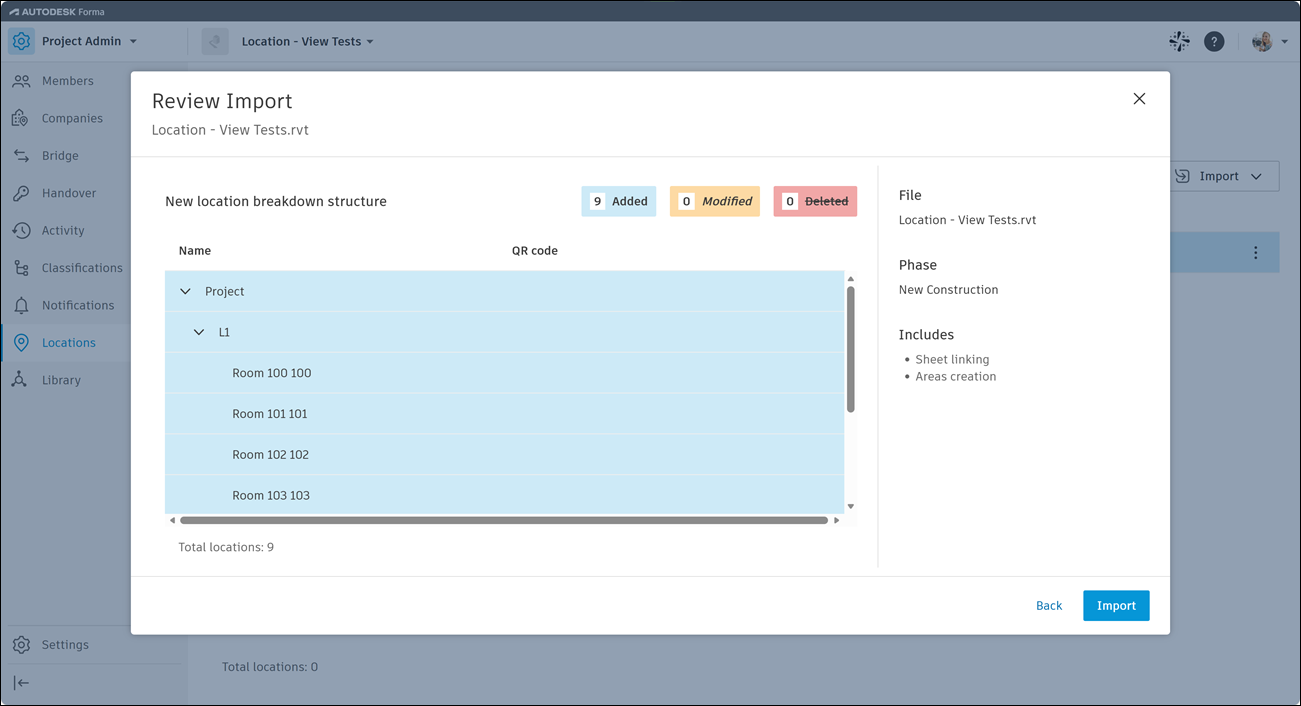
If you import to the root node, click Continue to confirm that the import replaces your existing LBS.
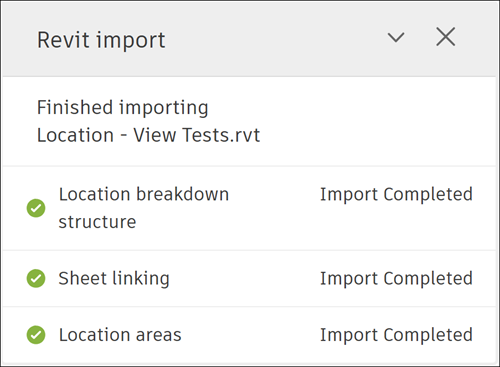
The Revit import panel in the botto right shows the status of each stage. Keep the browser window open until the import finishes.
On success, you should see a page similar to the following one:
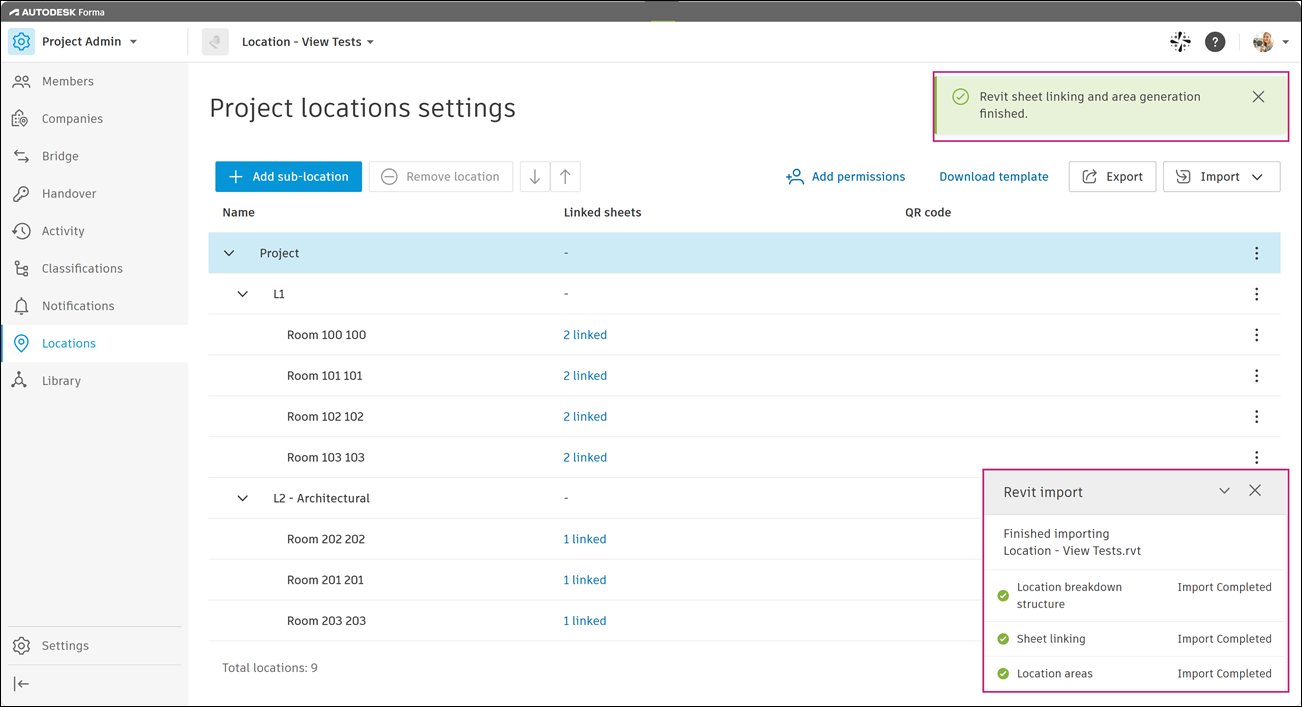
Imported locations keep the same order as in the Revit file.
Import to a Location Node
To add or update one branch of your LBS, import to a location node instead of the root node. Locations and location areas outside that node don't change.
Click the More menu
 next to the node.
Click Import from Revit.
Complete the steps in Import from Revit, starting with step 3.
With Link Sheets and generate Areas only, the node and its sub-locations stay the same. The import adds only sheet links and location areas within that node.
Review Import Results
Each stage either completes fully or makes no changes. If a later stage fails, the stages that already completed stay in place.
| Failed stage | What stays in place | What to do |
|---|---|---|
| Sheet linking | Your LBS, including any imported locations. No sheets are linked, and no location areas are created. | Check that the selected sheets can be matched to the sheet/view data in the selected Revit file, then click Retry. You can also link sheets manually. |
| Location areas | Your LBS and all sheet links. No location areas are created. | Click Retry. You can also generate areas with AI or draw them manually. |
If any selected sheet can’t be matched or linked, sheet linking fails and none of the sheet links are applied.
If the rooms in the Revit file have no boundaries to draw, the import skips location areas. Locations and sheet links still complete.
After the import, check the generated location areas on your sheets. To change them, see Link Sheets and Add Areas to Locations. For sheets that the Revit file doesn't cover, such as sheets added later, you can generate areas with AI.