Share Files and Folders with Anyone with the Link
You can share files and folders with anyone in the public. Anyone receiving the link may access, download, or further share the content in the link.
In this article, you'll learn how to:
- Enable Public Sharing
- Share Files and Folders with Anyone with the Link
- Delete Public Links to Files and Folders
Enable Public Sharing
In order to share files and folders with anyone, a project administrator must enable public sharing in the Files tool.
Enabling public sharing will let project members share:
- Sheets if they have View + Export permission or above
- Files if they have View + Download permission or above
To enable project sharing:
Click Files from the left navigation to open the Files tool.
On the right of the screen, click the Settings dropdown and select Advanced.
Note: For more information, see Advanced File Settings.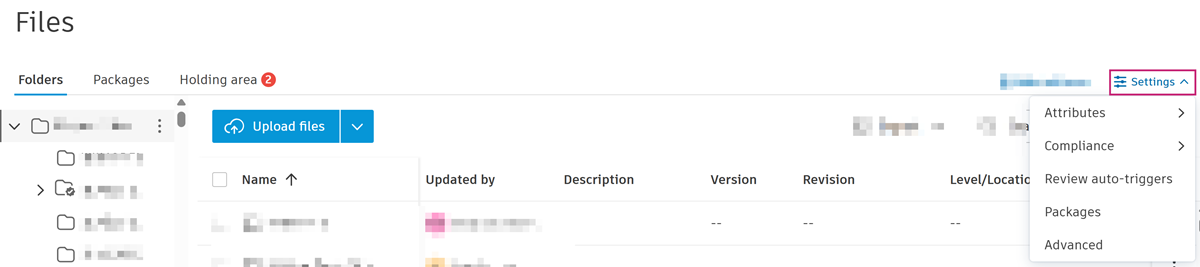
Click the Public links to sheets and files toggle to turn On public sharing.
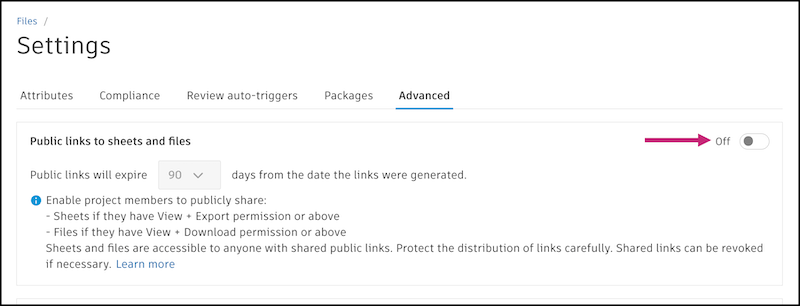
Confirm the action by clicking Turn on in the dialog. Enabling or disabling public sharing affects both the Files and Sheets tools.
In the dropdown menu after Public links will expire, select how long you want the links to be valid up to 365 days.
Once public sharing is enabled, members with View + Download permissions can generate links to share files and folders with anyone.
Sheets and files shared with public links are accessible to anyone. Protect the distribution of links carefully. Shared links can be revoked if necessary.
Share Files and Folders with Anyone with the Link
In Files, select the files or folders you want to share.
- For a single file or folder, select the checkbox next to the file or folder. Click the More menu
 next to the item and select Share.
 - For multiple files and folders, select the checkboxes next to the files or folders. Click
 in the header.
- For a single file or folder, select the checkbox next to the file or folder. Click the More menu
Select Anyone with the link.
Click the Link expires field to specify the date when the links will expire.
(For files only) Select one of the following version options:
- Always the latest current version
- Only the current version fixed at time of sharing
Choose one of these methods to share:
Email: Send an email with a links to the selected files or folders.
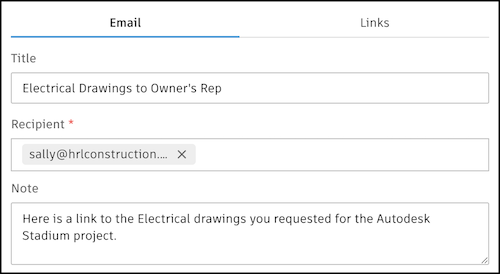
- Click the Email tab.
- (Optional) Enter a title. This title will be attached to this sharing event, which you can track in the Bridge tool. Learn more about tracking outgoing items in the Bridge tool.
- Enter emails for the recipients or paste the emails separated by commas.
- (Optional) Add a note to include in the email.
- Click Send.
Links: Copy the links to your clipboard to paste wherever you want to share them.
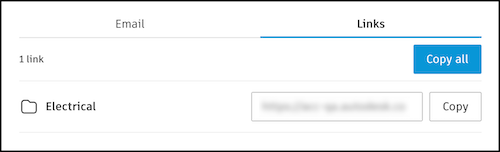
- Click the Links tab.
- Click Copy next to each file or folder you want the link for or click Copy all.
- Click Close.
You can now paste the links from your clipboard to share with other project members.
When the recipient opens a shared link, they'll access a landing page where they can download individual files or Download all files.

Delete Public Links to Files and Folders
You can delete the links to folders and files you've previously shared publicly.
Select the checkboxes of the previously shared files and folders.
Click the More menu
 above the list of files and select Delete shared links.
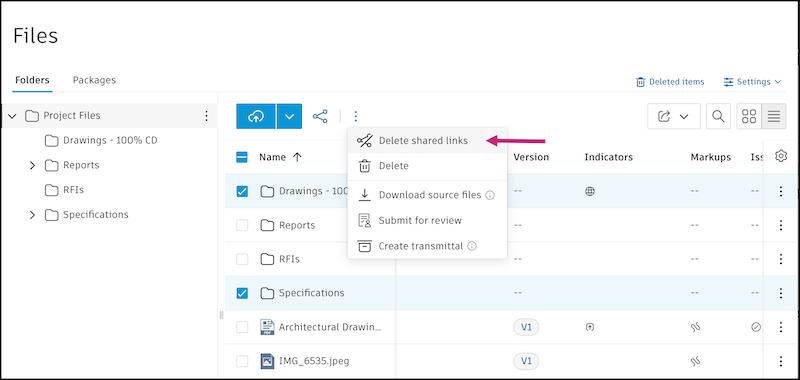
Click Delete to confirm.