Configure Menus
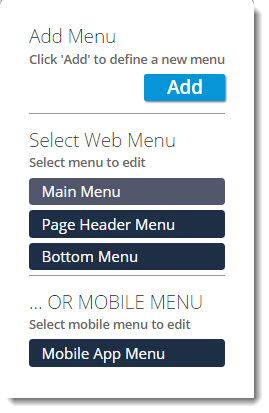
Configure the Main Menu, the Page Header Menu, the Bottom Menu, and the Mobile App Menu on the Configure > Menu page.

The Configure Menu page shows a preview of how the selected menu appears when rendered, as well as a table of all the items (and, for the Main Menu, groups of items) contained in the selected menu.
Edit a Menu
Add, remove, and reorder items and groups. Note: Groups are available on the Main Menu.
- From the Dashboard, select Design Mode.
- Select Configure > Menu from the Navigation menu.
- On the Account Menu page, select the menu that you want to modify.
- Click Edit
 to change the label of a link or the underlying page to which a link redirects a user.
 - Click Delete
 to remove the menu item (or group) in that row.
Note: If a group in the Main Menu is deleted, all items contained in that group are deleted as well.
 - Reorder menu items and groups by dragging and dropping the pallet
 for that item.
Add a New Item to a Menu
The System admin can create a new entry in any of the menus by selecting Add Item.
- From the Dashboard, select Design Mode.
- Select Configure > Menu from the Navigation menu.
- On the Account Menu page, go to the menu that you want to modify and click Add Item.
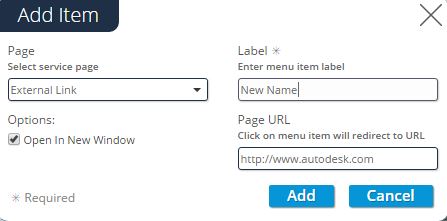
- On the Add dialog, select the Service Page for the new item. Note: Use the External Link option for links outside of Fusion Connect. If you are using an external link, select the Open in New Window check box if you want the target page displayed in a new window.

If you choose a service page that contains one or more destinations, such as reports, you can choose to link to all reports or just a specific report.
- Enter the name that you want displayed on the menu in the label field.
- Enter the path for where you want the menu item to take the user in the Page URL field.
- Click Add to save the new item to the menu.
- Drag and drop the new item to reorder the item in the menu.
Add a New Group to a Menu
Account supervisors can create pull-down menus of items by creating a group. Groups can only be added to the Main Menu.
- From the Dashboard, select Design Mode.
- Select Configure Menu from the Navigation menu.
- On the Account Menu page, select Main Menu and click Add Group.

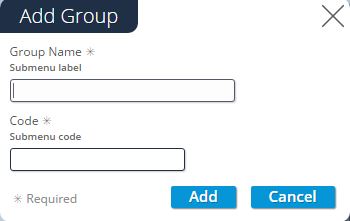
- Enter a new name for the submenu you want to create in the Group Name field.
- Enter a code for the new submenu group in the Code field.
- Click Add.
- Once the group is created, drag and drop the menu items into the group. Note: If only one item is added to the group, the Group will automatically convert to a single menu item.