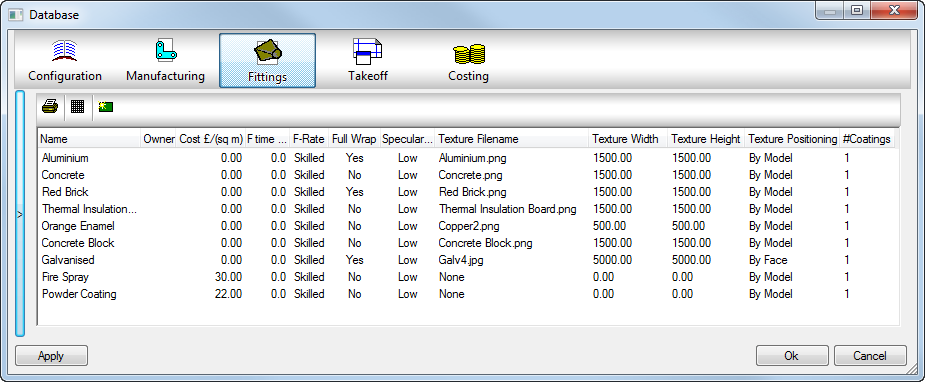
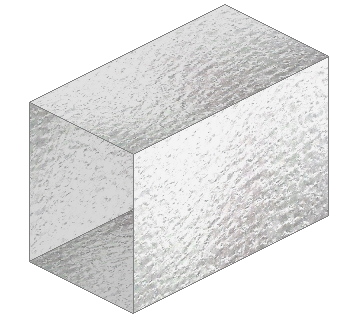
A facing is the name given to the treatment of the face of an item. Facings may include Galvanising, Powder Coating, Paint, Hot Dipping etc. It is also used to apply a texture to the fitting. These textures can be applied in bitmap (BMP), PNG, and JPEG image formats.
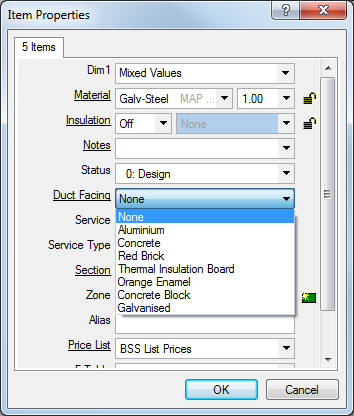
Facings can be applied to items during takeoff using the Duct Facing option drop-down list. If this option does not display on the dialog, follow the instructions below on how to add this field to the dialog.
Facings can also be added after items have been entered into the job. This is achieved using the Multiple Select option. You can change the Duct Facing entry from None to a pre-defined facing, or alternatively change the facing to another existing type.
To add Facings to items currently in the job, select the items required in Job Contents, then right-click
 Properties. Change the value of Mixed/None to the Duct Facing field value required.
If no field for Duct Facing exists in this dialog, then the option needs to be added by navigating to the Takeoff database
 Item Entry
 Multiple Item Properties.
Creating the Facing
To create a new facing:
- Click
 to create a new facing, or edit an existing facing by double-clicking on the name of the facing.
The Facing dialog displays.
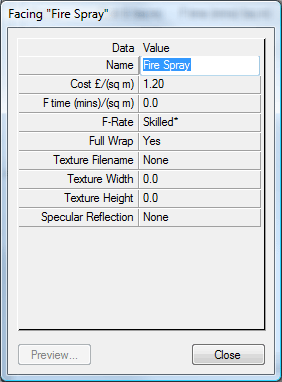
The Facing dialog allows the user to add costs and textures which can be used in Estimating or in the 3D Viewer for visualisation.
- Configure the options on the Facing dialog as required.
The following fields are available:
- Name: This is the name that displays when selecting a Facing at Takeoff.
-
Cost£/(sq m): This is the price per square meter that will be used in calculating the cost of applying a facing to the Item.
-
F time (mins)/(sq m): This is the amount of time in minutes that it would take to fabricate one square meter of the Facing.
-
Full Wrap: This is only used in the manufacture of Silencers.
-
Texture Filename: This gives the user the options to select the Texture file they will apply to the item. The options are:
- None
- Custom: When a Texture has been selected this will be replaced by the Texture Filename.
-
Browse: Displays dialog to allow the user to select a file for use as a Texture. The default Autodesk Fabrication product installation comes with a number of selections in the Shared/TEXTURES folder.
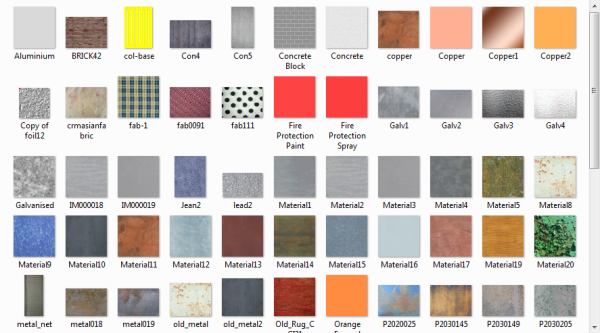
- Texture Width: This is the width, in Pixels, of how you require the image selected to be displayed.
- Texture Height: This is the height, in Pixels, of how you require the image selected to be displayed.
-
Specular Reflection: Specular reflection is the mirror-like reflection of light of off the Item Texture. Turning this on will make the pattern "shiny".
Adding the Duct Facing field to the view
To add the Duct Facing field to the various views:
- For Quick Takeoff, click View
 Customize
 and then select the relevant tabs.
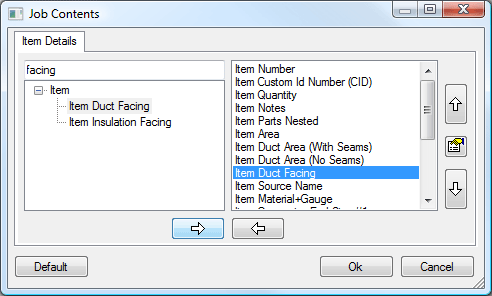
- For Product listed items click the Library Information tab, and add Item Duct Facing to the right pane, as shown below.
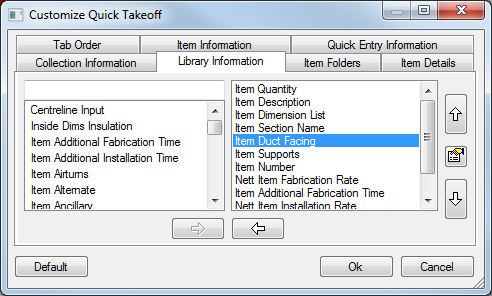
- For Template items, such as Rectangular, use the Quick Entry Information tab and add Item Duct Facing to the right pane.
- Select OK to confirm.
Note: It is best practice to add to all the view types for consistency across Round product listed (bought out) and Rectangular.
- For Item Folder Takeoff, click Takeoff
 Customize within the Takeoff window.
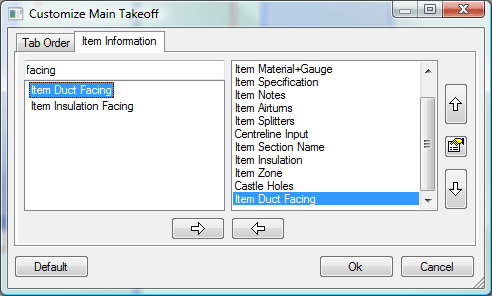
- Click the Item Information tab, add Item Duct Facing to the right pane as shown below, and click OK.
- For CAD Takeoff, do the same.
- A facing can also be shown on reports and also viewed in Job Contents by clicking View
 Customize within the Job Contents window. This allows selection of extra fields wanting to be shown in the column data.
