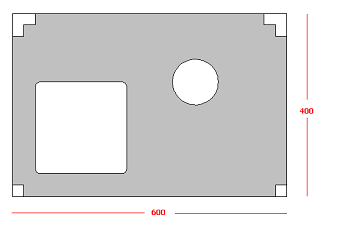
fixed size sheared blanks that only requires internal holes and notches cutting out. Example : 600 x 400 SS-306 blank with notches and holes.
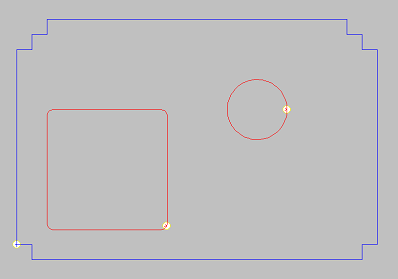
- First, draw the part as required using Opus, and verify that it displays correctly in Profiler.
Alternatively, instead of drawing the part fom scratch, you may import the part as a DXF file.
- Save the part in a folder.
The next step is to assign a Null Tool to the elements that do not require cutting, and then write the NC from Profiler. Note that there is no requirement to place the part in a job, or to nest from a job.
- From the Profile menu, click Tools.
- Click on each of the 4 main lines of the outside of the part.
These 4 will be highlighted (dotted yellow).
- When all are selected, right-click and the Tool Use dialog displays.
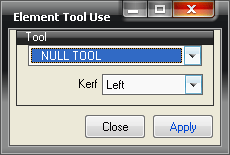
- In the Tool drop-down, change the tool to Null Tool.
- Apply and Close.
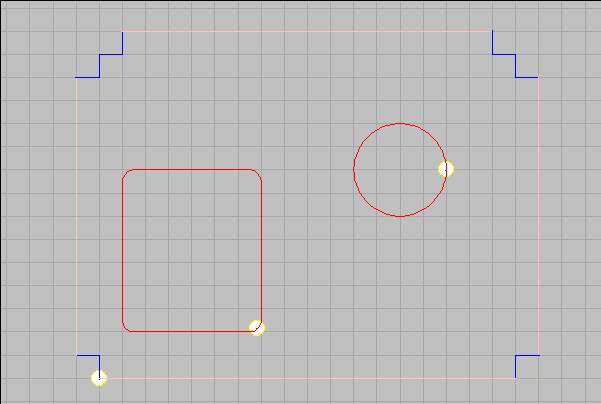
The 4 lines will now display in pink, showing that these have been assigned the Null Tool. These lines will not be cut, but are used as references for the tool movements.
Note: The lead-ins and lead-outs are outside of the part (the default lead-in's are 4mm).After mounting the plate, you may need to place some scrap up to the blank where the lead-ins start. You could delete the lead-ins; however, the torch may not start on the very edge of the part. Also, the start usually gives an initial bad cut, which is why lead-ins are used.
- From the Profile menu, click Write NC.
- Enter a number for the job.
-
This can then be downloaded at any time from your Plasma Controller.
- From the Utilities menu, select View NC.
- Select the NC Number saved in the previous step.
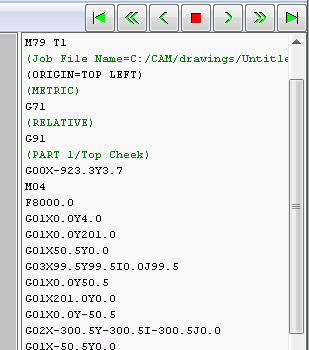
- Click on the green arrows to examine the cuts that will be made.
-
Note: Place the left bottom corner of the blank plate exactly under the torch. This could be anywhere on the bed of the cutter.
- Make sure the blank is parallel to the bed.
- Mount some scrap around the lead-ins.