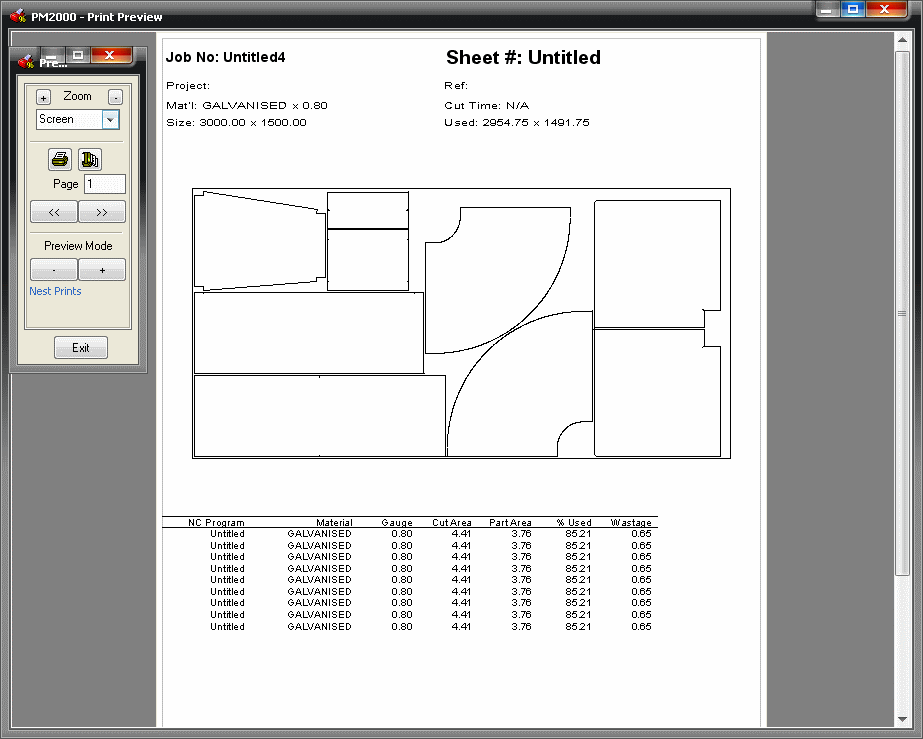
The following example demonstrates how it is possible to create a customised report. In this case a Wastage report will be created.
- Create and nest a small job, ensuring that the job is small enough to fit on one sheet.
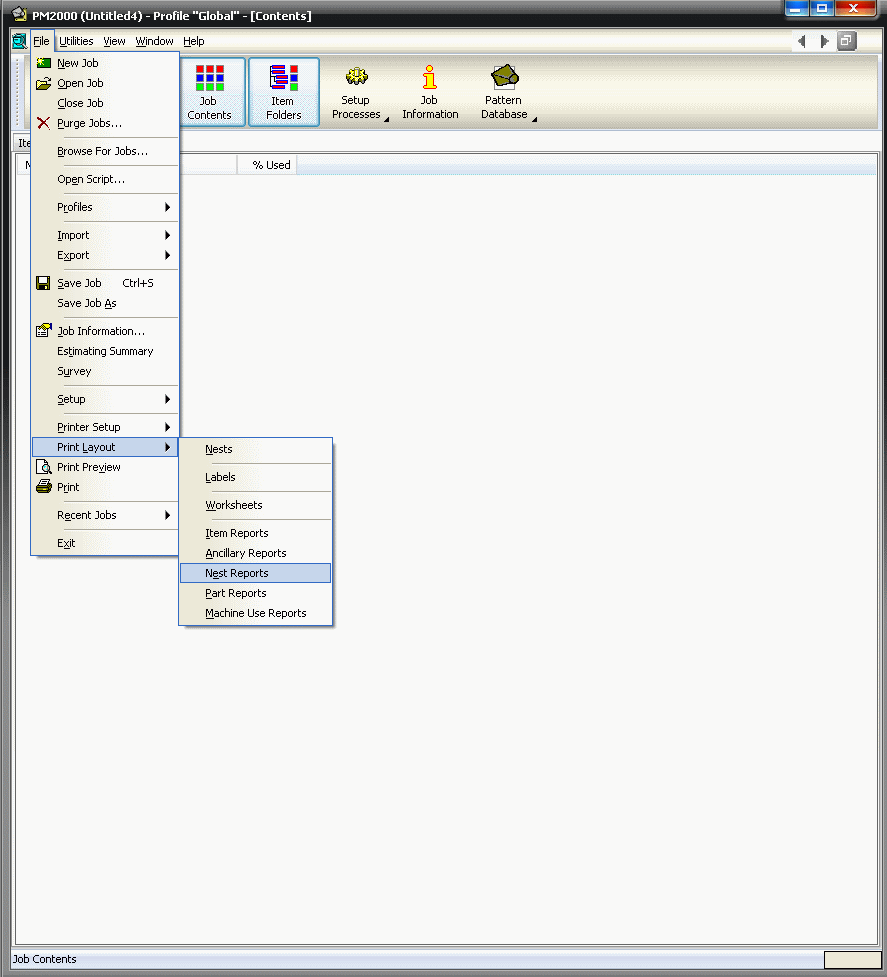
- Click File
 Print Layout
 Nest Reports.
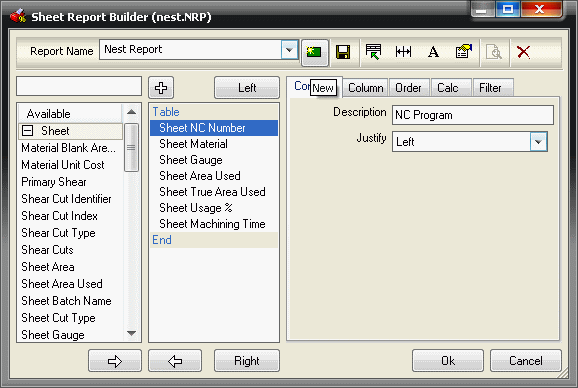
The Sheet Report Builder dialog displays.
- In the Report Name field drop-down menu select Nest Report.
-
Click New
 and the following prompt displays.
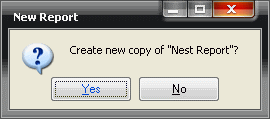
- Click No.
A new Untitled report will now be visible.
- Change the title from Untitled to Wastage Report.
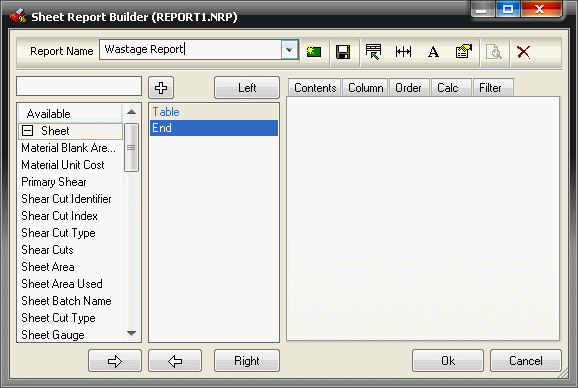
It is now possible to select the print objects to be included on the report.
-
Choose fields from the column on the left hand side and click the right-pointing arrow to include them in the report.
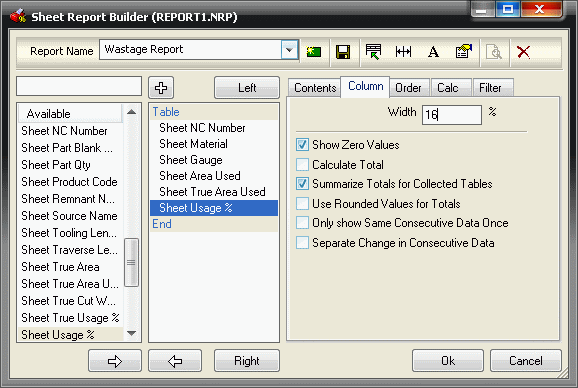
The fields chosen in this example are all from the 'sheet' section - Sheet NC Number,Sheet Material,Sheet Gauge, Sheet Area Used, Sheet True Area Used, and Sheet Usage % as in the image below.
Adjust the column widths in the Column tab to an appropriate percentage (i.e. a value large enough to print the data without any wrap-round).
-
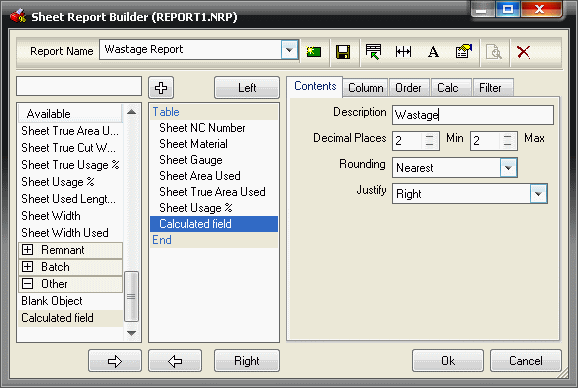
Choose the last field on the left hand pane, Calculated Field, click the left arrow to add it to the report.
-
With Calculated Field still highlighted in the report contents pane, click on the Contents tab and in the Description field type Wastage.
-
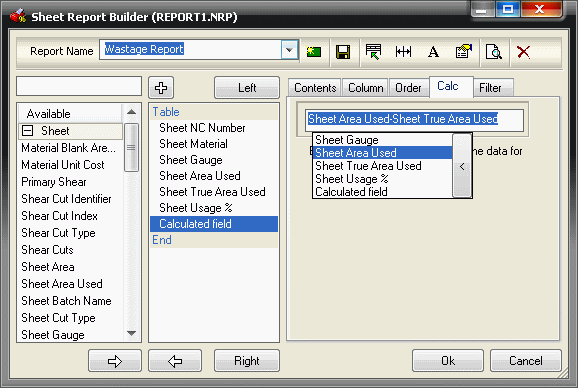
Click on the Calc tab, and in the empty text field create the formula [Sheet Area Used]-[Sheet True Area Used].
-
Click Ok to accept these changes.
It is now possible to print or print preview the new report.
-
Click File
 Print Preview.
-
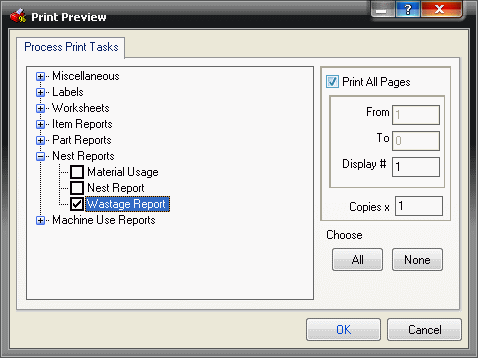
In the Process Print Tasks, click the Wastage Report box and click OK.
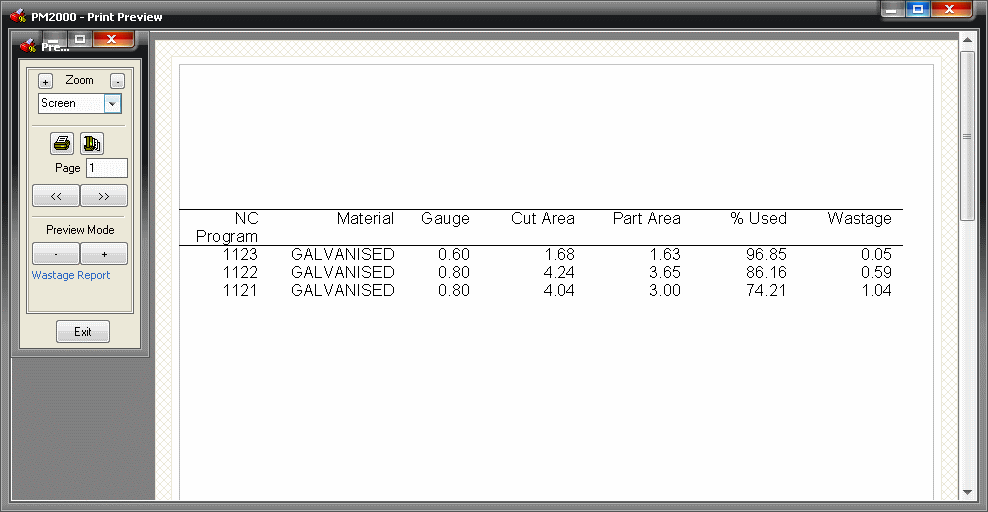
The report that is produced will look similar to the example below:
It is also possible to print this report with every nest print.
-
Click File
 Print Layout
 Part Reports and follow all of the steps above to create exactly the same report.
-
Then Click
 File
File
 Print Layout
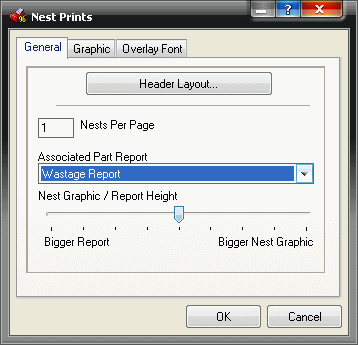
 Nests and the following dialog is displayed .
-
Click on the General tab, and from the drop-down menu in the Associated Part Report field select the report that is to be attached, in this case Wastage.
-
Click File
 Print Preview and select Nest Print and the Nest prints can be viewed with the wastage report attached as below.
