The Fillet and Chamfer commands are similar in their application. The Chamfer options are described below.
The Chamfer option can be used in two different ways. The two options available from the Modify menu and icon are:
- Chamfer Distance + Distance
- Chamfer Distance + Angle
These are explained below.
Chamfer Distance + Distance (Shortcut: CHAMFER)
This option allows the user to create a chamfered corner where the two lines of the junction meet. This option creates the chamfer along 2 specified dimensions and will trim the corner accordingly if required.
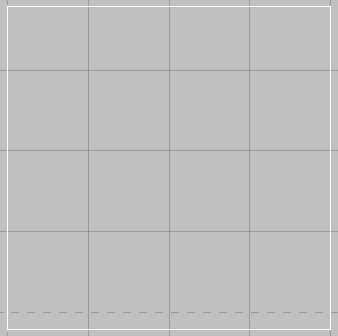
- In Opus, draw a Rectangle or Square similar to the one shown below.
- From the menus, select Modify
 Chamfer
Distance + Distance, or select the Chamfer - Distance + Distance Icon
Chamfer
Distance + Distance, or select the Chamfer - Distance + Distance Icon
 from the toolbar, or type CHAMFER in the program.
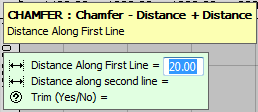
- A prompt requesting the Distance Along the First Line, Distance Along the Second Line, and whether the corner is to be Trimmed or not is displayed. Enter the information required, and press the Enter key each time.
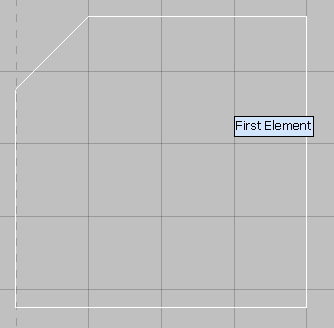
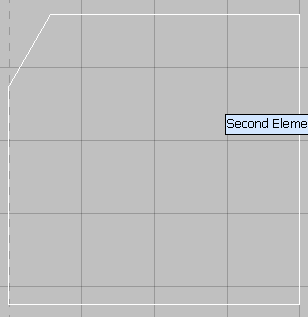
- The prompt changes and asks to select the First Element on the junction.

- Once selected, the prompt asks for the Second Element on the junction.

- The chamfer is created with the relevant sizes trimmed from each element at the junction.
- This command is still active, and repeats itself, prompting for the First Element again, until the user right-clicks the mouse, or presses the Escape key on the keyboard.
Note: If different sizes are required on different junctions, it is necessary to perform this operation separately for each of the different chamfers.
Chamfer Distance + Angle (CHAMFERANGLE)
This option is similar to the Chamfer in that it will trim back the corner junction a specified distance. The difference between this command and the Chamfer Distance + Distance command is that this command only requires one distance, and creates the chamfer at the specified angle.
- In Opus, draw a square or rectangle similar to the one below.
- From the menus, select Modify
Chamfer
Distance + Angle or select the Chamfer- Distance + Angle Icon
 or type CHAMFERANGLE in the program.
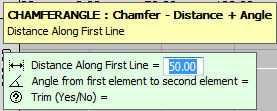
- The prompt displays asking to select the Distance Along the First Line, the Angle from the First Element to the Second Element and whether the junction has to be trimmed or not.
- Once this information has been entered, the prompt changes and asks to select the First Element. This is the element that will get the distance applied, and from where the Angle to the Second Element will derive.

Next you are prompted to select the Second Element.

- The Chamfer is then applied to the part.
- This command is still active, and repeats itself, prompting for the First Element again, until the user right-clicks the mouse, or presses the Escape key on the keyboard.
Note: If different sizes are required on different junctions it is necessary to perform this operation separately for each of the different Chamfers.