The following example describes how to create a job and apply a customised label to it. The label will be customised to incorporate both the Fabrication product user's (your) company name, as well as the customer's (your client's) company address. The steps below describe each of the stages of job creation where relevant information must be provided so that it can be accessed during label creation.
Creating a label involved completing the following sub-tasks. Each of these is described below.
- Creating a new job, including the customer's name and address
- Entering the users company name and address
- Creating a sample job
- Creating new labels
- Printing the Labels
- Create a new job, including the customer's name and address. To do this:
- Click File
 New Job
 Blank Job and click Next.
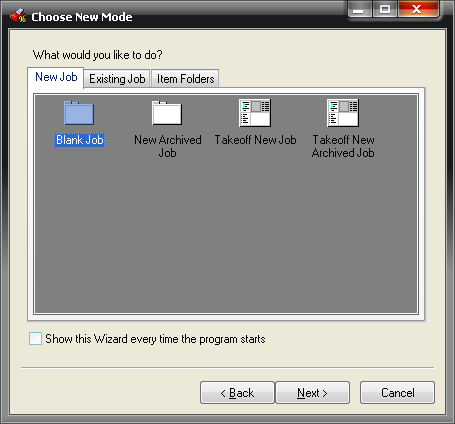
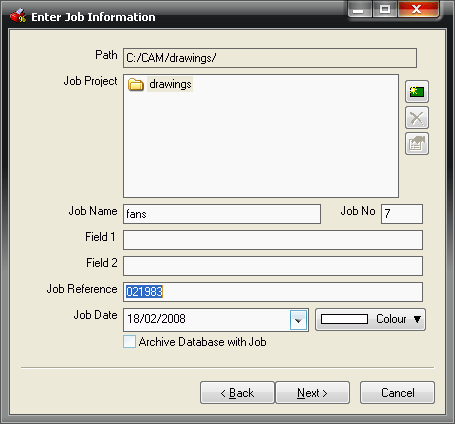
- Enter a Job Name and Job Reference, as shown below, and click Next.
- The Enter Customer Information dialog displays. On this dialog, enter the customer details as required.
Note: In order for whole address to be displayed on the label, the full address (town, region, postcode and country) should be entered in the address field, as shown in the example below. The Label Address field on the label is limited in the number of characters it can display, and only obtains data from the Address field.
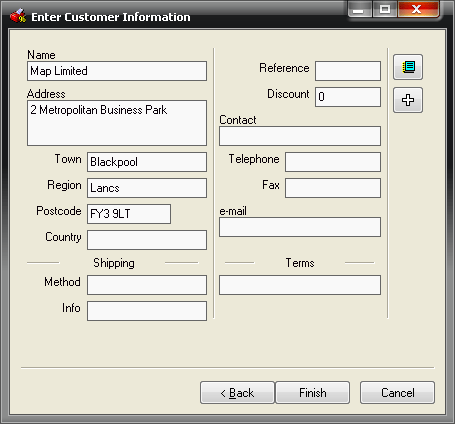
- Click Finish when all of the relevant information has been entered.
An empty Job Contents dialog displays.
- Click File
- Enter the user's company name and address.
If the user's company name is required to appear on the labels, it must be set up as follows:
- Click File
 Setup
Setup
 Main Database
 Company.
The user's company details can be entered here, similar to the customer details in the previous step.
- Click OK.
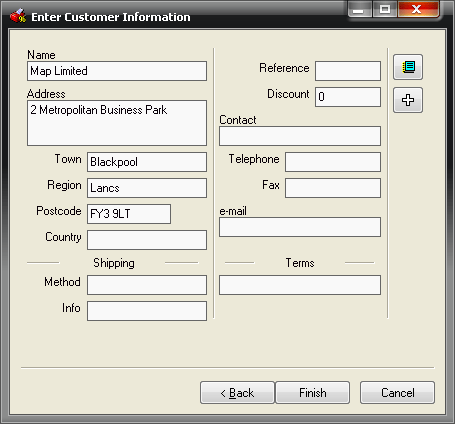 Note: If the user sets up company information in the database, then this will only be used by subsequent jobs that are created. Existing jobs (ones that have already been created) will not be affected.
- Click File
- Before labels can be produced, it is necessary to create a job for which the labels are relevant. To do this:
- Click Utilities
 Item Folders, and create a job consisting of a Square Bend, a 3-Way Tee, and a Reducing Bend, all from the Rectangular folder.
- Click Utilities
 Automatic Nesting to produce the nested sheets.
- Click Utilities
- Create new labels. To do this:
- Click File
 Print Layout
 Labels.
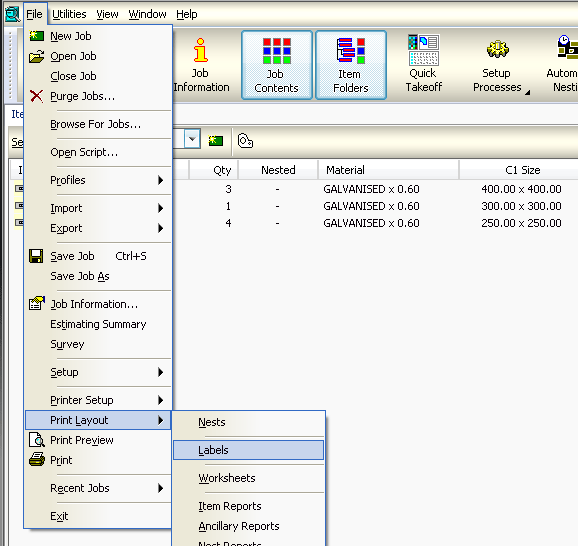
- From the drop-down menu in the Label Type field, select Part Labels.
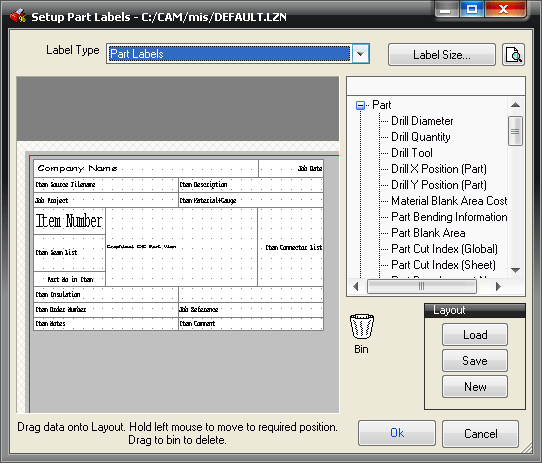
- Click on the Label Size button to view and define the layout of the labels.
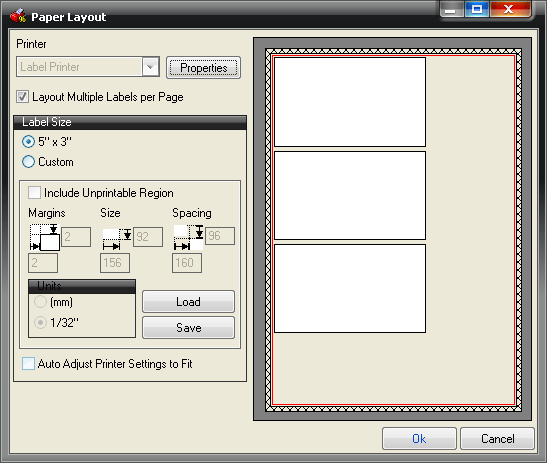
- Set the Label size, and click OK to save any changes, and return to the Setup Labels dialog.
- To create a new label layout, click the New button.
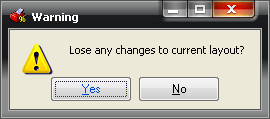
- Click Yes when the following warning dialog displays.
- A new, blank label displays. The white grid pane on the left is the label. The list in the right pane contains field options that you drag onto the grid once you have defined the layout.
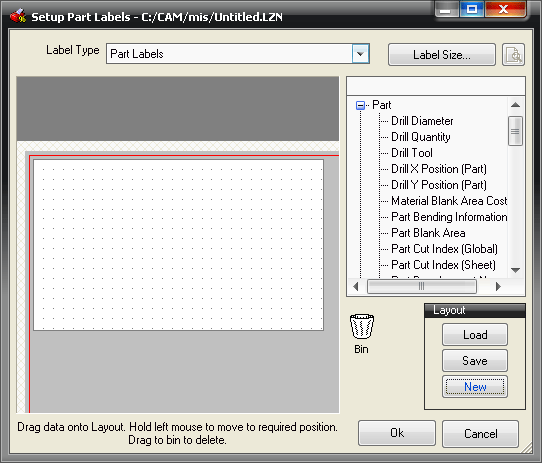
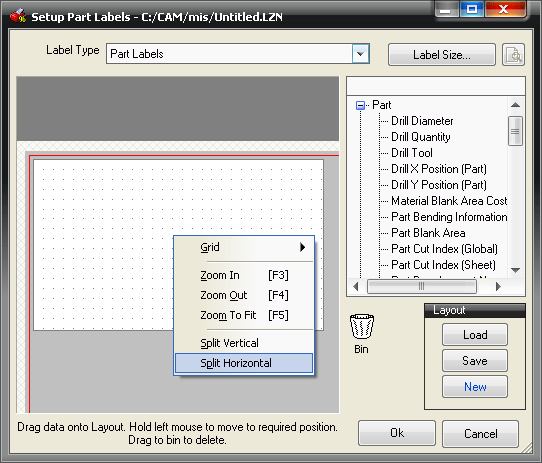
- To define the layout of the label, move the cursor over the grid and right-click the mouse button.
- On the menu that displays, click Split Horizontal, then right-click the mouse button again, but this time click Split Vertical.
- Continue with this method, adding more splits, until it looks like the image below.
Note: If a mistake is made, the lines can be deleted. Right-click in the field box and select Delete, but note that the field might not be able to be deleted as the line, if it is part of another field. For example, in the example below, the bottom horizontal line cannot be deleted without first deleting the bottom two vertical ones.
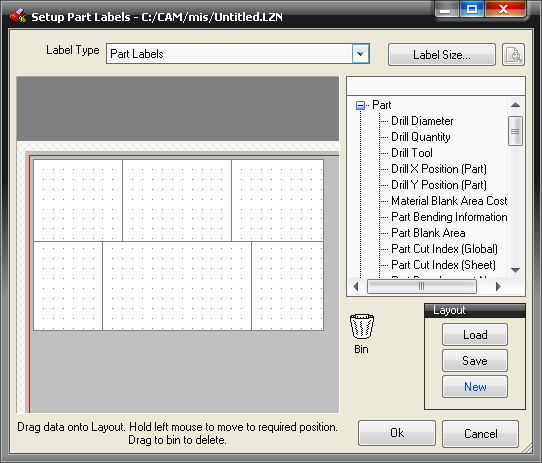
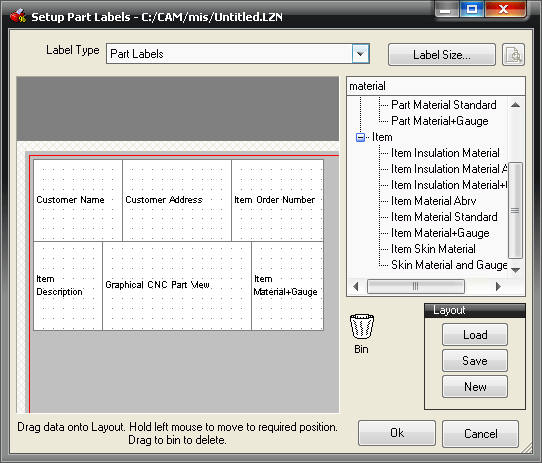
- Once the layout has been set up as above, it is now possible to add print objects to each of the cells. This can be done by dragging the required information in required area.
- Configure the label to contain the same information as the one below.
- It is now possible to set the properties of each of the print objects that have been added. Right-click on any of the print objects and select Properties.
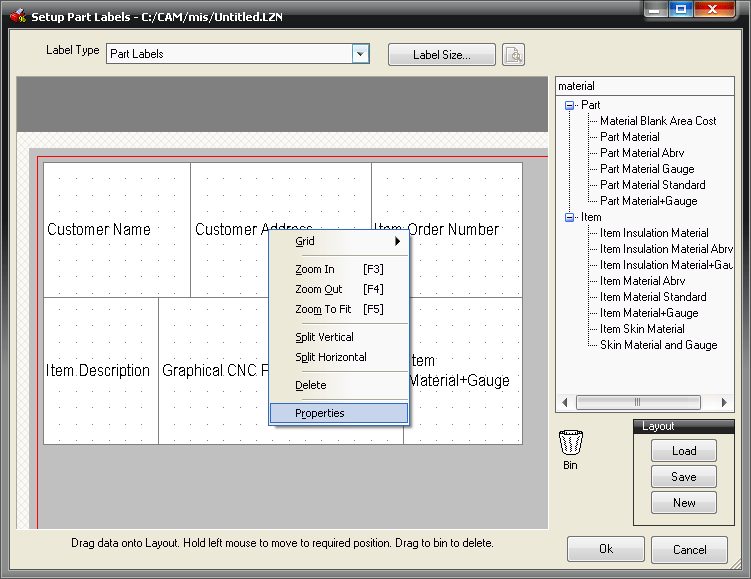
- This option allows different options to be set. Right-click on the Customer Address print object, and select Properties. Then set the General and Data tabs as shown below.
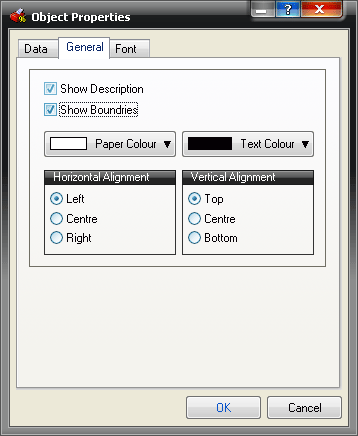
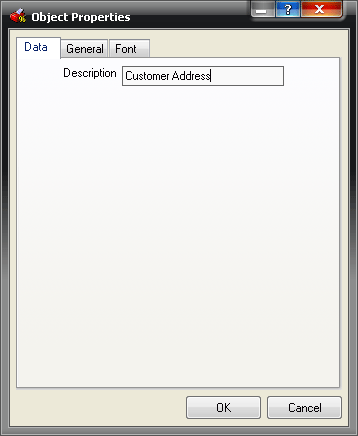
- Click OK to save changes and return to the Setup Labels dialog.
- The Item Labels can be customized in the same way as Part Labels.
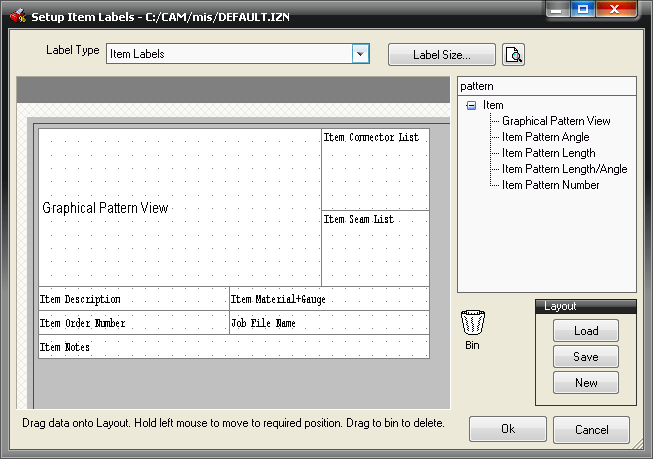
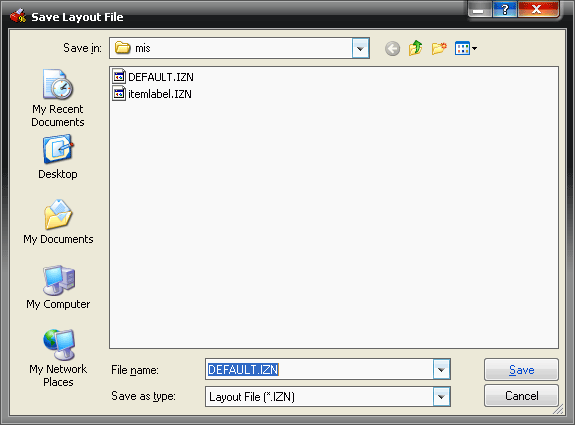
- To save the customised files, click Save, and select the name of the file you want to save as in the Save Layout File dialog.
- Click File
- Assuming that the Label printer has been set up, it is now possible to print preview or actually print the required labels. To do this:
- Click File
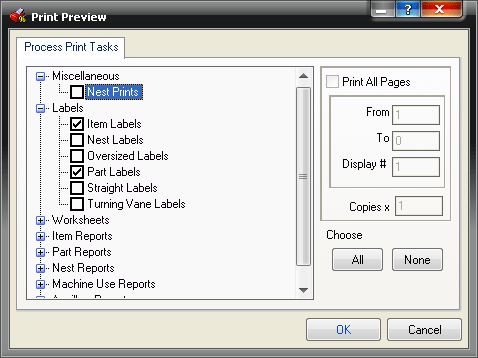
 Print Preview, and select the Part Labels and Item Labels.
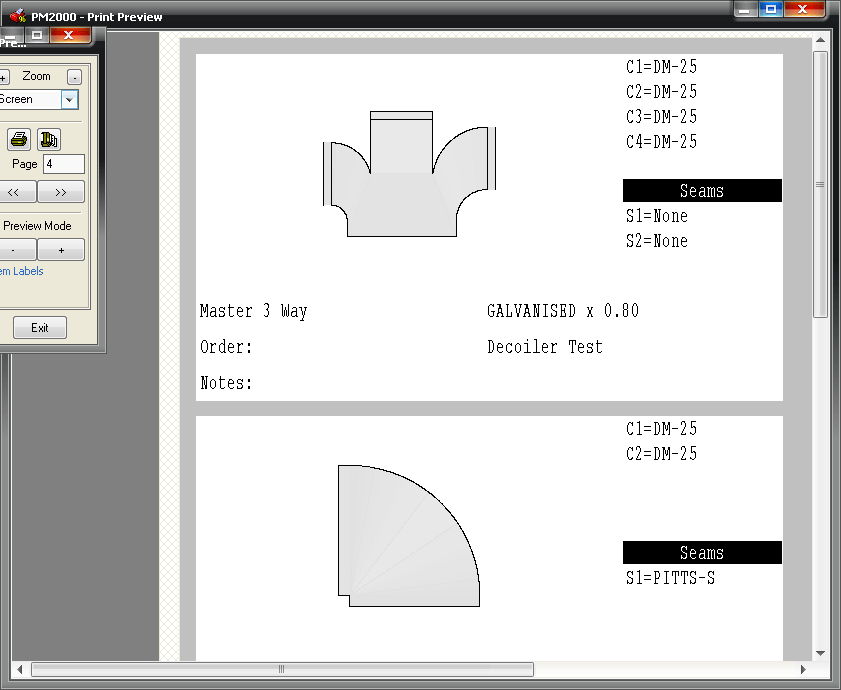
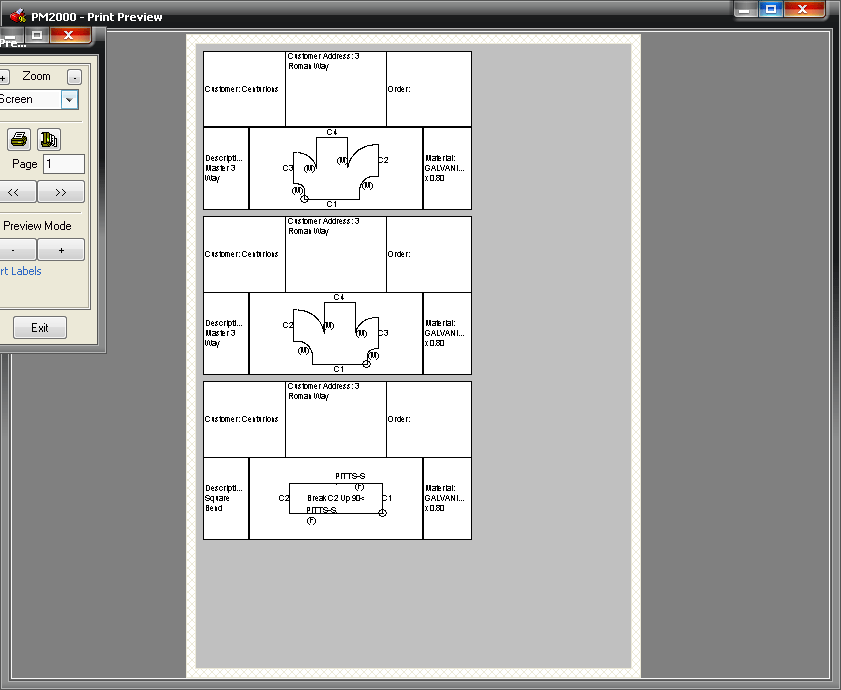
The labels are displayed in the Print Preview mode.
- Navigate through the reports by clicking the + sign under the Preview Mode heading on the Preview dialog.
- Click File