A variety of preconfigured and default label types are available for selection within the Fabrication products. Labels can be used to apply to parts/items in preparation of both manufacturing and delivery. The label types that are supplied with the Fabrication products can all be adjusted to suit your specific site and project requirements.
Designing Labels
To access all pre-configured label types, in CAMduct:
- Click File
 Print Layout
Labels.
Print Layout
Labels.
-
Click the Label Type drop-down to select the desired label category.
Each label type is specifically designed to display only relevant information. For example, Straight Labels will only display Straight items and can only be previewed if a Straight exists in the job.
- Click
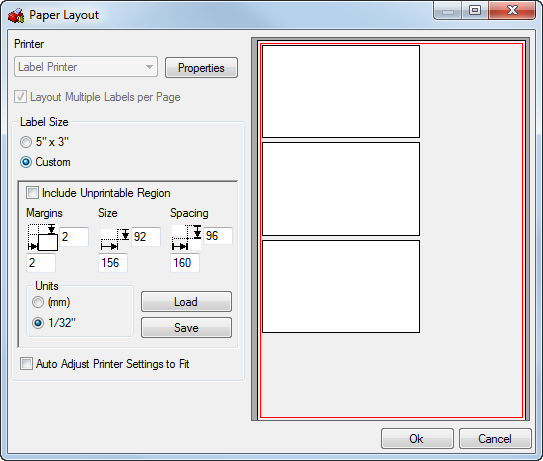
 to display the Paper Layout dialog.
-
Configure the following options:
-
5" x 3" and Custom: These options specify whether the standard 5" X 3" label size, or a custom label size, set by the user with the Margins, Size and Spacing parameters, is used. When the Custom label size is enabled, the following options become active:
- Margins:Specifies the distance from the top left corner of the paper to the first label on the horizontal and vertical axis.
- Size: Specifies the label size. Set the horizontal and vertical dimensions of the label in the chosen units.
- Spacing: Specifies the spacing of the label. This is the distance from the top left corner of one label to the top left corner of the next one.
- Units: 1/32" / (mm): Specifies inches or millimeters.
- Auto Adjust Printer Settings to Fit: Enabling this option automatically adjusts the printer properties to size the paper for a single label, and should only be used for certain combinations of printer and paper; for example, continuous label feed.
-
- Click OK to save any changes and return to the Setup Part Labels.
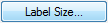
The Layout Display of the label will have changed to suit the new label size (if changes have been made). The Layout is used to determine what information to put on the label, where it is positioned and what each print object should show.
- Right-click on any of the print objects on the label layout to display the menu shown below.
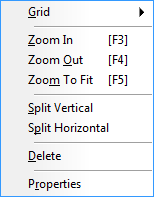
The following options are available:
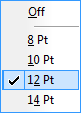
- Grid: Specifies the distance between the pips used to align the splits.
- Zoom In / Out / To Fit: Specifies a zoom factor.
- Split Vertical: This option places a vertical delimiting line onto the label so that information fields are created that Print Objects can be dragged and dropped into.
- Split Horizontal: This option places a horizontal delimiting line onto the label so that information fields are created that Print Objects can be dragged and dropped into.
- Delete: This option deletes a split line but only if it has no other lines depending on it.
-
Properties: Displays the Object Properties dialog. Below is an example of the Object Properties visible when using the Graphical CNC Part View print object.

- Grid: Specifies the distance between the pips used to align the splits.
- On the Graphic tab of the Object Properties dialog, select the information to be shown on the view.
- Click the General and Font tabs to further modify the appearance.
- Click OK to return to the Setup Part Labels dialog.
More options are available on the Setup Part Labels dialog.
-
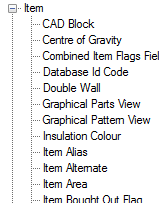
The Print Object List allows any item on this list to be dragged and dropped onto the layout display into an area defined by Horizontal and Vertical Splits.
Any print object that needs to be removed from the print layout can be dragged onto the Bin
 .
.
-
Use the Load / Save / New buttons on the label design view to transfer label designs or create new revisions of Labels designs .
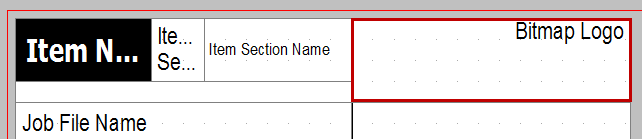
Applying a Company Logo
Customized or company logos can be added to the report or label. To do this:
- Ensure the print object Bitmap Logo is placed onto the design view, as shown below.
- Right-click on the Bitmap logo area and select Properties.

- Browse to and select the logo image file, which must be a PNG or BMP file format.
- Click OK to accept any changes made or Cancel to exit without saving.
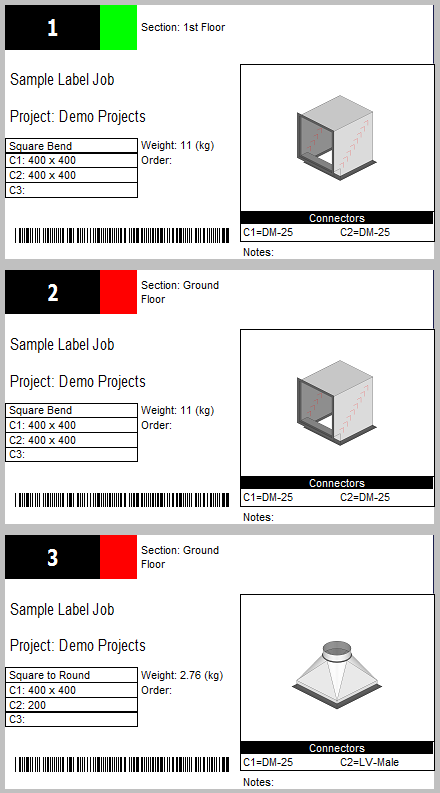
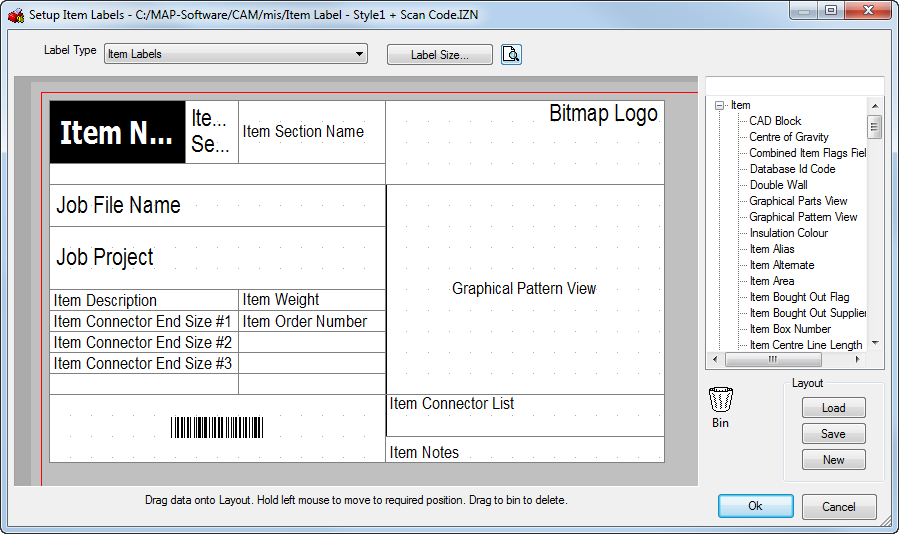
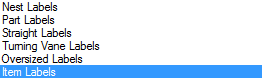
Preview of Item Labels
Tip: You can assign a section color to an Item Label for allocating to the duct item so it becomes immediately obvious which section the item belongs to. Samples of this are shown below.