This topic describes a variety of tasks that can be performed on Remnants. The following tasks are covered:
- Nesting Using Remnants
- Measure Dimensions on a Remnant
- Print Remnants in Reports
- Export Remnant Information
Nesting Using Remnants
Remnants are created from left over parts of sheets that have been created within Sheet Management. Once sheets have been set up within Sheet Management, it is possible to nest on these sheets and any remnants created from them. Is possible to nest on these in two ways. You can manually select a remnant, or you can use stored remnants automatically. Both methods are described below.
To manually select a remnant:
- To begin, create a job with a few items that are made from the same material as those set up in Sheet Management.
- Click Utilities
 Automatic Nesting and the Automatic Nesting dialog displays.
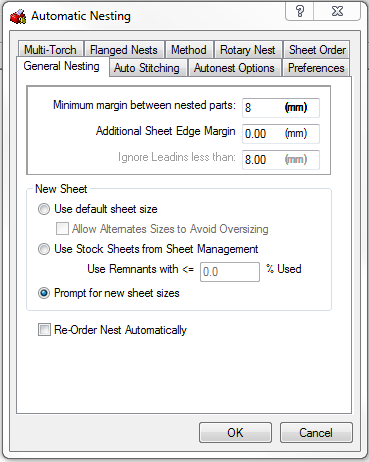
- In the New Sheet section of the dialog ensure that the Prompt for new sheet sizes option is selected, and click OK.
- The following dialog displays. Click Load Remnant.
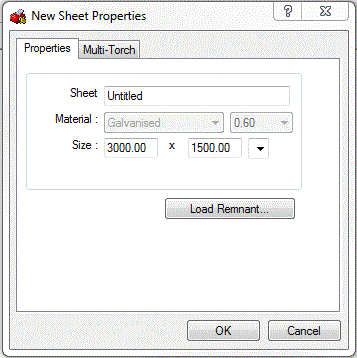
It is now possible to select a remnant from the Import Remnant Sheet dialog that displays.
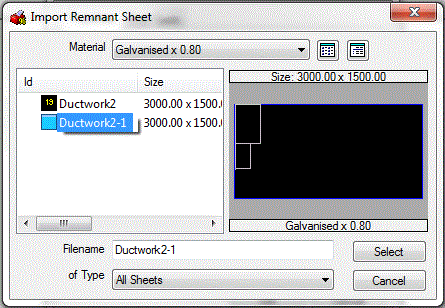
- Click on the relevant remnant, then click Select and then OK.
- The part is now nested on the remnant.
Note: When the part is nested on the remnant, and it appears in Job Contents, it will look as though it has been nested along side the parts that were burnt on the original sheet. This however is not the case. The original parts are there for reference only and will not be reproduced.
To automatically use stored remnants automatically:
- As previously described, to begin, create a job with a few items that are made from the same material as those set up in Sheet Management.
- Click Utilities
 Automatic Nesting and the Automatic Nesting dialog displays.
- Ensure that the Use Stock Sheet Sizes from Sheet Management option is selected.
This option enables the Use Remnants with <= field. This field specifies the size of remnant that will be used. In the example below, the program will only used remnants with less than 50% of the original sheet used. If the field is set to 0%, the software will just use full sheets contained within sheet management.
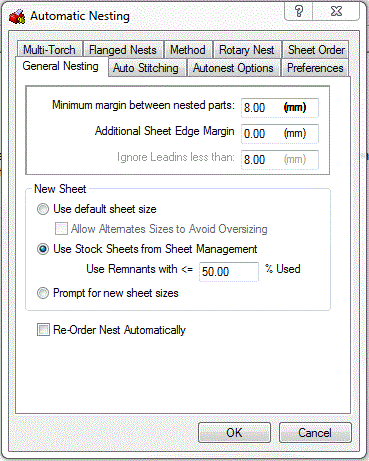
- Click OK and the parts will be nested on remnants where possible.
Measure Dimensions on a Remnant
In addition to creating, loading and saving remnants, is also possible to measure dimensions on the sheet to determine if a part will fit on the remnants. This can be done by right-clicking on the remnant, left-clicking to edit, and then selecting the Ruler tool
 on the toolbar. Left-click and drag between the points to measure. For more information, see
Edit a Remnant.
Print Remnants in Reports
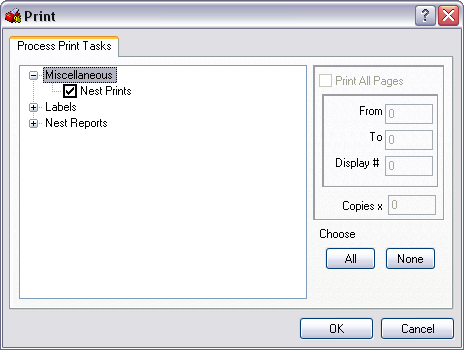
Reports can also be printed by left-clicking file and then selecting Print. Then select the reports to print.
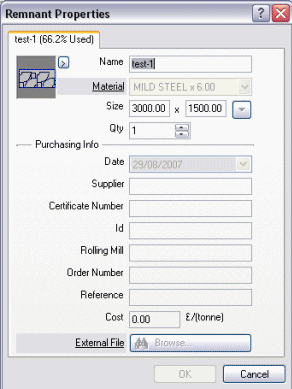
Display Remnant Properties
You can right-click on each remnant and left-click Properties to display information about each sheet.
Export Remnant Information
It is also possible to perform a Database Export of the remnants information using the Export wizard. This can then be imported into a third-party database application or a spreadsheet.