This topic describes how to use insertion points and reference points when using Opus in CAMduct.
Insertion Points
In Opus, insertion points are used to create a known point on a part which can later be used for accurate positioning. The insertion point acts as the base point when adding shapes to an existing part. However, only one insertion point can exist. Insertion points are identified by a thick cross and displays its position and name when the mouse is hovered over it.
To insert an insertion point:
- From the menu, click New
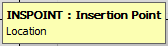
 Insertion Point, or type INSPOINT into the program.
You are prompted to specify the location of the insertion point.
- Specify the location point using the mouse, or by typing in X ,Y coordinates.
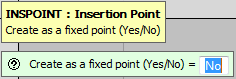
The next prompt asks if you wish to create the insertion point as a Fixed Point. If No is selected, then the point can be repositioned using the Move command. Selecting Yes places the insertion point into the drawing, but it cannot be moved after that. A moveable insertion point displays as white
 and a fixed insertion point displays as black
 .
.
- Specify Yes or No to the prompt, and press Enter.
The insertion point is placed in the drawing.
To delete an insertion point, select it and press Delete.
Reference Points
Reference points in Opus are used to create additional snap points. The are placed at and can be offset to any location. Reference points are identified by a thin white or black cross and will display the Label name and its position when hovered over with the mouse.
To insert a reference point:
- From the menu, click New
Reference Points
Create.
You are prompted to specify the location of the reference point.

- Specify the location point using the mouse, or by typing in X ,Y coordinates.
You are prompted to specify the reference point a label. This can help in identifying it at a later stage.
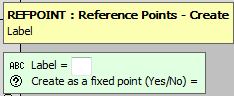
The next prompt asks if you wish to create the reference point as a Fixed Point. If No is selected, then the point can be repositioned using the Move command. Selecting Yes places the reference point into the drawing, but it cannot be moved after that. A moveable reference point displays as white, and a fixed reference point displays as black
 .
.
- Specify a label, and enter Yes or No to the prompt, andthen press Enter.
The reference point is placed in the drawing.
To delete all reference points on a drawing, select them and press Delete, or from the Modify menu, click Modify
Reference Points
Delete All.