The following steps describe how to customize the text that displays below each sheet, when displaying nested sheets on the Nests tab. This text is sometimes referred to as title text or tooltip text.
- In CAMduct, after creating nested sheets, display the nested sheets on the Nests tab.
- Right-click on a blank area in the Nests tab and click Customize from the right-click menu.
Note: Do not right-click on a nested sheet. To display the Customize option, right-click on a blank area.
The Job Contents dialog displays.
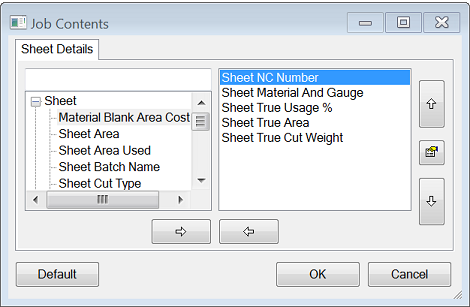
- On the Job Contents dialog, add the desired sheet details to display on this label by moving them from the left pane to the right pane.
For example, add details such as material+gauge (Sheet Material And Gauge), sheet percentage (Sheet True Usage %), weight (Sheet True Cut Weight), or other details.
- Change the order in which this information displays from left to right using the up and down arrows on the dialog.
- Click OK when finished.
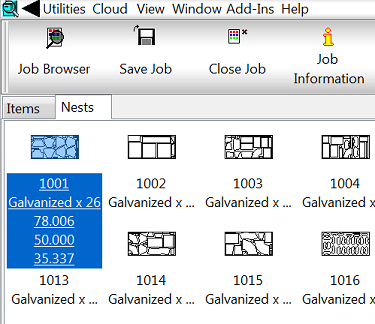
The selected details now display, in a truncated format, below each nested sheet. Hover the mouse curser over the nest to display all of the detail information (not truncated).
In the image below, the nest displaying in the upper left corner of the Nests tab, highlighted in blue, shows how the full detail information displays when mouse hovering over it.