This topic describes two different examples of ancillary kits.
Example 1 - Additional Quantity of Fixings - Example 1 shows how to introduce additional requirements of Nut, Bolt, Penny Washer to further breakdown the quantities of assigned ancillaries.
Example 2 - Sized Based Kits - Example 2 shows how you could use Ancillary Kits to introduce bolts and gasket selection for each diameter of flange, making them size dependant.
Assigning the Ancillary Kit to the connector is also covered below.
Example 1 - Additional Quantity of Fixings
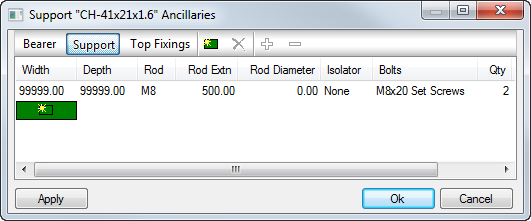
Bolt assignment can be grouped as a set quantity, as shown below, or can be broken down into individual ancillaries, and then made into an Ancillary Kit. This Slotted Channel support setup shows M8x20 Bolts being assigned as a single ancillary. The terminology used on the description of the ancillary, in this case, is to say that there is a set included. However, by using an Ancillary Kit, you can build up the makings of the set, and then use these for reporting exact quantities on the project (for example, for each Nut, Bolt and Washer quantity totals).
For creating the Ancillary Kit, you must first create the individual ancillaries needed. See the Ancillaries topic on how to create an ancillary in the main database.
Assuming that the ancillaries have all been created and individually linked to maybe a price list from a product code, we can now create the Ancillary Kit.
From Database
 Fittings
 Ancillaries
 Type of Ancillary drop-down menu, select Ancillary Kits.
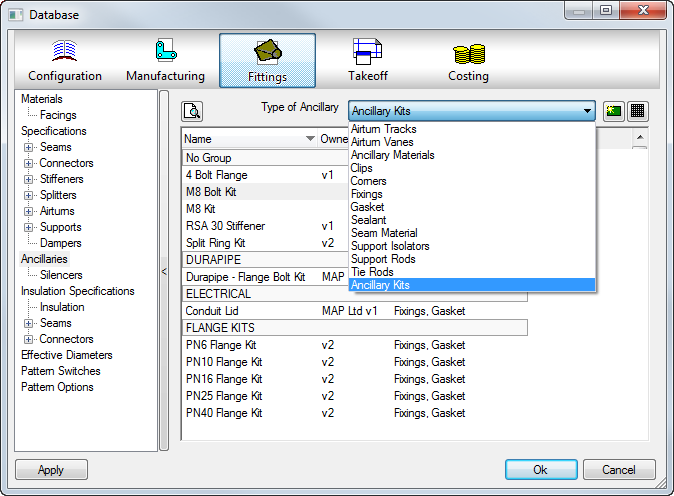
All Ancillary Kits created in the database are listed here. You can create a new ancillary kit by clicking
 , or select an existing kit in the row, and then clicking
 to be prompted to create a copy of the selected one present in the database.
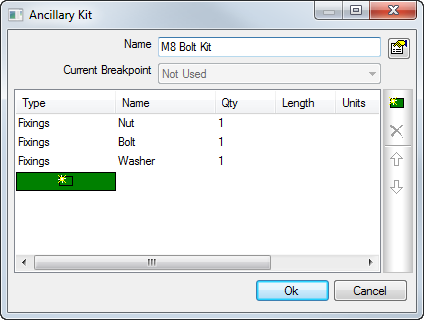
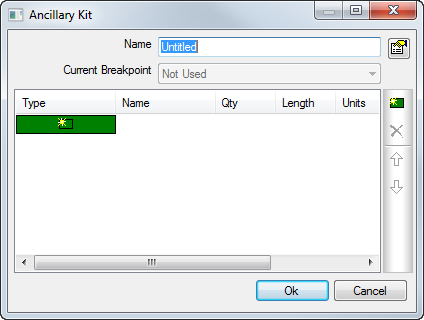
Specify an overall name of the kit, and then add for each ancillary, a row for each type required, as shown above. On selection of Type, the Name field then has a drop-down of the database selection of each ancillary listed. Here we have added 3 rows as Fixings types, so the Name field becomes a drop-down option of all Fixing ancillaries in the database (requirement to be created prior to selection).
Specifying each row with a quantity or length means that when the kit is used, the quantities entered here will be taken off each time. The ancillary kit, once saved, can then be applied to the required connector, support or stiffener etc. If using the length field, ensure the ancillary used has a cost per meter.
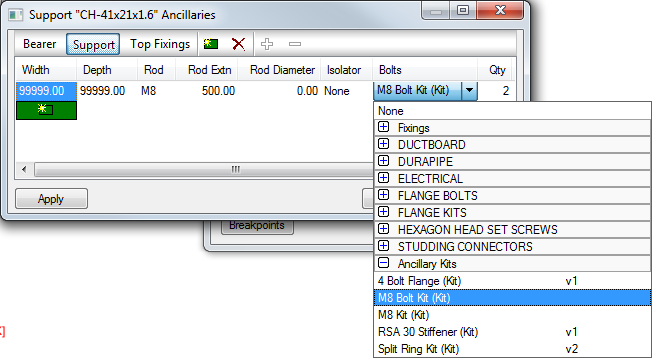
All created ancillary kits become available for selection under the Ancillary Kits subsection.
Example 2 - Sized Based Kits
Sized based ancillary kits allow selection of ancillaries based on the size of the item used. This example shows how to achieve a diameter-based ancillary kit to establish the quantity of flange bolts and the size of gasket around the circumference of the pipe.
This example shows 100 diameter pipe requiring 8xM16 bolts with gasket, and a 200 diameter pipe requiring M20 bolts with gasket. Variant diameters of flange (in this example PN16) would require not only different types of bolts, but also the quantity used around the circumference.
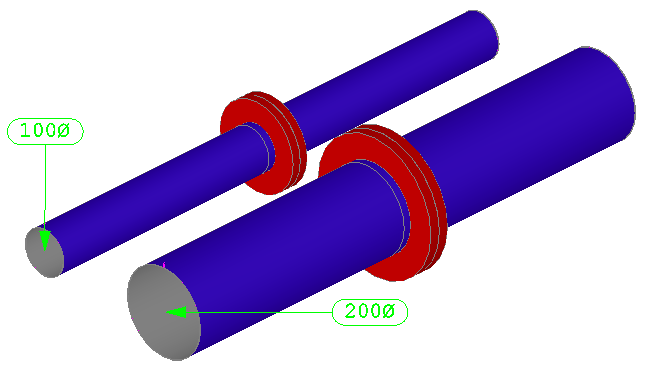
On creation of the new ancillary kit, selecting the Properties option
 lets you enter a breakpoint list.
The Breakpoint type can be a Width / Depth table or just a LS/Diameter-based table.
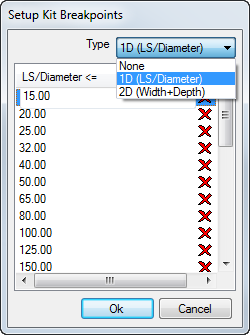
Adding multiple breakpoints which cover the sizes of pipe used at takeoff will allow to filter the breakpoint for selection of ancillary used for that size. From selecting the Current Breakpoint, you are able to choose which breakpoint is to be customized.
The example below shows selection of 200 dia where we can now setup the Ancillary Type and use the Name drop-down to choose the pre-existing ancillary.
The Gasket type would be a length-based item (costed per meter), which enables the Length to be set at Auto. The Auto Length would calculate the circumference automatically from the pipe is use. As this kit will be allocated against one of the connector ends, the software will use the connector's circumference on the pipe to determine which breakpoint selection of ancillaries is to be used at takeoff. This applies the quantity and costs to the connector and therefore includes these into the Items rate.
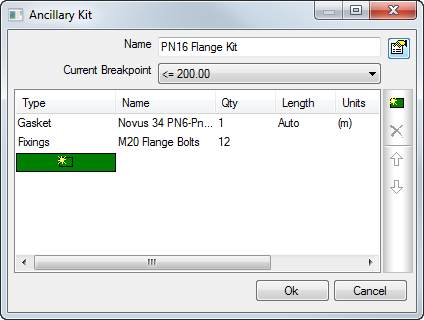
Cycling through each breakpoint and assigning the relevant ancillaries and their quantities completes the Ancillary Kit creation.
Assigning the Ancillary Kit to the Connector
From the Connector Database (Database
 Fittings
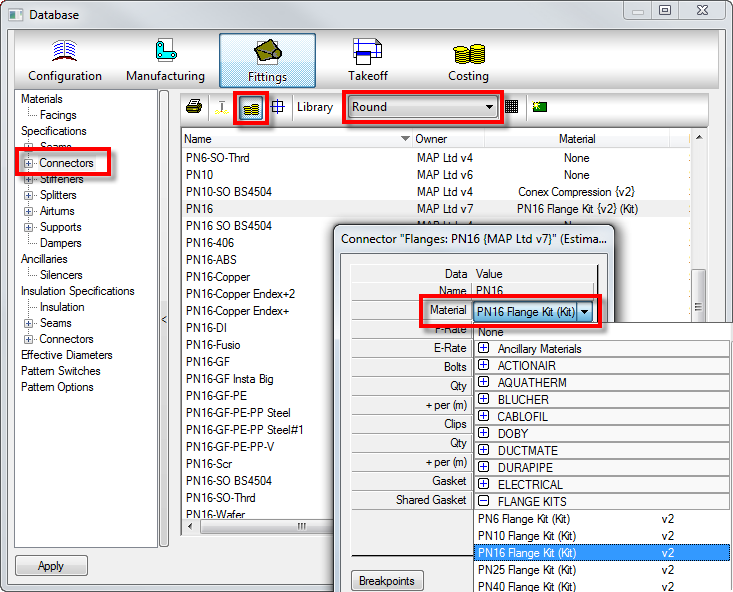
 Connectors), accessing the Costing icon for Round Connectors
 , allows assignment of ancillary kit to the material section. Double clicking the Connector opens up the dialog for assigning the newly created kit. The Material section calculates the periphery or circumference of the connector. The auto length from the gasket assignment in the Kit, populates this length and report the correct amount Gasket required.
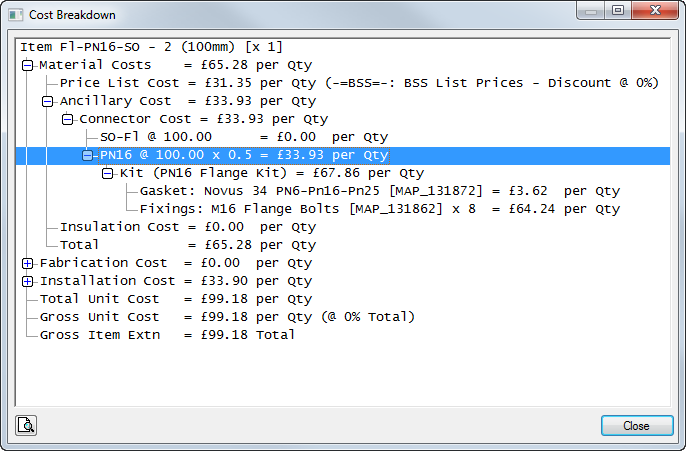
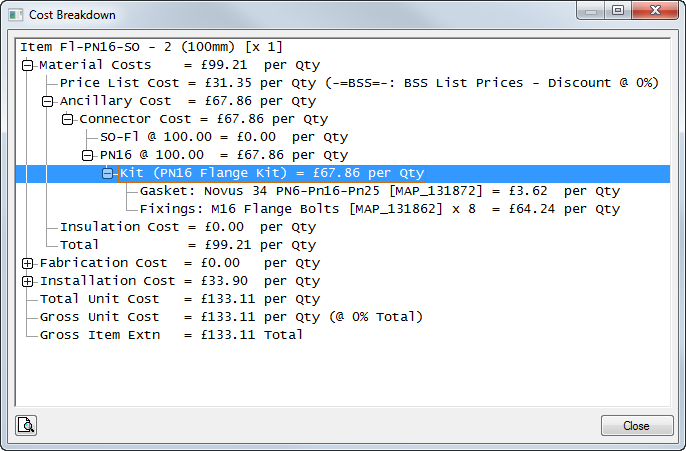
The Cost breakdown of the 100 dia PN16 flange is shown below. As this only has one connector called PN16, this will report the Ancillary Kit assigned as a quantity, but within the kit lies the Gasket and Bolts with their own quantity values.
The connector PN16 from the database can be additionally setup to be Shared from the setup which will half all values assigned if using for sharing of joints.
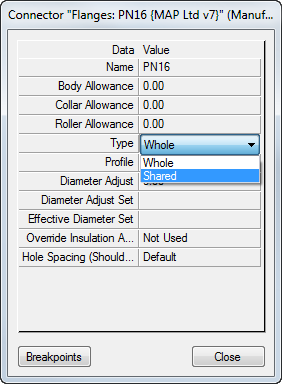
Now when viewing the breakdown, the cost of the Kit is halved (multiplied by 0.5) at the end calculation which is used when sharing joint quantities.
