The Swap Out command lets you swap out items for equivalent systems. A typical scenario is the need to swap out a manufactured low pressure system, for example, with a fire-rated equivalent system.
Using the Swap Out command, you can easily change the items from one service to another, for equivalent services, while maintaining certain specification entries; for example, the material thickness, standard straight lengths, flanges, seams, support, etc and any other linked fields, such as alternative fabrication/installation tables and ancillary facings that may be applied.
The following example describes how to use the Swap Out command. To use the Swap Out command, services must be configured with button codes for each item that will be swapped out. The Swap Out command looks for matching button codes to determine if an item will be swapped out or not. Additional logic also looks for having the correct number of connectors. However, this feature is primarily designed to swap out similar, or 'like' items.
For information on configuring button codes, see Design Line Button Codes.
Note that in the low pressure system in the example Job Contents shown below, the specification has been selected (Setup Service
 Service
 Specification). For this example, the system may have already been drawn or entered into the job. If the client subsequently requested that this be changed to a fire-rated system, instead of an un-coated Galvanised run, the Swap Out feature could be used to make this change quickly.
 Service
 Specification), and should
not be set to "Not Set".

To use the Swap Out feature:
- Select all the items in this job/section, then launch the Swap Out command by doing one of the following:
- In CADmep, at the command line, type SWAPOUT and press Enter.
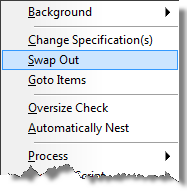
- In ESTmep or CAMduct, select the items, then right-click
 Swap Out.

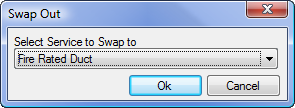
The Swap Out dialog displays.

- On the Swap Out dialog, select the service you want to swap out to, and click OK.
In this example, the Fire Rated Duct service is selected. This service has additional duct facing for fire spray and some additional time allocation for fabrication.
 Note: Make sure that a service specification is locked on the service you are going to swap out to.
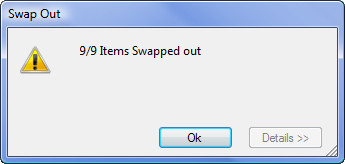
Once the Autodesk Fabrication product software has finished identifying the matching button codes, and linked them for conversion, a status dialog, similar to the one shown above, is displayed, indicating how many items were swapped out.
- Click the Details button on this dialog to display a list of any failures.
- Click OK on the status dialog to display the Swapped Out items in the service list, as shown below.

The items have been converted. Notice the service and specification has changed to the specification that was locked on the service. Also, coatings now appear on these items, along with additional fabrication cost based on the fire rated items' presets.
Note that the items may now include different fabrication costing and or specification parameters that the previous items they were swapped from.