The steps below describe how to add installation time on a connector for a fitting. This procedure uses an elbow with a threaded connection type as an example.
To add installation time on a connector for fittings:
- Click Database
 Costing
 Labour Rates
 Installation Rate, and enter the value then click OK. For example, enter 30 for Skilled.
For imperial configurations, the unit is $/(hrs). For metric configurations, the unit is £/(hrs).
- Click Database
 Costing
 Installation Times, and then click New to create a new installation table for the threaded type.
- In Create New Table dialog, select Create New Empty Table, and Breakpoint Table for Type of Table, click OK.
- Click the Properties button
 to display the Table Properties dialog, enter a name for the table, specify a group from the drop-down list, and click OK.
- Set the following properties:
- Breakpoints: Duct-End 1 Width/Diameter<=
- Unit Cost: By Qty
- Units: (mins)
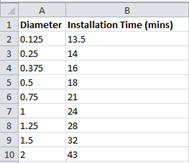
- Create an external spreadsheet file that contains the installation time for each diameter, as shown below.

Installation time information is usually found in the manufacturer’s installation manual, or from other relevant materials.
- Copy and paste the data from the external spreadsheet table in to the Installation Time table dialog in the Autodesk Fabrication product, then click OK.

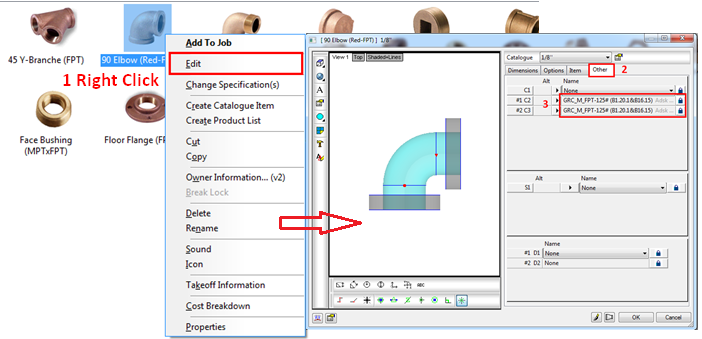
- Right-click on the item
 Edit and then click the Other tab to display the item connector information.

- On the Other tab, click the small arrow button
 next to the Connector Name to display the Connectors database dialog, and then click the Costing
 button.

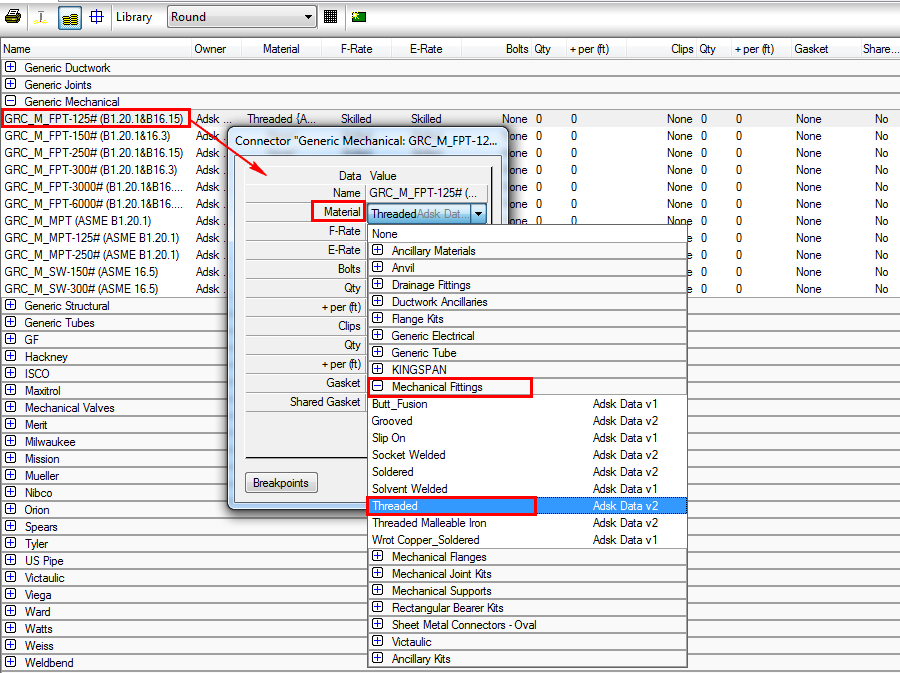
- Double-click the connector, and check the Material group and name.

- In the Database dialog, click Fittings
 Expand Connectors collection
 Ancillary Materials. Find the material mentioned above.
- Double-click the material Threaded, select Times Table for E time and select the Threaded installation time table created previously for Installation Table Cost. Then click Close and select No for the version number.
- After finishing the whole setting above, then click OK in the Database dialog.
At this point, the Installation Time information has been created.
- To verify that Installation Time information is being calculated correctly, see Verifying Installation Time.