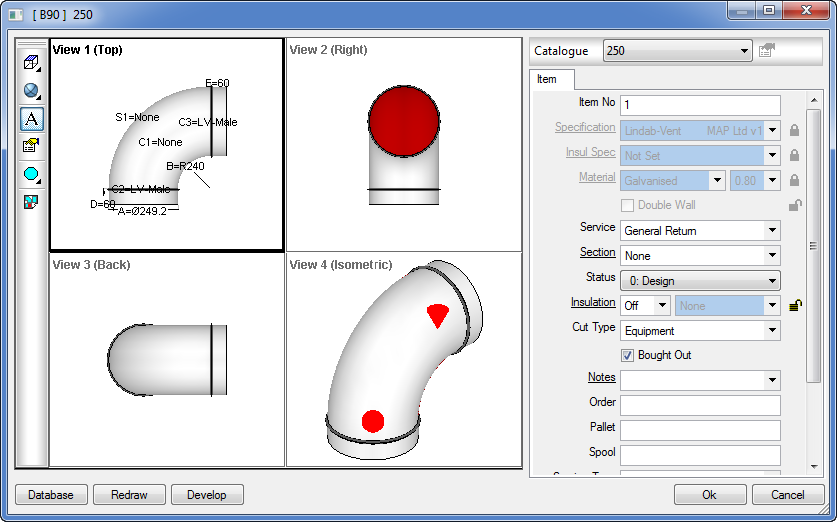
To assist in viewing the items in takeoff, the option to enable OpenGL gives dimension lines and proper shading to the part.

The options available are as follows.
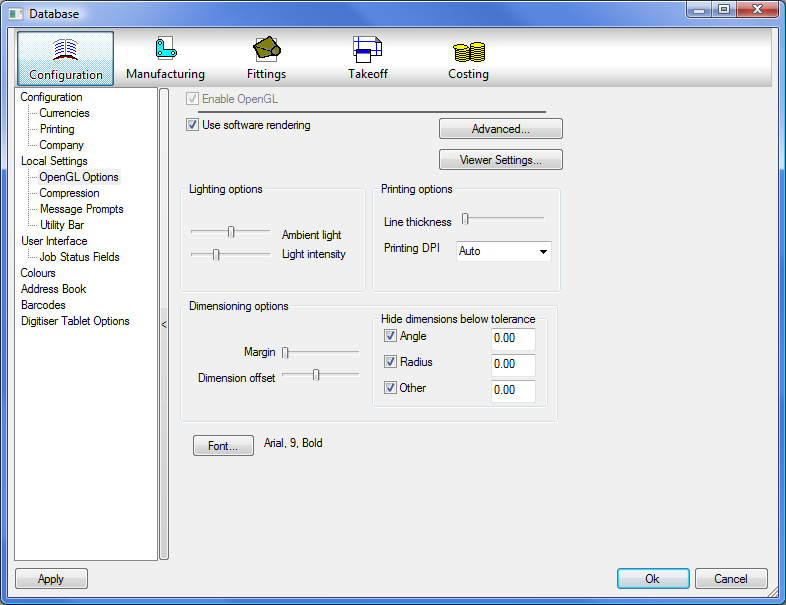
Use Software Rendering: This will use system memory instead of the chip memory based on your graphics Card. Choosing this option can sometimes resolve some issues with built-in graphics cards.
Ambient Light: This controls the main light source and affects the amount of light reflecting onto the pattern. If the pattern is to be placed in a square room with a single light source, the ambient light is the amount of light reflected off the walls, back onto the pattern. Moving the slider to the left reduces the light reflecting onto the pattern.
Light: This controls the distance of the light source to the pattern. The further to the left the slider is moved, the closer to the pattern it becomes. Moving it all the way to the left will put the light source into the middle of the pattern.
By manipulating these sliders you can adjust the lighting to the settings that you want.

Dimensioning options - Arrows: There are 4 different Arrow sizes available to use. These are None, Small, Medium, and Large.
Dimensioning options - Margin: This slider determines the amount of space between the pattern and the edge of the window. The further to the left the slider is moved the smaller this margin becomes.
Dimensioning options - Dimension offset: This slider determines the distance away from the pattern the dimension lines are placed. The further to the left the slider is moved the closer to the pattern edge the dimension lines are placed.
Dimensioning options- Stencil Buffer: This option is needed by OpenGL to display the dimensions correctly. Some cards may have problems with this and so it can then be turned off.
Dimensioning options - Font : This allows the user to choose the font displayed used for the dimension measurements. Fonts are selected from the fonts installed in your Windows/Fonts directory.
Printing options: Line thickness : This determines the thickness of the line shown when printing the pattern. The further to the left the slider is moved the thinner the line becomes.
Printing options: Darker/Lighter: This determines how dark the picture will be when printing the pattern. The further to the left the slider is moved the darker the image becomes.
Hide dimensions below tolerance: This enables the user to determine below what size not to report the dimension, this is useful in some patterns where you may wish to eliminate some of the information displayed so that it becomes less cluttered. the options available are:
Angle: When selected, the display will not show any dimension lines for an angle below the dimension specified.
Radius: When selected, the display will not show any dimension lines for a radius below the dimension specified.
Other: When selected, the display will not show any dimension lines for any line below the dimension specified.
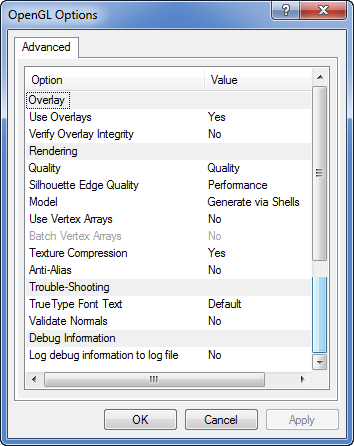
Advanced: This contains the advanced options for Open GL detailed below. Click on this button to display the Open Gl Advanced options.

Use Overlays: The overlay is used by the system to speed up large drawings when zooming or panning.
Rendering: The options here are advanced users to alter performance and graphical reproduction techniques with in the software. These settings should only be changed under the instruction of your supplier.
Debug Information: The options here should be left un selected unless specifically requested by your supplier. These generate log files that can be used to debug graphical errors.
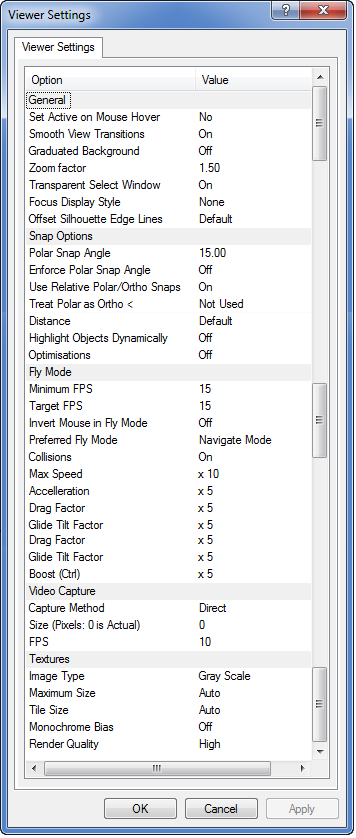
Viewer Settings: This contains the advanced options for Viewer Settings. Click on this button to display the Viewer Setting options.
