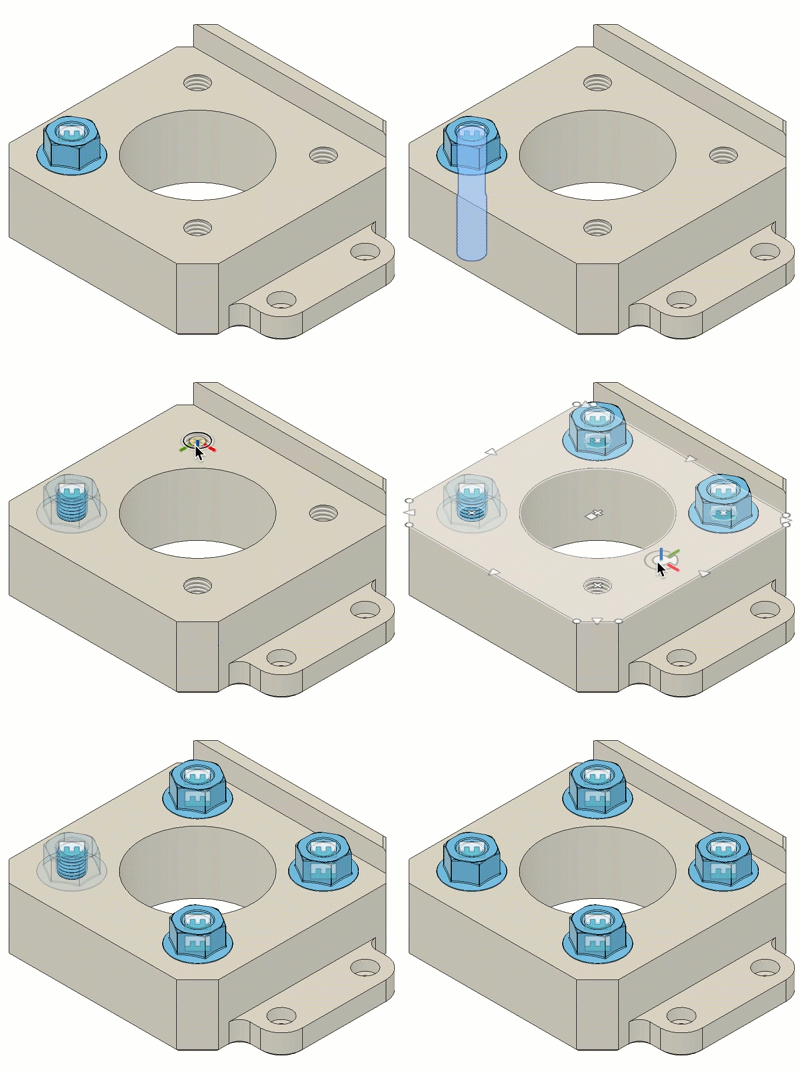
Duplicate components with their joints
Learn how to use Duplicate With Joints to duplicate components in an assembly and the joints attached to them Fusion.

On the Design toolbar, select Assemble > Duplicate With Joints
 .
.The Duplicate With Joints dialog displays.
In the Browser, select a Component that is assembled with a Joint.
Optional: Click Add
 to select additional Components in the assembly.
In the dialog, select a Joint from the table to place instances.
Select an Origin Mode:
 Simple: Select Snap points to place an instance.
 Between Two Faces: Select Plane 1 and Plane 2 to center the joint origin between them, then select a Snap point to place an instance.
 Two Edge Intersection: Select Edge 1 and a non-parallel Edge 2 to locate the Snap point at the extended intersection.
In the canvas, select a Snap point to place an instance.
Optional: Repeat step 6 to place additional instances.
Optional: In the dialog, click More
 to display the list of placed instances. For each instance, click Flip
  to flip the component over the Joint Origin.
Click OK.
Duplicate instances of the components and joints display in the canvas at the locations you selected. A Copy Component and a Joint feature display in the Timeline for each instance.
The duplicate components are associative instances. When you modify any component instance, the changes affect all instances. The duplicate joints are independent instances. When you modify a joint, the changes do not affect any other joints.
Tips
- As a best practice, use the Joint tool in tandem with Duplicate with Joints, rather than As-Built Joint.
- To clear placed instances, locate the joint in the dialog table and click More
 to display the list of placed instances. Then select Clear Last Duplicate or Clear All Duplicates.