Generate a Thread toolpath
On the Manufacture workspace toolbar, click Milling > 2D > Thread.
The Thread dialog opens.
On the Tool tab, click Select to pick a tool. You will need to create a thread milling tool if you do not already have any.
Tip: Thread mills are best suited for the Thread toolpath.On the Geometry tab, select a Definition Method:
Manual: Lets you enter values to manually define the thread geometry.
Standard: Lets you select thread parameters from predefined options.
Automatic: Lets Fusion automatically detect thread geometry from threads defined in the Design workspace.
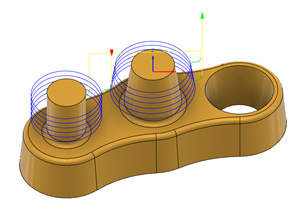
On the Geometry tab, from the Selection Mode drop-down menu, select Faces.
With the Circular Face Selections field active, select cylindrical or conical faces on the model that you want to machine. The toolpath preview appears as you select each face.
Tip: Mouse over the Circular Face Selections box for more information.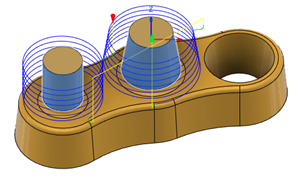
Select a Threading Hand option to specify which direction a fastener should tighten on the thread.
Tip: Right handed threads, which require a fastener to turn clockwise to tighten, are the most common type of threads.Enter a Thread Pitch distance. This should be provided by your tooling manufacturer. For imperial units, you may need to calculate it using 1 / Threads Per Inch.
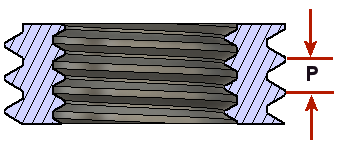
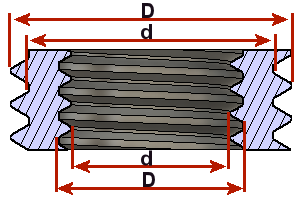
Enter a Pitch Diameter Offset distance. For internal and external threads, this is the difference between the major diameter (D), and the minor diameter (d).
Optional steps:
To change the entry angle of the tool, on the Passes tab, enter a Start Angle value.
To have multiple leads on the thread but keep the same pitch, on the Passes tab, enable Do Multiple Threads and then specify the Number of Threads.
To clear any stock that is left over from tool deflection, on the Passes tab, enable Repeat Passes to repeat the pass. The repeating pass is commonly referred to as a spring pass.
Click OK.
The toolpath is generated.