Activity 4: Rest rough using 3D pocket
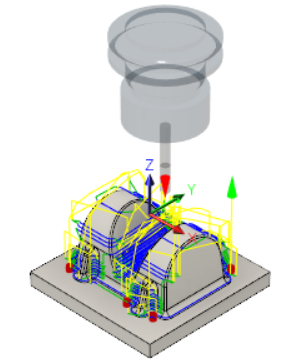
In this activity, you will use a 3D Pocket Clearing strategy to remove more of the remaining material where the 20 mm tool from the previous operation did not fit.

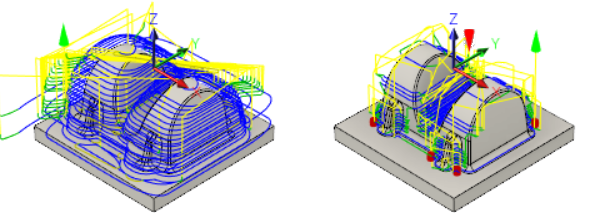
Part with Adaptive Clearing applied to it (left). Part after using 3D Pocket Clearing (right).
Prerequisites
- You have applied an Adaptive Clearing strategy to the part (Activity 3).
Steps
In the Pocket dialog, select the tool #13 - Ø6 R1 mm bullnose tool.
- On the Manufacture toolbar, Milling tab, select 3D > Pocket Clearing
 .
. - On the Tool tab
 , click Select to access the tool library.
 - Select the tool #13 - Ø6 R1 mm - bull nose from the Tutorial4 library.
- Click Select to close the Select Tool dialog.
- On the Manufacture toolbar, Milling tab, select 3D > Pocket Clearing
Remove the material the previous operation did not remove.
- Click the Geometry tab
 .
. - Enable the Rest Machining checkbox.
- Click the Geometry tab
Specify the machining passes parameters.
- Click the Passes tab
 .
. - Set the Smoothing Deviation to 1 mm.
- Set the Maximum Roughing Stepdown to 2 mm.
- In the Stock to Leave group, set Radial Stock to Leave to 0.3 mm.
- Click the Passes tab
Set the retraction policy to shortest path.
- Click the Linking tab
 .
. - Select Shortest Path from the Retraction Policy drop-down menu. This gives the shortest possible rapid movement paths but can only be used on high-speed-enabled machines where rapid motion is interpolated as linear moves. Should you wish to machine the tutorial part on your machine, you may have to change this setting to suit your machine and control.
- Click OK to automatically start calculating the toolpath. A preview appears on the canvas.
- Click the Linking tab

Activity 4 summary
In this activity, you used a 3D Pocket Clearing strategy to remove more of the remaining material where the 20 mm tool from the previous operation could not reach.