Activity 11: Post-process the toolpaths
In this final activity, you regenerate all the toolpaths and simulate them. This enables you to identify and correct any toolpath errors. When you are satisfied with the toolpaths, you post-process the operations to produce the NC code to be used by the machine tools.

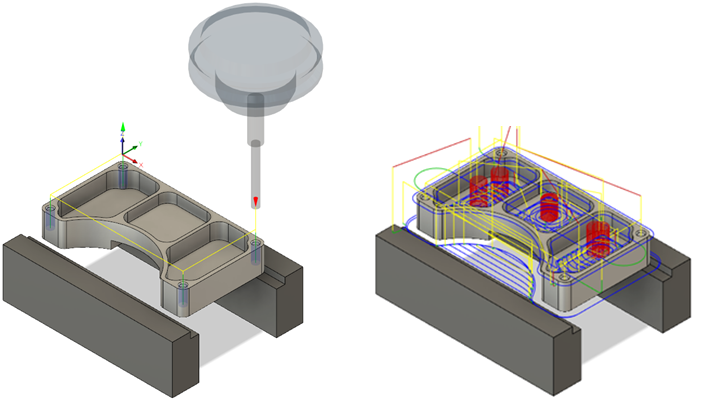
Before, showing the Drill toolpath using the tapping cycle applied at the four holes (left). After, showing all the toolpaths during simulation (right).
Prerequisites
- Activity 10 is complete.
Steps
Regenerate all the toolpaths in the Setup.
In the Browser, click the Setup1 node.
On the Manufacture toolbar, Milling tab, select Actions > Generate
 .
.If a message indicates that the one or more operations don’t require regeneration, click Yes anyway.
Simulate the toolpaths.
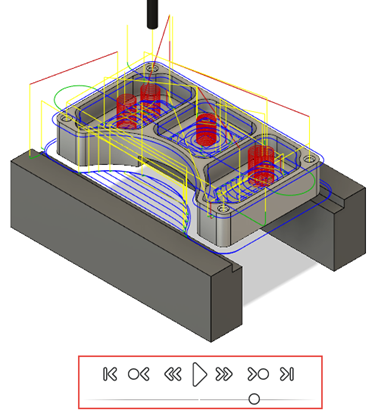
With the Setup1 node still selected in the Browser, on the Manufacture toolbar, select Actions > Simulate
 .
.The Simulate dialog is displayed and the Simulation contextual environment opens, replacing all the tabs in the Manufacture workspace.

At the bottom of the canvas, on the Simulation player, click Play
 to show the defined toolpaths.
When the simulation is complete, on the toolbar, click Exit Simulation
 .
.
Post-process the setup using Haas / A-axis to show the NC code.

Select Setup1 from the Browser.
On the Manufacture toolbar, click Setup > Create NC Program
 . The NC Program dialog opens.Tip: You can also right-click the Setup1 node in the Browser and select Create NC Program.
In the Machine and Post group, from the Post drop-down list, select Choose from library to pick a post processor.
Set the Filters > Capabilities to Milling and the Vendor pull down to Haas Automation.
Select the HAAS - A-axis (pre-NGC) post processor, drag it to the Local folder and press Select.
Note: Once the post has been downloaded and moved to your Local folder you will not need to do this again.In the Program group, accept the default program Name/Number or provide another.
Accept the default Output Folder for the nc-code file or choose another.
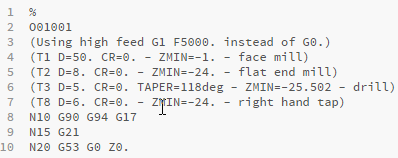
Note: With Open NC File in editor selected, the post processed nc-code file will open in the default NC Editor.To post processor the file, click Post. The editor will open showing the nc code for the selected machine.
Tip: You can also post-process individual operations by right-clicking the operation in the Browser and selecting Create NC Program.
Activity #11 summary
In this activity, you regenerated all the toolpaths and simulated them. You then post processed the toolpaths to produce the NC code to be used by the machine tool.

Before, showing the Drill toolpath using the tapping cycle applied at the four holes (left). After, showing all the toolpaths during simulation (right).