Create a preset of a print setting
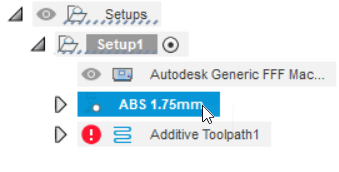
In the Browser, under the setup, double-click the print setting of which you want to create a preset.

The Print Setting Editor opens.
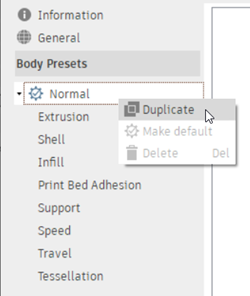
In the left pane, under Body Presets, right-click an existing preset and choose Duplicate so that you can make a copy of it.
Note: If you have never created a preset before, only one preset is listed. This is the default preset and applies to all bodies in the active setup.
A copy of the preset is created with a number affixed to its name.
Select and expand the newly created preset so that you can edit it.
(Optional) Change the Name of the newly created preset.
In the left pane, click the options in the list and change the settings as needed on the right.
Repeat steps 2 to 3 to continue creating presets of the print setting.
(Optional) To make a preset the default
 that all bodies use (unless assigned a different preset), in the Body Presets group, right-click the preset, and then choose Make Default.
Click OK.
If you have multiple bodies in the active setup and you want them each to use different print-setting parameters, you can now assign the presets to bodies.