Generate a Multi-Axis Clearing toolpath
This feature is part of an extension. Extensions are a flexible way to access additional capabilities in Fusion. Learn more.
On the Manufacture workspace toolbar, click Milling > Multi-Axis > Multi-Axis Clearing.
The Multi-Axis Clearing dialog opens.
On the Tool tab, click Select to pick a tool. If you have not created a tool to use, in the left panel of the dialog, from the Fusion Library, pick a tool from the Sample Tools library.
Tip: Ball End mills are best suited for roughing curved floors and undercuts.On the Multi-Axis tab, in the Machining Type group, select a machining type. You can choose 3, 4, or 5-axis machining.
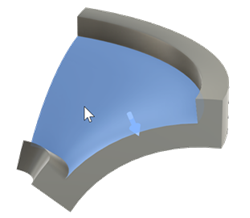
On the Geometry tab, in the Floor Surfaces group, select a floor surface to offset the toolpath from.
A blue arrow appears to indicate the floor normal, and usually points in the appropriate direction. If the tool machines the wrong side of the surface, you can select Flip Floor Normal.
(Optional) To change the way the toolpath is offset by using another surface, select the Ceiling Surfaces checkbox and specify a ceiling surface.
Note: If you don't specify a ceiling surface, the strategy automatically detects large holes and creates a tangential cap to use as the ceiling.On the Passes tab, from the Type drop-down menu, select Pocket or Adaptive.
Optional steps:
If you specified a ceiling surface, in the Passes tab, you can use the Cutting Mode parameter to change the way the toolpath is offset between the ceiling and floor surface.
You can target undercut or non-undercut areas specifically by using the Areas to Machine drop-down menu.
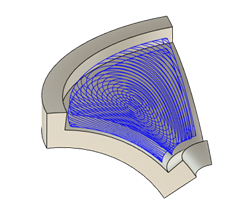
Click OK.
The toolpath is generated.