Generate a Deburr toolpath
This feature is part of an extension. Extensions are a flexible way to access additional capabilities in Fusion. Learn more.
On the Manufacture workspace toolbar, click Milling > 3D > Deburr
 .
.The Deburr dialog opens.
On the Tool tab, click Select to pick a tool. If you have not created a tool to use, In the left panel of the dialog, from the Fusion Library, pick a tool from the Sample Tools library.
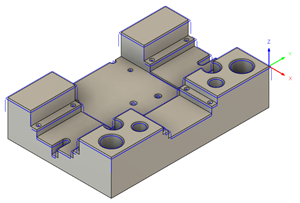
Tip: Ball-end, lollipop, flat-end, chamfer, tapered, and spot drills are all suitable tools for the Deburr toolpath.In the Geometry tab, from the Edges to Deburr drop-down menu, select an option to specify how to find the edges on the part to deburr.
Tip: Mouse over a parameter for more information.Specify a Minimum Edge Angle to filter out any edges that do not require deburring.
(Optional) Select Exclude Circular Holes to skip circular holes during deburring. When enabled, specify the Minimum Diameter and Maximum Diameter to select holes within the range. Default values are 0 mm and 10 mm respectively.
In the Heights tab, select an option from the Clearance Type drop-down menu. Selecting Automatic uses a clearance option that is most suitable for the model geometry.
In the Passes tab, in the Edge group, select an option from the Deburr Edges by drop-down menu. If you select Filleting, you also have to select the Multiple Passes checkbox.
Select an option from the Edge Shape drop-down menu.
Select an option from the Unreachable Corners drop-down menu to specify what to do with areas that the tool cannot initially reach.
In the Multi-axis tab, select an option from the Machining Type drop-down menu to specify whether you want to machine using 3-, 4-, or 5-axis machining.
Note: In 5-axis deburring, Climb and Conventional milling directions apply only when Cut at Fixed Point on Tool is enabled. In that case, non-flat end mills might not cut on the ball.(Optional, 3-axis only) In the Geometry tab, select Exclude Vertical Edges to skip vertical edges during deburring. Useful for preventing full engagement on vertical corners that can cause tool breakage.
Optional steps:
To deburr edges that are modeled as fillets, in the Geometry tab, select the Include Rounded Edges checkbox.
To avoid deburring certain edges, click the Edges to Exclude button and select edges on the model.
For smoother cutting motion, in the Passes tab, if you selected Cut with tip of tool from the Unreachable Corners, select the Add Loops for Smooth Motion checkbox.
If you want to use a portion of the tool that has experienced the least tool wear, in the Multi-axis tab, select the Cut at Fixed Point on Tool checkbox then specify a Point Along Flute (%).
Click OK.
The toolpath is generated.