Create an NC program
Ensure that you have an active setup, and all its operations are generated.
On the Manufacture workspace toolbar, click Setup > Create NC Program
 .
.The NC Program dialog opens.
In the Settings tab, in the Post list, choose a post processor.
Note: If the post processor you are selecting or changing contains operation properties, a dialog opens summarizing which properties are added to which operations. Confirm the change to proceed.Enter a Name/Number for the NC program.
Enter a File Name for the NC file that will contain the postprocessed NC code.
Note: To browse existing output files and use their names, turn on display of the Save As dialog. You can do it in the Preferences dialog by turning on General > Manufacture > Show the Save As dialog when posting from NC Programs.Select an Output Folder for the NC file.
In the Post Properties group, review the list of properties and update their values as needed. The properties are specific to the chosen post processor.
If you have an active setup, by default, all the operations in the active setup are included in the NC program. If you want to exclude certain operations, in the Operations tab, deselect the checkboxes next to the setups or individual operations.
(Optional) If you have multiple operations and want to group those that use the same tool, select the Reorder to Minimize Tool Changes checkbox.
Finish creating the NC program:
- To create an NC program and post process it, click Post.
- To create an NC program but not post process it, click OK.
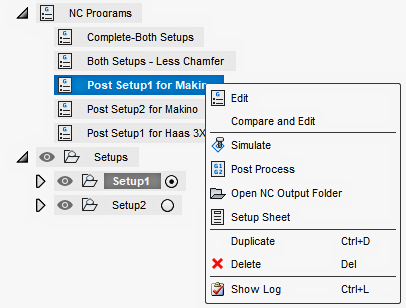
When the NC program is created, you can:
Simulate its operations.
Post process its operations to generate an NC file that will contain the postprocessed NC code.
Open the NC output folder that contains the NC file.
Create a setup sheet for its operations.
Duplicate it to create another NC program.
Edit it to alter the selected operations or change the post processor.
In the Browser, right-click an NC program to review your options.
