Replace a tool without recalculating a toolpath
This feature is part of an extension. Extensions are a flexible way to access additional capabilities in Fusion. Learn more.
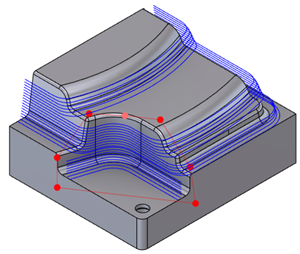
The optional steps 1-4 show how to split a toolpath before using the Replace Tool modification.
(Optional) In the Browser, select the toolpath you want to split.
(Optional) On the Manufacture workspace toolbar, click Milling > Modify > Trim
 . The Trim dialog appears.
(Optional) With Polygon selected for Trim Type, on the canvas, click three or more points to create a closed boundary around the area of the toolpath that you want to split so that you can use a different tool for it.

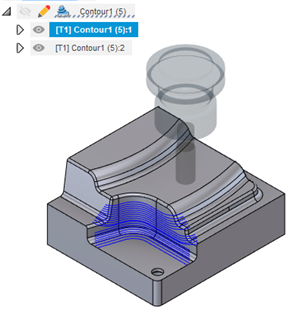
(Optional) In the Trim dialog, in the Keep drop-down menu, select Both. The toolpath is split into child toolpaths, which is represented in the browser.
In the Browser, select the toolpath that you want to replace the tool on.

On the Manufacture workspace toolbar, click Milling > Modify > Replace Tool
 .
.In the Replace Tool dialog, click Select to pick a tool. The Tool Library opens.
In the Tool Library, select a tool. The tool's tip geometry must be the same as the original tool, whereas geometry such as the tool length can be different.
Click Select to confirm your choice.
(Optional) Change any Feed & Speed values if necessary.
(Optional) To add notes as an aid to later recall why you were performing the modification, type some text in the Notes box. The notes appear when you place the pointer over the modification in the timeline.
Click OK. The newly selected tool is used on the toolpath without any toolpath recalculation.
Example
Watch this video to view when, and how, to use the Replace Tool command.