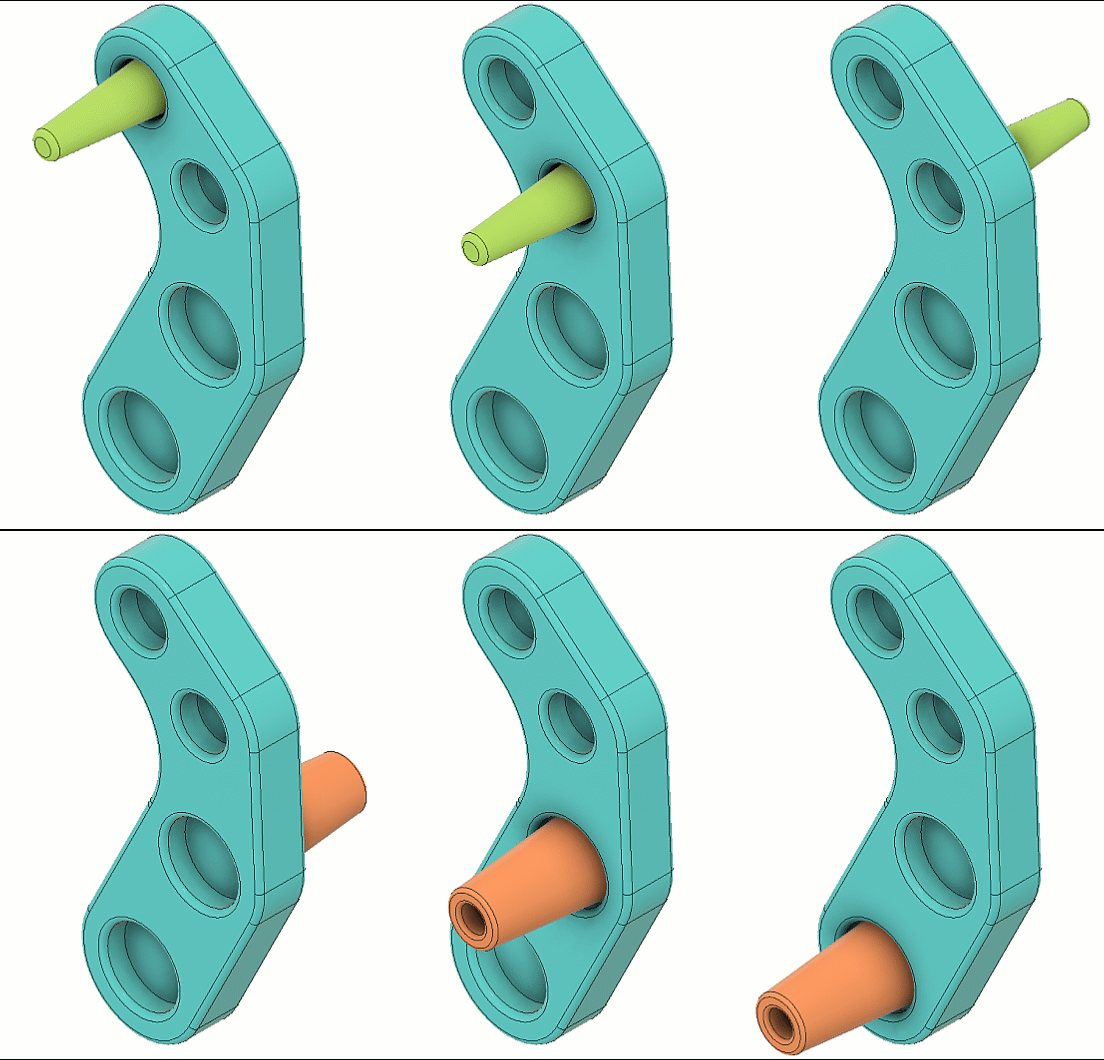
Configure joint snaps
Learn how to configure the Snap and Flip aspects of a joint for configurations in Fusion.

Add joint Snap and Flip aspects to the Configuration Table
In the Timeline, select a joint feature:
In Configuration Mode, click a highlighted joint feature.
Outside Configuration Mode, right-click a joint feature and select Configure.
The Configure dialog displays.
Check aspects to add them to the table:
- Component 1 > Snap
- Component 2 > Snap
- Alignment > Flip
Click OK.
A column for each configured aspect is added to the Configuration Table.
Add a joint snap definition to the snap list
In the Configuration Table, activate the configuration where you want to add a new snap.
In the Snap column, expand the list of snaps for the active configuration.
Click Add Snap.
The Add Snap dialog displays.
In the dialog, enter a unique Snap Name.
Optional: Select a different Origin Mode.
In the canvas, select a Snap point on any valid geometry.
A preview of the new location display in the canvas.
Click OK.
The component snaps to its new location and the Snap column updates to the new value in the Configuration Table.
Configure joint snaps
- In the Configuration Table, locate the Snap column.
- For each configuration, expand the list of snaps.
- Select a Snap.
The configured snap updates for the configurations you changed. If you update the snap for the active configuration, the design updates in the canvas. If the column is in a custom theme table, the snap updates for every configuration that uses the themes you edited.
Configure joint flip
In the Configuration Table, locate the Flip column for the joint you want to edit.
For each row, click the Flip button to change the flip state:
 Flipped
 Not Flipped
The configured flip state updates for the configurations you changed. If you update the flip state for the active configuration, the design updates in the canvas. If the column is in a custom theme table, the flip state updates for every configuration that uses the themes you edited.
Edit a joint snap definition
In the Configuration Table, activate a configuration where the snap is selected.
In the Snap column, expand the list of snaps for the active configuration.
Hover over the snap you want to edit.
Click Edit Snap
 .
.The Add Snap dialog displays.
In the dialog, edit the details of the snap:
- Snap Name
- Origin Mode
- Snap selection
Click OK.
The changes to the snap definition update in the canvas and the Configuration Table.
Delete a joint snap definition
- For every configuration that references the snap, select a different snap.
- In the Configuration Table, for any configuration, expand the list of snaps.
- Hover over the snap you want to delete.
- Click Delete
 .
.
The snap definition is deleted from the list of snaps.
Tips
- Configure different joint snap locations within the same component to provide multiple orientations for it within an assembly.
- Configure joint snaps selections on different components to swap similar components in an assembly.
- You can only add, edit, and select Snap aspects if their Joint feature is unsuppressed and the Timeline marker is rolled past the feature.
- Right-click columns and move them to custom Theme Tables to organize similar parameters and simplify the top table.
- To configure an object or feature outside of configuration mode, right-click it and select Configure.
- Double-click the right edge of a column header to expand to the width of its full name.
- As you create or edit parametric features, click the Configure tab to add configurable aspects to the table without interrupting your design flow.